


About
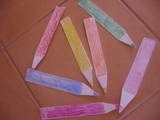
So random, so cool!
You can use them however you want- decorate your workspace or room with them, turn them into bookmarks or make them fridge magnets by gluing a magnet to the back or make tiny ones and turn them into badges(See instructions for button badges for this).
Tags
-
 Shivi entered their project Origami Pencils to Fiskars Craft Contest
21 Jun 12:48
Shivi entered their project Origami Pencils to Fiskars Craft Contest
21 Jun 12:48
-
Shivi entered their project Origami Pencils to PLAY CRAFT: Contest
15 Mar 01:42
You Will Need
-
 Step 1
Cut out a rectangle strip of paper. Start off with bigger ones and when you get better at this project you can make smaller ones.
-
 Step 2
Make a crease along the dashed line by folding the strip in half.
-
 Step 3
Fold the right hand corner of one of the ends into the middle.
-
 Step 4
Make a crease along this dotted line.
-
 Step 5
see the 2 blue dots/points? Fold the paper backswards (that's on the left side of the dotted line) until the 2 points meet.
-
 Step 6
It should look like this.
-
 Step 7
The section that has the star on it ,fold it inwards so it lies on the other half.
-
 Step 8
It will look like this.
-
 Step 9
Make small folds to sharpen the tip of your pencil. The pink bits are the sections I folded.
-
 Step 10
Turn over and colour the pencil in.
Voila!
You can actually use coloured paper but it must only be coloured on one side and you start on the blank side. I didn't have any available to me so I just coloured it in at the end. -
 Step 11
Now you can experiment with different colours and sizes. You can even decorate your pencil with little pictures or use patterned papers.
NOTE: All the little marks I drew on the back of the pencil were just for demonstration, you do not need to do these.


Comments


