About
Origami City
The Helicopter is made from two sheets—one for the Main Rotor
and one for the Fuselage. An unusual technique is used to connect
the two pieces.
-
 JadeSucksAtLife favorited Origami Helicopter
25 Feb 09:30
JadeSucksAtLife favorited Origami Helicopter
25 Feb 09:30
-
 Crafterella featured Origami Helicopter
27 Nov 23:00
Crafterella featured Origami Helicopter
27 Nov 23:00
-
 Tuttle Publishing published her project Origami Helicopter
22 Nov 09:00
Tuttle Publishing published her project Origami Helicopter
22 Nov 09:00
You Will Need
-
 Step 1
Main Rotor
The Main Rotor is based on the traditional origami pinwheel. Begin with the hidden (inside) side of the paper facing you. The position of the paper is not important.
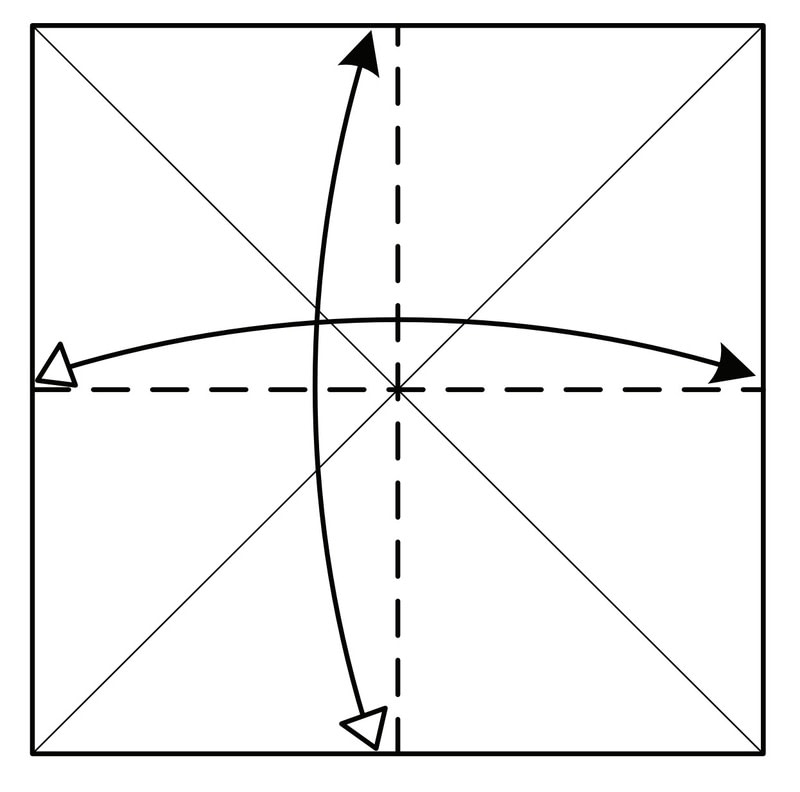
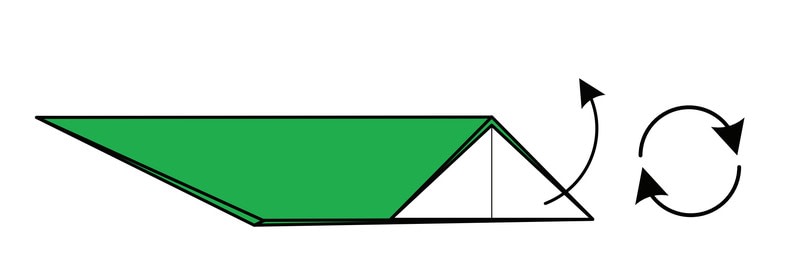
Fold and unfold corner to corner in both directions.
-
 Step 2
Fold and unfold left to right and bottom to top.
-
 Step 3
Fold and unfold each of the four edges to the center.
The result is a 4 x 4 grid with two diagonals. -
 Step 4
Turn the paper over.
-
 Step 5
Fold and unfold all four corners to the center.
-
 Step 6
Turn the paper over.
-
 Step 7
Press down at each of the four dots. This curls the four corners up and makes the next few steps easier to do.
-
 Step 8
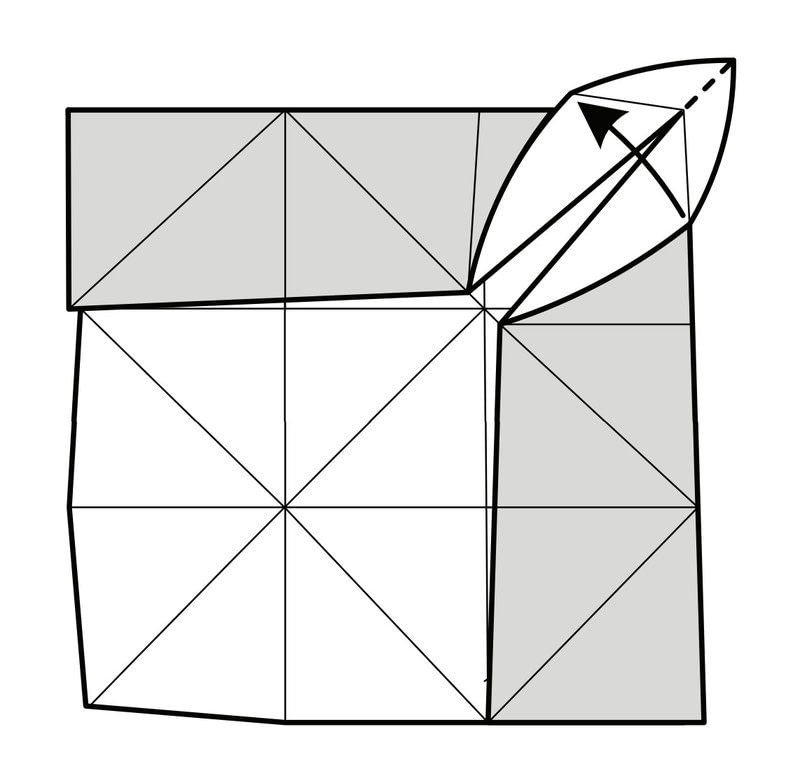
Fold the top and right edges inward at the same time. This causes a triangular flap to stand up in 3-D where the edges meet.
-
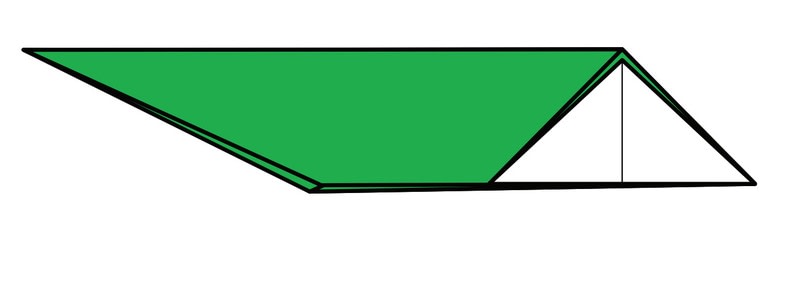
 Step 9
Lay the triangular flap flat to the left.
-
 Step 10
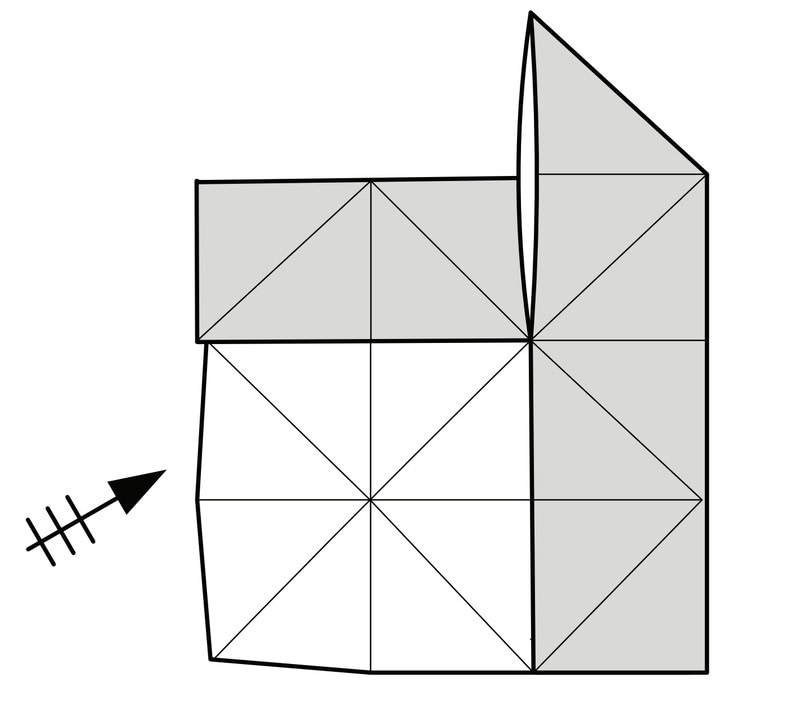
Repeat steps 8–9 on the other three sides, creating a pinwheel. For the fourth side you’ll have to undo the first flap a little.
-
 Step 11
Turn the model over.
-
 Step 12
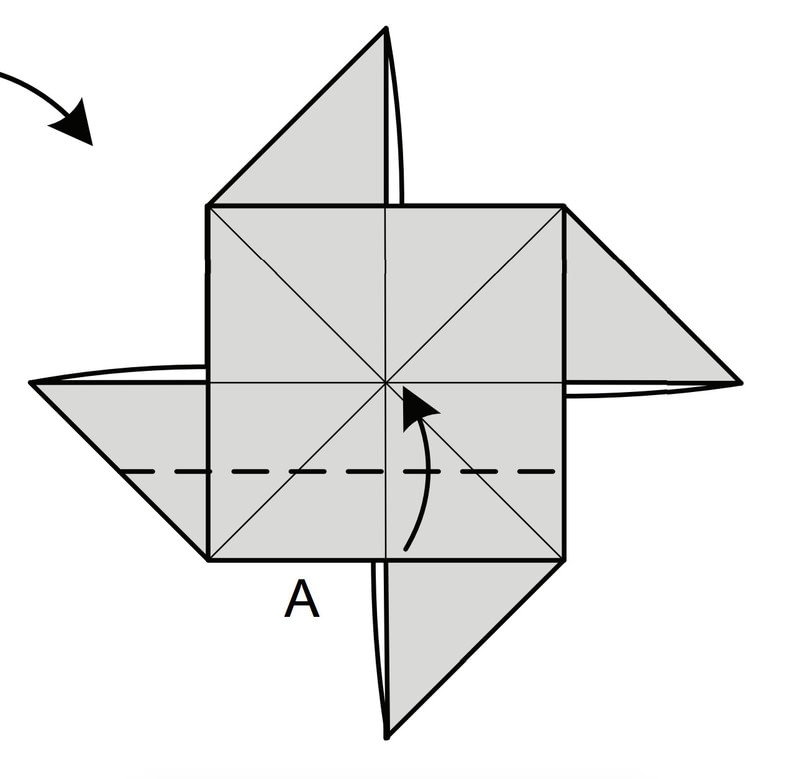
Fold edge A to the horizontal center crease
-
 Step 13
Unfold step 12.
-
 Step 14
Repeat steps 12–13 on the other three sides.
-
 Step 15
Bring sides X and Y toward the center at the same time. The corner where they meet will pop up in 3-D.
-
 Step 16
Pinch the corner that was created in step 15 so that it pops up fully. Then repeat steps 15–16 on the other three adjacent sides.
-
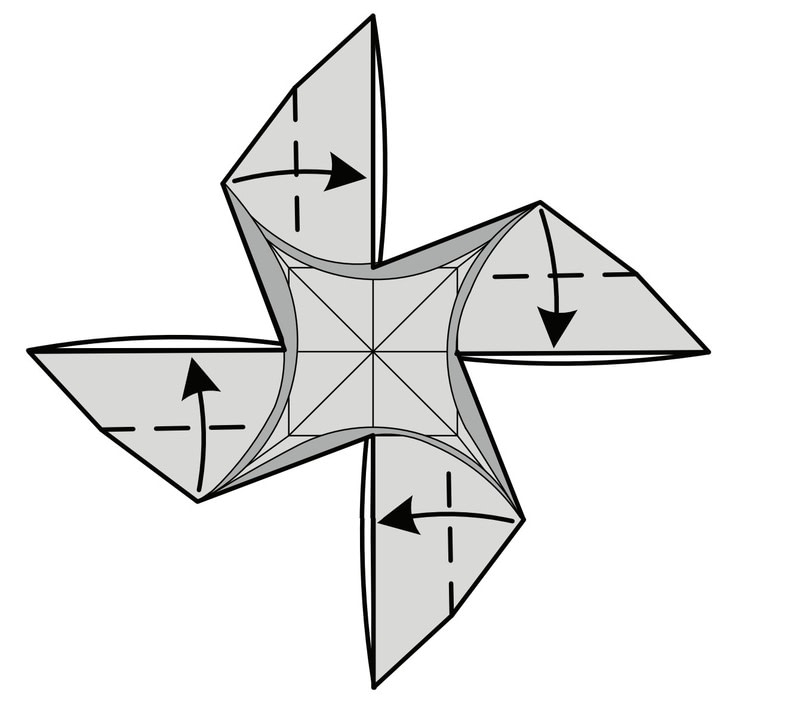
 Step 17
All four corners are now 3-D. Flatten each side as shown. You’ll have to do this on all four flaps at the same time in order for them all to lie fl at.
-
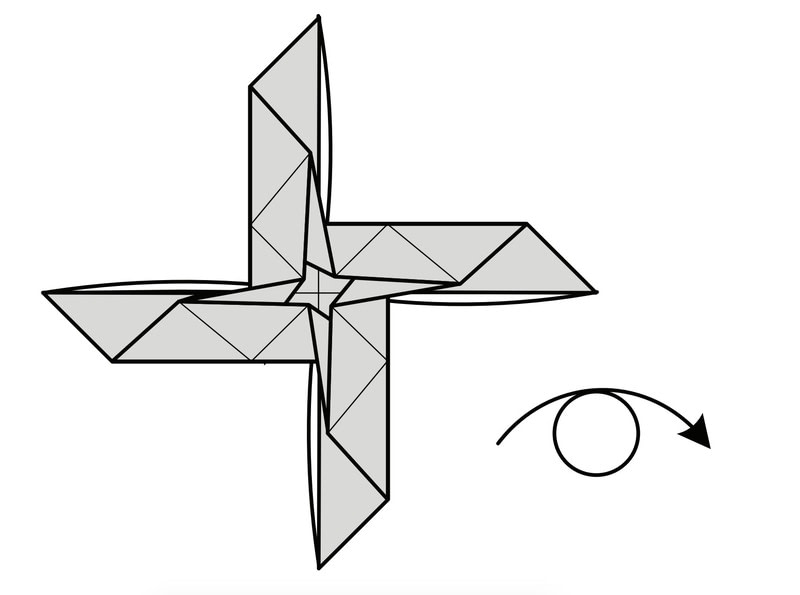
 Step 18
The completed Main Rotor.
-
 Step 19
Fuselage
Begin with the hidden (inside) side of the paper facing
you. The position of the paper is not important.Fold and unfold the bottom corner to the top.
-
 Step 20
Fold the edges to the center crease.
-
 Step 21
Fold the top and bottom corners to the dot.
-
 Step 22
Mountain-fold the model in half.
-
 Step 23
Fold and unfold the white triangular portion of the model as shown.
-
 Step 24
Fold the near flap over to the other side.
-
 Step 25
Reverse-fold (tuck inside) the right corner along the crease you made in step 5.
-
 Step 26
Fold the near layer to the left.
-
 Step 27
Fold the bottom corner up to the top.
-
 Step 28
The completed Fuselage.
-
 Step 29
Prepare the Main Rotor for assembly
Turn the Main Rotor over.
-
 Step 30
Open out one layer of each blade as far as possible.
-
 Step 31
Here is the result.
-
 Step 32
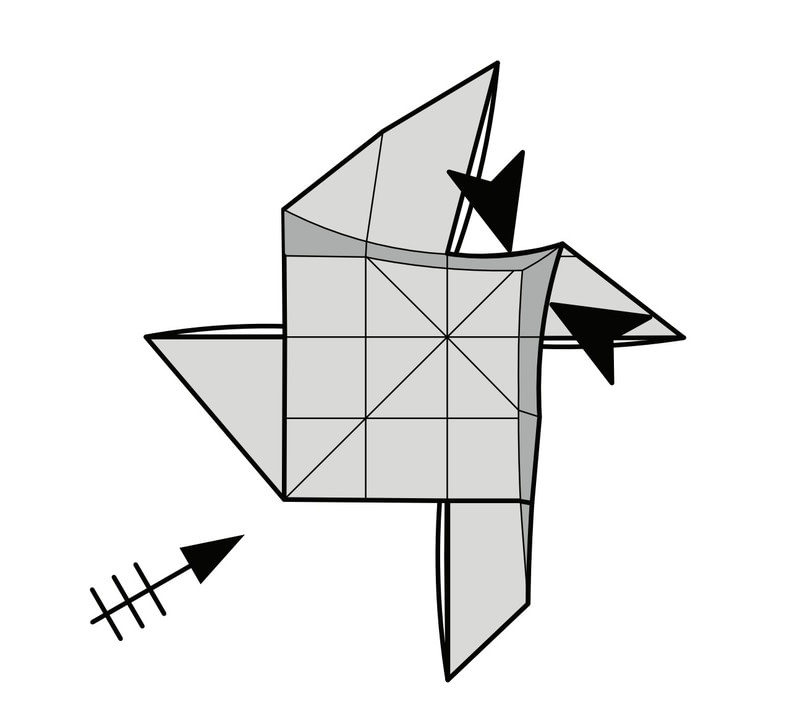
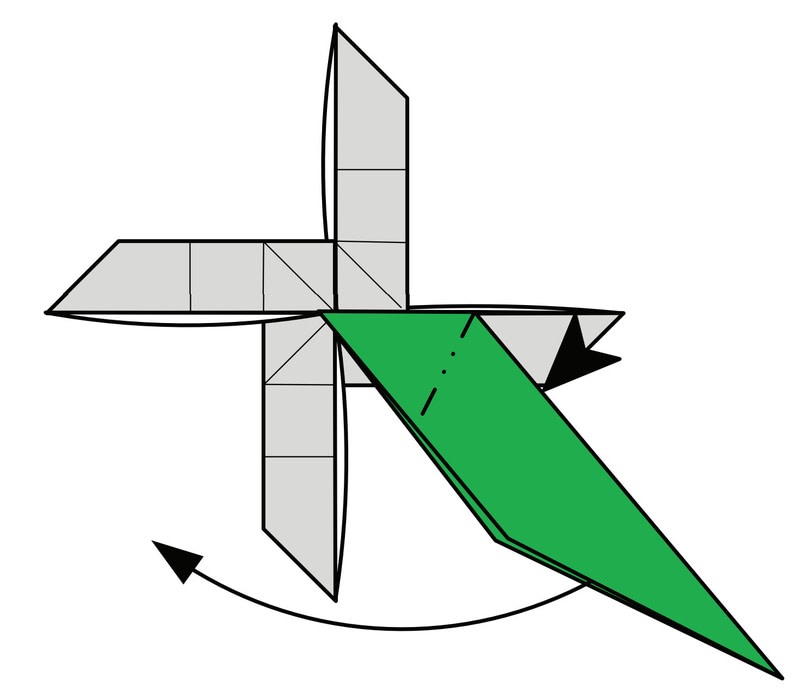
Prepare the fuselage for assembly
Swivel the triangular fl ap a little
to the right so that it’s perpendicular
to the colored portion. Then stand
the piece upright. -
 Step 33
Here is the result.
-
 Step 34
Assembly
Place the corner of the base of the Fuselage on the corner of the center square of the open Main Rotor. The dotted gray triangle shows where the base goes. Two corners of the base will protrude a little beyond the square.
-
 Step 35
Tuck the two protruding tips of the corners under the edges of the center square.
-
 Step 36
Close the Main Rotor back up, wrapping the flaps around the triangular base. As you do this, the base will be forced to lay to the right.
-
 Step 37
Fold the base down, creasing along the inner edge of the Main Rotor.
-
 Step 38
Fold the base to the left so that edge C lies along edge D.
-
 Step 39
Unfold step 5.
-
 Step 40
Reverse-fold (tuck inside)
the Fuselage along the crease
you made in step 5. -
 Step 41
Swivel the Main Rotor up
so that it is positioned perpendicular
to the Fuselage. -
 Step 42
The completed Helicopter. Add
tail rotor stickers and you’re
ready to take a whirl over your
city!