About
A simple and stylish ombre bracelet that's easy to make
Create a stackable bracelet with simple materials and an easy method.
Tags
-
 Kathy C. favorited Ombre Cord Bracelet
04 May 23:48
Kathy C. favorited Ombre Cord Bracelet
04 May 23:48
-
 Stephanie R. favorited Ombre Cord Bracelet
03 Mar 07:05
Stephanie R. favorited Ombre Cord Bracelet
03 Mar 07:05
-
 Corleen M. favorited Ombre Cord Bracelet
30 Aug 23:39
Corleen M. favorited Ombre Cord Bracelet
30 Aug 23:39
-
 ALadyLotus favorited Ombre Cord Bracelet
15 Jun 13:31
ALadyLotus favorited Ombre Cord Bracelet
15 Jun 13:31
-
 Jennstar329 favorited Ombre Cord Bracelet
23 Mar 13:36
Jennstar329 favorited Ombre Cord Bracelet
23 Mar 13:36
-
 Elin H. favorited Ombre Cord Bracelet
20 Mar 19:21
Elin H. favorited Ombre Cord Bracelet
20 Mar 19:21
-
 Maristella R. added Ombre Cord Bracelet to Bracelets with Fibers
16 Mar 08:45
Maristella R. added Ombre Cord Bracelet to Bracelets with Fibers
16 Mar 08:45
-
Zoe F. added Ombre Cord Bracelet to Alexa Chung
03 Feb 16:46
-
 Tracy G. favorited Ombre Cord Bracelet
28 Jan 16:48
Tracy G. favorited Ombre Cord Bracelet
28 Jan 16:48
-
Donna C. favorited Ombre Cord Bracelet
26 Jan 15:07
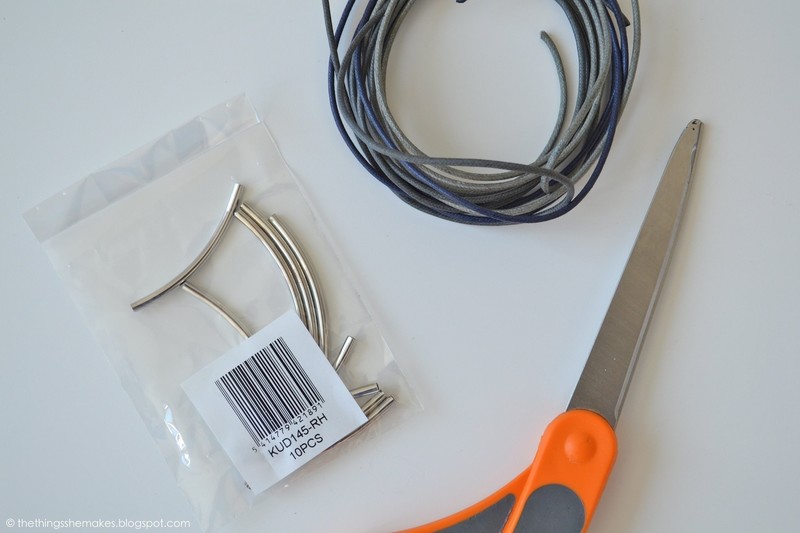
You Will Need
-
 Step 1
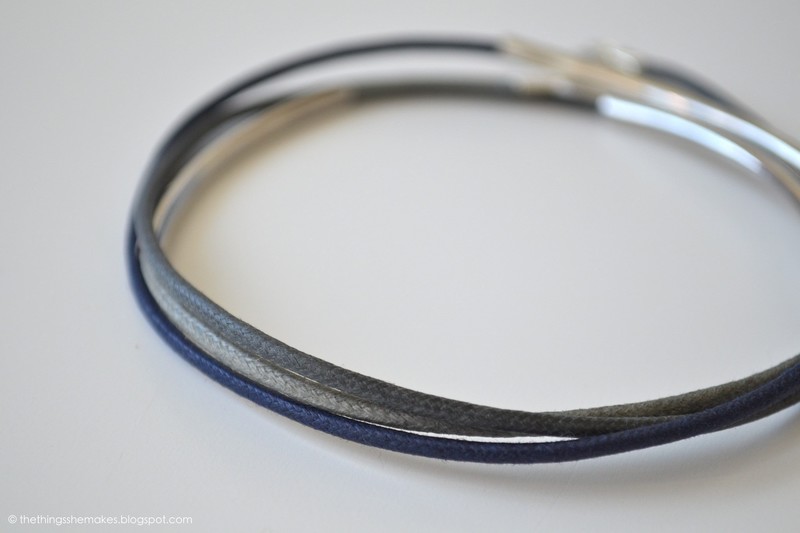
The method is very simple and you can have this whipped up in 20 minutes. To begin, select your cord. I chose three similar shades: light grey, dark grey and dark navy and bought 1m of each.
-
 Step 2
I started by threading each cord with one of the curved bars.
-
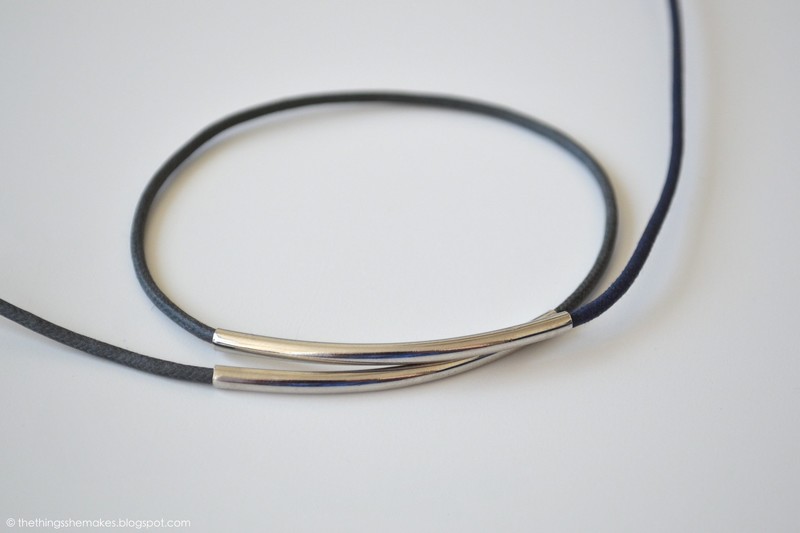
 Step 3
To measure my first length of cord, I started from the centre of the underside of my wrist, around to the top of my wrist, ensuring the curved bar rested neatly on top and then wrapping back under, round and finishing again at the centre top.
Cutting the thread, I then attached this with hot glue to the second cord - both ends flush. -
 Step 4
To hide this, the bar threaded on the second cord is moved to rest over the centre of the join.
-
 Step 5
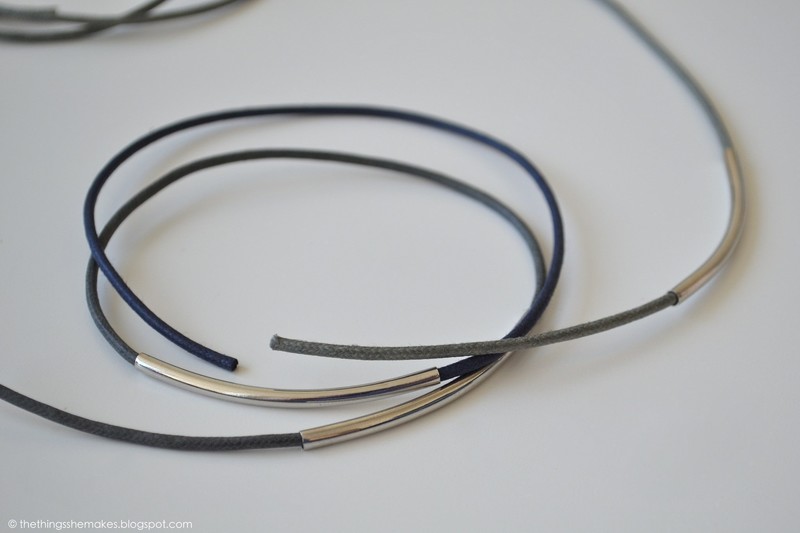
Making the cord and change in colour seem seamless [if you have any trouble threading the bar over the join, trim the edges a little to help]. Resting both curved bars on the centre top of my wrist, I then measured the second cord length by wrapping it around my wrist one time and making the cut:
-
 Step 6
....before joining the third cord in exactly the same way, hiding the join with the curved bar threaded on the third length of cord.
-
 Step 7
This length was then cut when the thread reached the underside of my wrist, reaching the start of the first cord to complete the bracelet. I decided to keep the design simple, with one loop of each cord, but you can repeat these steps as many times for as many stacks you like.
Next, finishing with fastenings. I chose clasps as they are incredible secure and easy to use. -
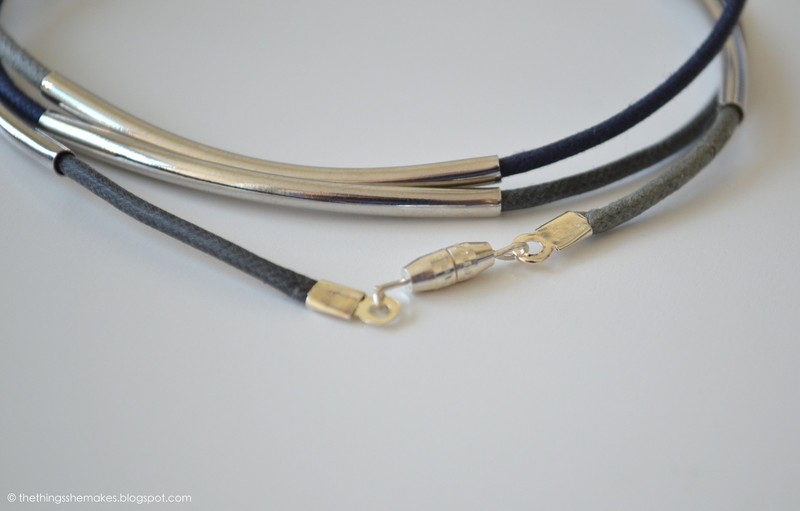
 Step 8
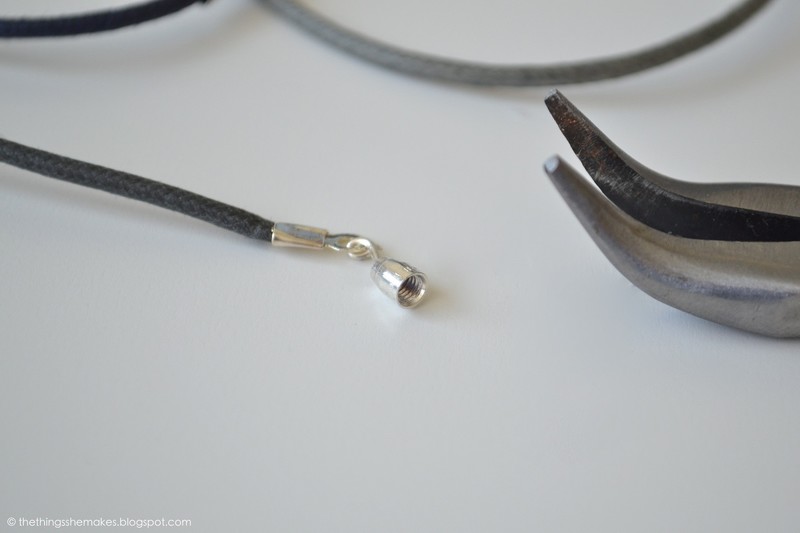
Take a clasp and place the end of the cord inside - use pliers to close the clasp to secure the cord in place [the clasp will be a pyramid shape].
-
 Step 9
...to secure the cord, flatten one side down flat with the pliers [you can also close the clasps without jewellery pliers if you don't have them, e.g. scissors - but I am terrible for using incorrect tools!].
-
 Step 10
...and then close the other half flat and flush on top.
-
 Step 11
...using the pliers to help open and close the join of the fastening, attach this to the end of the clasp.
-
 Step 12
...and repeat on the opposite side.
-
 Step 13
And it really is as simple as that.
-
 Step 14
...stacked with other jewellery pieces on on their own - I'm a little bit in love with how simple they are - dressed up or down. So, if you are new to jewellery making, this would be a perfect project to get you on your way.