


About
Cool MRI Lamp!!
I created this lamp for a crafty challenge on another site, but it was something that I've been puzzling out for a while.
I was inspired by <a href="http://www.hgtv.com/hgtv/cr_home_accessories/article/0,1789,HGTV_3255_2334731,00.html ">this</a> and <a href="http://www.craftster.org/forum/index.php?topic=68694.0">this</a> (can't see those pics though....)
The total time listed for this project does not include the overnight drying time of the glue and paint.
<i>Edit May 7, 2008: It's an <b>honor</b> to be the featured project!! Thank you!!</i>
-
 Coreen M. favorited No Bones About It Lamp
29 Sep 14:45
Coreen M. favorited No Bones About It Lamp
29 Sep 14:45
-
 tyler t. favorited No Bones About It Lamp
15 Mar 10:25
tyler t. favorited No Bones About It Lamp
15 Mar 10:25
-
 Ginger Darkstar favorited No Bones About It Lamp
13 Jan 19:09
Ginger Darkstar favorited No Bones About It Lamp
13 Jan 19:09
-
 Mariah K. favorited No Bones About It Lamp
27 Jul 20:24
Mariah K. favorited No Bones About It Lamp
27 Jul 20:24
-
 Veronica B. favorited No Bones About It Lamp
09 Mar 21:52
Veronica B. favorited No Bones About It Lamp
09 Mar 21:52
-
 Crafty Pirate favorited No Bones About It Lamp
18 Nov 05:26
Crafty Pirate favorited No Bones About It Lamp
18 Nov 05:26
-
 flor.delgadorizzi favorited No Bones About It Lamp
29 May 01:22
flor.delgadorizzi favorited No Bones About It Lamp
29 May 01:22
-
 Corvii favorited No Bones About It Lamp
28 May 09:38
Corvii favorited No Bones About It Lamp
28 May 09:38
-
 Monice M. favorited No Bones About It Lamp
19 May 07:41
Monice M. favorited No Bones About It Lamp
19 May 07:41
-
 Judy favorited No Bones About It Lamp
06 May 22:36
Judy favorited No Bones About It Lamp
06 May 22:36
-
Step 1
I'm not sure how true this is, but it is possible that xrays emit fumes that can be hazardous to your health. It might have something to do with the composition of the film paper. mri, ct, xrays are all printed on same paper and may contain trace amounts of silver which can be dangerous to touch as well, but that could just be in large amounts.
If you are wary of such things, then don't make this lamp!!
-
Step 2
Start by removing the glass and cardboard backing from the frames. Measure the long side of the frame and cut the dowels to that size.
-
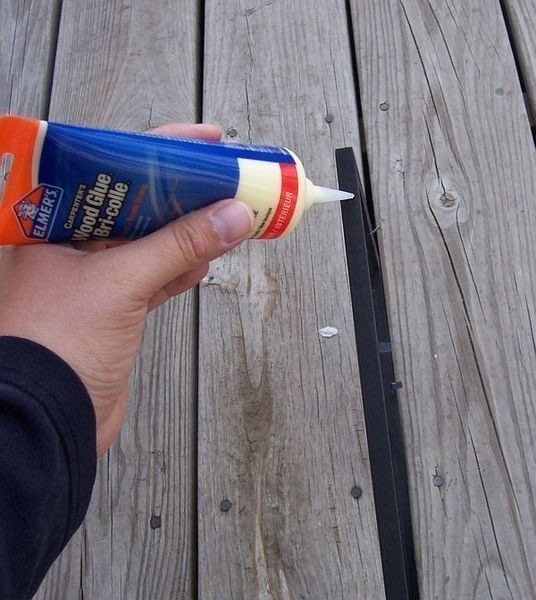
 Step 3
Glue one dowel to one frame with wood glue. Do the same for the other 3 frames and pieces of dowel.
-
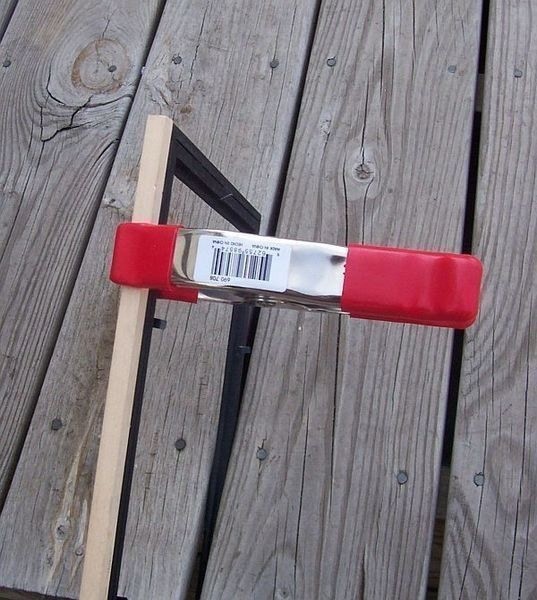
 Step 4
Clamp for 30 minutes, and then let dry overnight.
-
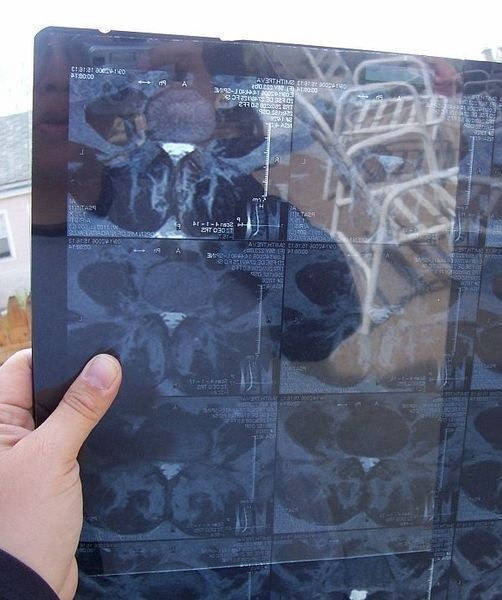
 Step 5
While the frames are drying, use on of the glass pieces from a frame as a guide to cut your image down to size.
I used my mom's MRI images. Also make sure a plain white sheet of paper is the same size as the glass.
-
 Step 6
Now that your frame pieces are dry, start gluing them together to form a box. Clamp for 30 minutes, then let dry overnight. I painted the dowels and the outside of the frame box black.
Let the paint dry overnight.
-
 Step 7
You now have a box. Here comes the harder part. How to hang it on the lamp harp. Take an eye hook and screw it into the frame, I put mine about 3 or 4 inches from the top. I picked the same spot in each corner, so that there is one eye hook in each frame.
-
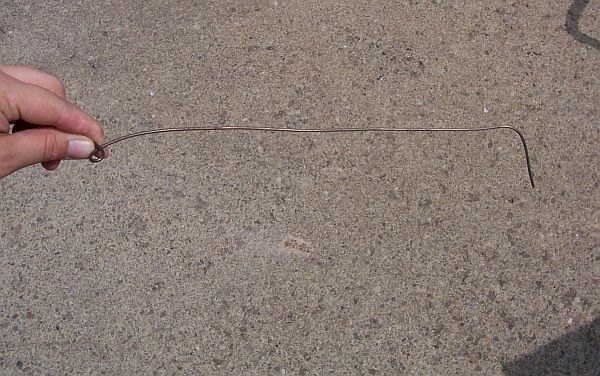
 Step 8
Take a piece of wire and lay it across your box diagonally. Make sure to have about 2 or 3 inches extra on each end. I used a heavy gauge annealed binding wire that my dad gave me. I think you could probably use bailing wire.
-
 Step 9
Fold the wire in half to find the middle. Make a loop to fit around the screw on top of the lamp harp.
-
 Step 10
Bend the extra 2 or 3 inches of the wire down, so that you can put it in the eye hooks. You want to hang the wire diagonally across the box.
-
 Step 11
You want to try and get the loop in the center, so that your shade will hang evenly. You might have to fiddle with it a bit.
-
 Step 12
When I put the images back into the frame, I also used the glass. So here is how the items go into the frame: MRI image, paper, glass. Put the shade on the lamp harp, add the finial and you have a lamp!


Amanda, thanks! I had a lot of fun making it
I'd like to thank every one for their comments, and for favoriting my lamp
I only know this because I ASSUME it was their brothers room. haha.
I only know this because I ASSUME it was their brothers room. haha.
this is creative as hell. good job