
About
A cute bird that's simple to make.
This bird is really easy to make apart from one step which is a lil fiddly but I'll talk you through once you get there.
This is my first tutorial so tell me if you enjoy :) Plus, I'll be happy to add extra instructions if you require.
Tags
-
 Laura T. favorited Nesting Bird
21 Dec 20:30
Laura T. favorited Nesting Bird
21 Dec 20:30
You Will Need
-
 Step 1
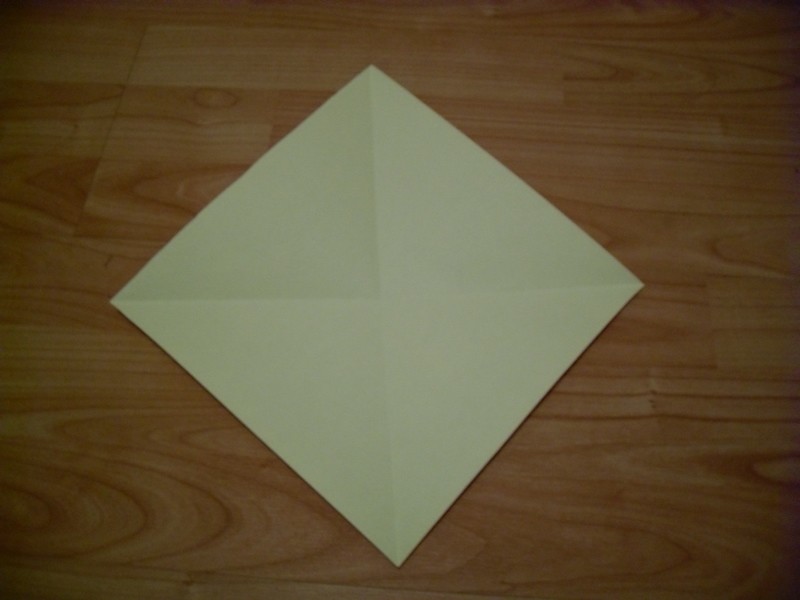
Fold your square across the diagonals.
-
 Step 2
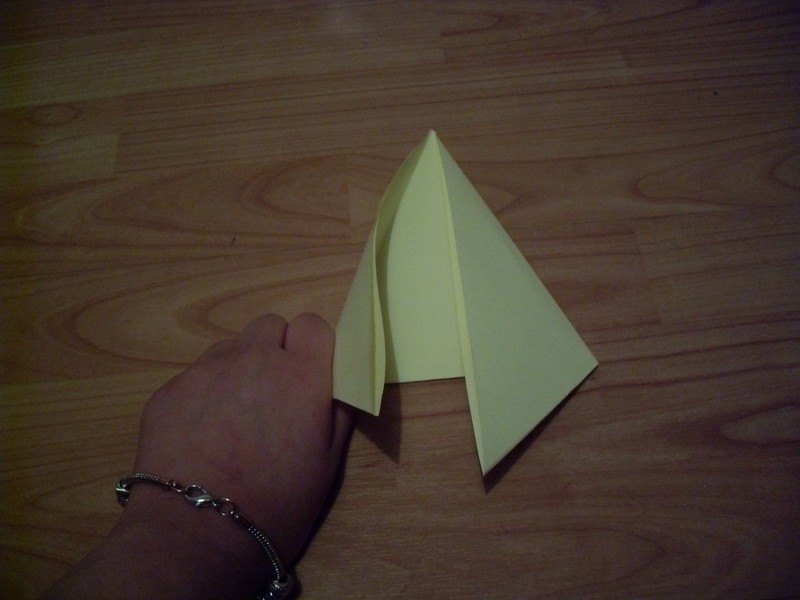
Now fold the bottom half upwards so you get a triangle.
-
 Step 3
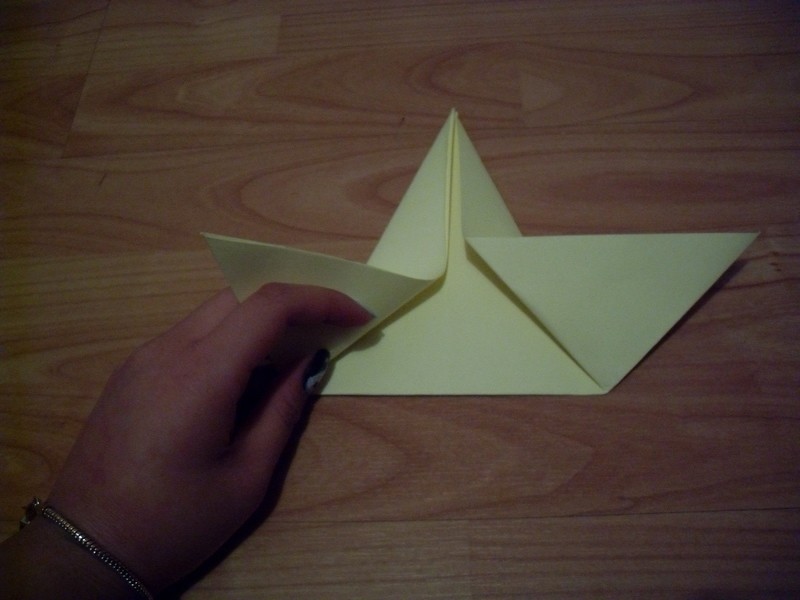
Fold the two corners down along the vertical, centre crease.
-
 Step 4
Again, using the same corners, fold them back up to form triangles. Make sure the top of the triangles are level with each other.
-
 Step 5
Right, if you grab the top spike you will find there's actaulyl another one inside so..
-
 Step 6
... pull it right out...
-
 Step 7
...and flatten. Voila, this is what you should have.
-
 Step 8
Flip it over.
-
 Step 9
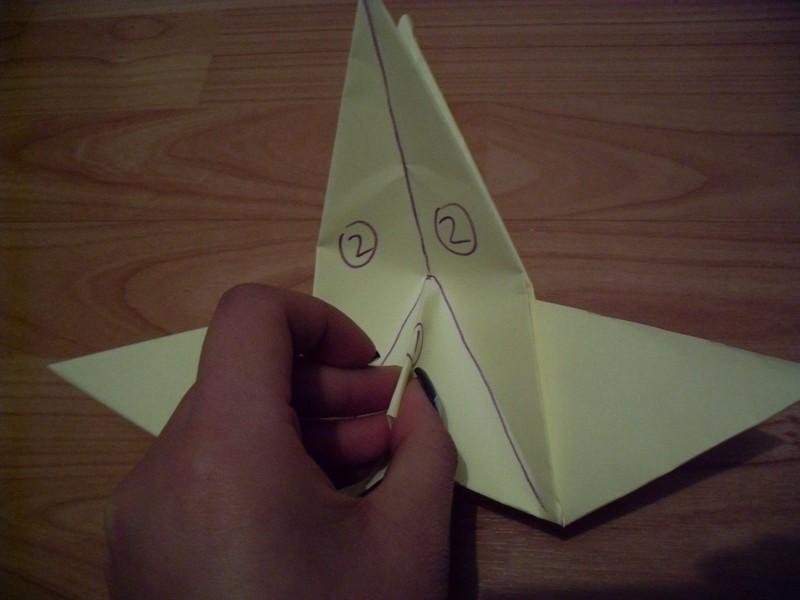
Right this is the tricky step so I've marked on the creases you will be making.
Note the triangle is shape 1 and the spike bits are shape 2. -
 Step 10
Mountain fold the triangle (shape 1) so it's creased towards you...
-
 Step 11
..whilst folding the two spkies (shape 2) together. The shape should flatten but the spike behind (remember how there was one in the other) might not invert itself so give it a hand.
-
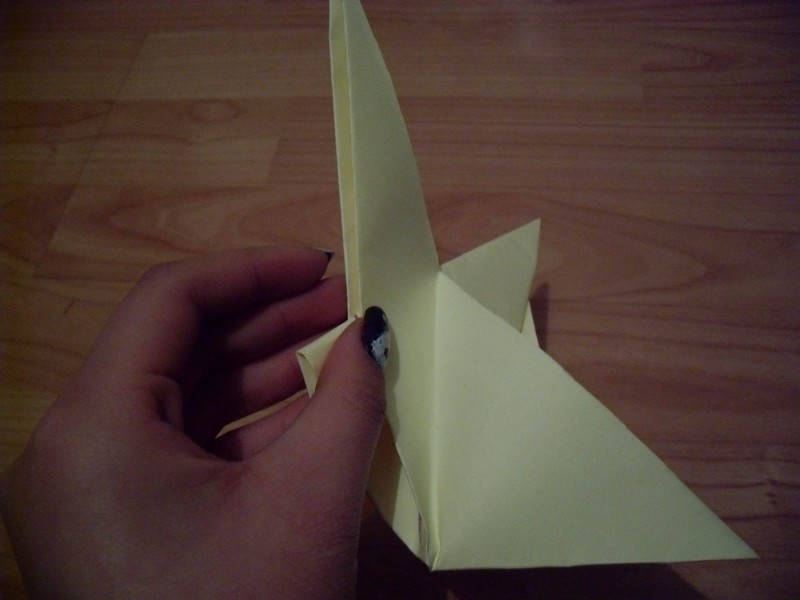
 Step 12
This is the shape you should get when it's flattened. It's cool if you don't get it the same way I've explained. End result counts :)
-
 Step 13
Fold upward the top flap. This will be one wing. Whilst folding...
-
 Step 14
...fold in the left point and flatten so it forms a triangle. What you have just folded is a wing.
-
 Step 15
It should end up like this. Now you can fold the other wing behind...
-
 Step 16
...like this. Looking like a bird yet?
-
 Step 17
This is what you have so far. The left spike is the neck of your bird and then you have your wings and a tail sticking out at the top.
-
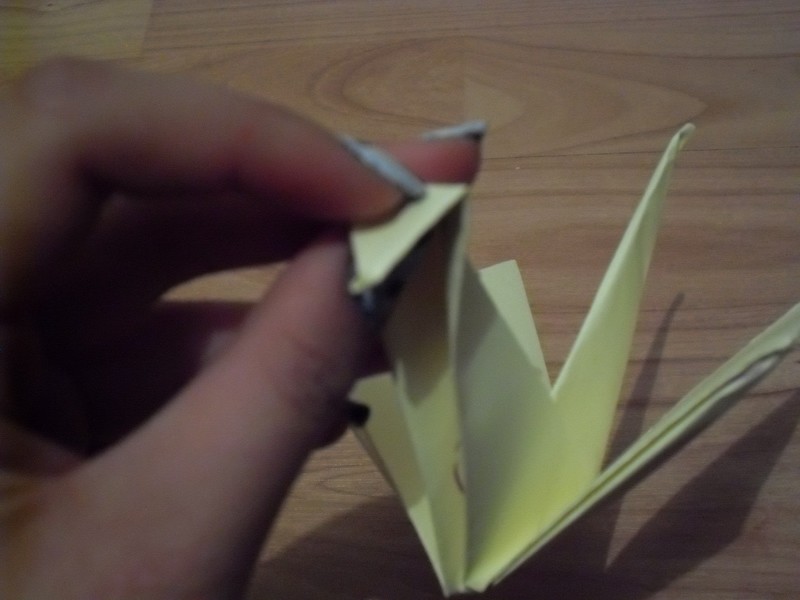
 Step 18
Reverse fold the neck. So open up the neck and fold it part way down...
-
 Step 19
... and press the neck together. Ta-daa! A beak.
-
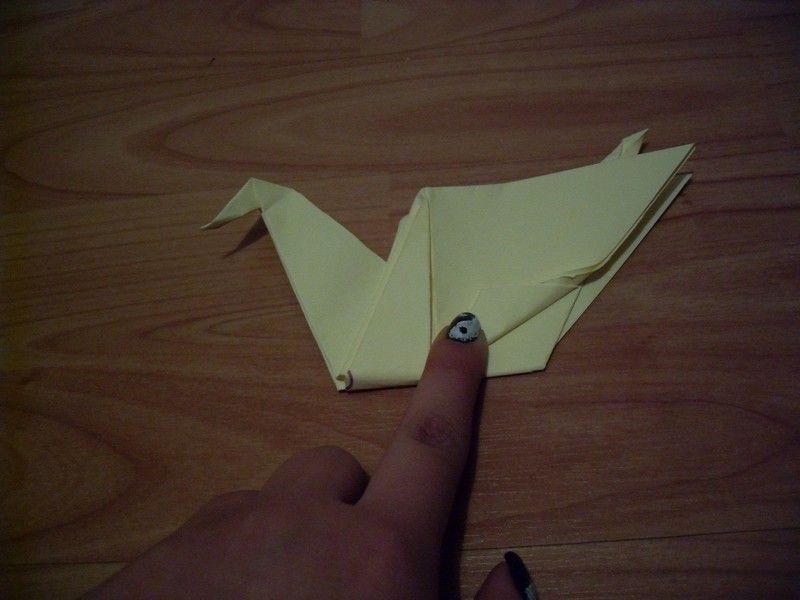
 Step 20
Finally, fold the bottom of your bird into a triangle to form a base. This will allow the bird to stand up and 'nest'. Do this on both sides.
-
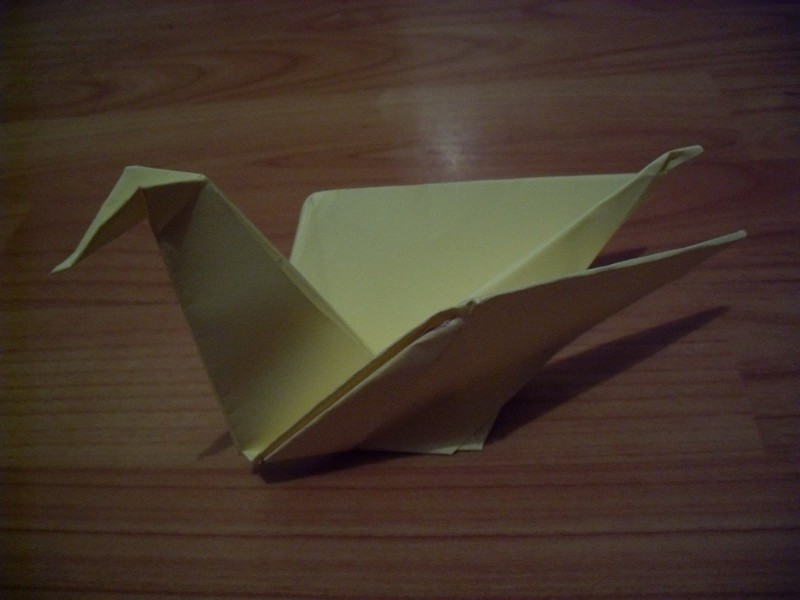
 Step 21
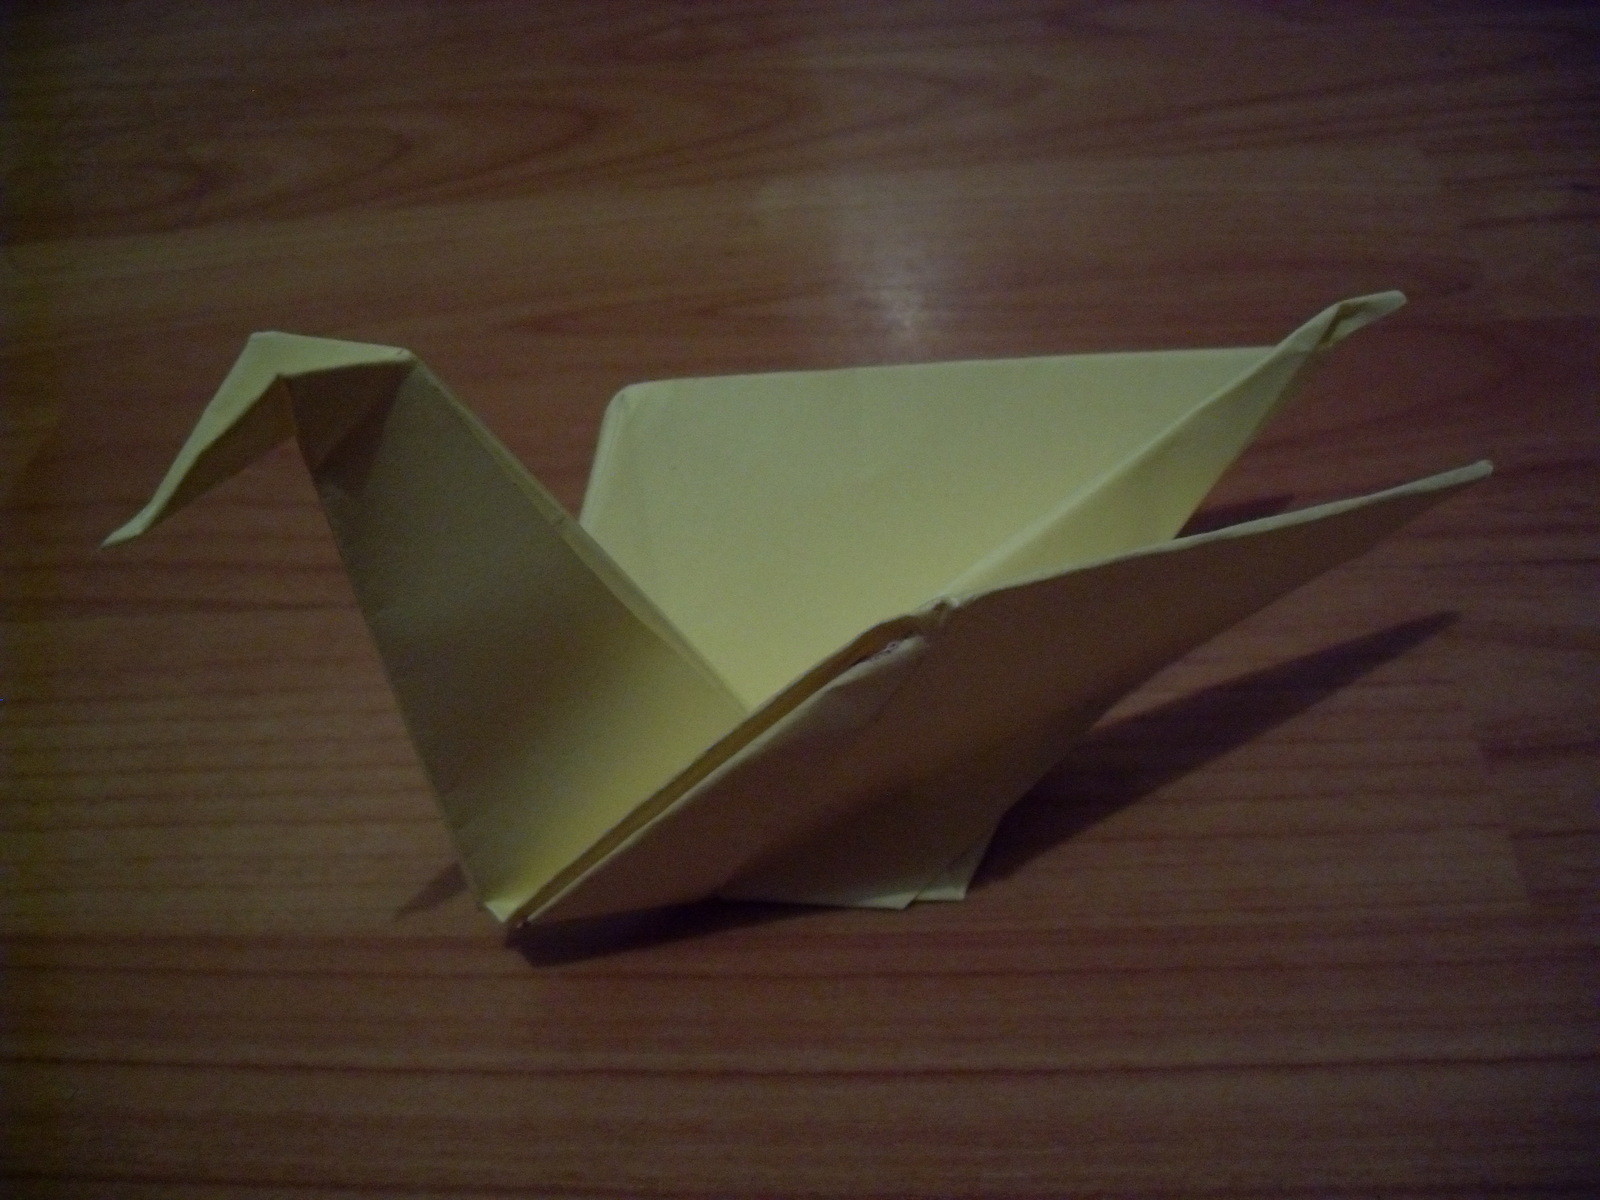
Behold... a bird.
:D