

About
Pretty ^^
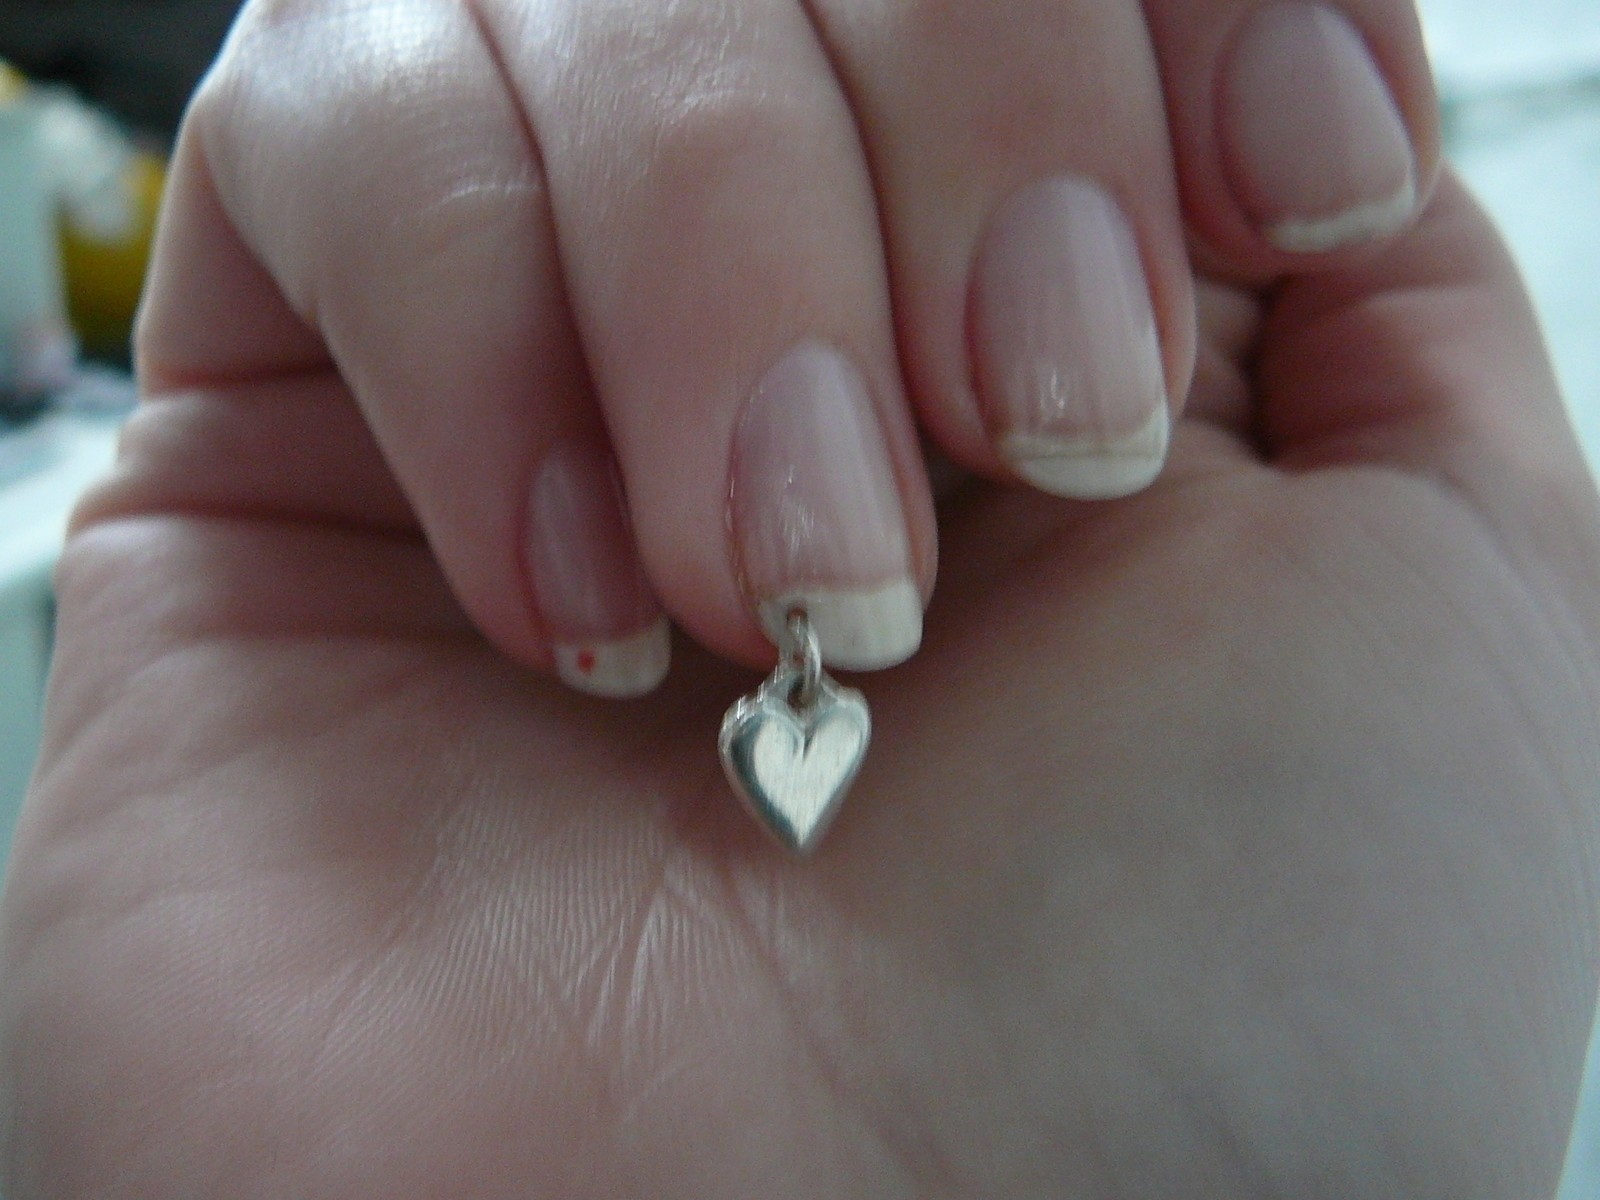
This is a much safer way of piercing your nails than the other project I found. First and foremost, your nails must be in excellent condition. They must be strong and split and crack free. If they look anything like my middle finger's nail in the photo above...don't even think about it... The best way to make sure your nails will be ready for the piercing is to prep them for at least a month.
No paint...At all
Cut them short.
File them (in ONE direction!!) into a shape you like.(with an EMERY BOARD, not a metal nail file!!)
Massage cuticle oil into your nails everyday at least twice a day. Remember, your nail bed starts at the first knuckle back from your fingertips, so massage that too to make nails grow strong and long.
2 weeks before piercing: Apply a strengthening nail enamel like Sally Hansen's 4-in-1 care complete whatever whatever, or anything that you know makes your nails stronger.
And yes, those are my real nails in the picture :) the crack proves it... I have naturally white nails tips, just like my mommy :)
Tags
-
 tina h. favorited Nail Piercing (The Safe Way)
18 Aug 00:51
tina h. favorited Nail Piercing (The Safe Way)
18 Aug 00:51
-
 Nankita favorited Nail Piercing (The Safe Way)
19 Oct 23:04
Nankita favorited Nail Piercing (The Safe Way)
19 Oct 23:04
-
 sephmariewe favorited Nail Piercing (The Safe Way)
25 Jul 15:27
sephmariewe favorited Nail Piercing (The Safe Way)
25 Jul 15:27
-
 Chinese_Food_Product favorited Nail Piercing (The Safe Way)
18 Jun 16:06
Chinese_Food_Product favorited Nail Piercing (The Safe Way)
18 Jun 16:06
-
 AnthemFlashback favorited Nail Piercing (The Safe Way)
07 Jun 19:05
AnthemFlashback favorited Nail Piercing (The Safe Way)
07 Jun 19:05
-
 Taylor P. favorited Nail Piercing (The Safe Way)
07 Jun 17:30
Taylor P. favorited Nail Piercing (The Safe Way)
07 Jun 17:30
-
 Raven Beauty commented on her project Nail Piercing (The Safe Way)
06 Jun 06:26
Raven Beauty commented on her project Nail Piercing (The Safe Way)
06 Jun 06:26
-
 PaigeKayJay favorited Nail Piercing (The Safe Way)
05 Jun 21:20
PaigeKayJay favorited Nail Piercing (The Safe Way)
05 Jun 21:20
-
 allison wonderland. favorited Nail Piercing (The Safe Way)
02 Jun 15:08
allison wonderland. favorited Nail Piercing (The Safe Way)
02 Jun 15:08
-
 Denise B. favorited Nail Piercing (The Safe Way)
01 Jun 18:39
Denise B. favorited Nail Piercing (The Safe Way)
01 Jun 18:39
You Will Need
-
Step 1
Find yourself a needle-like tool. I have a stainless steel blackhead remover that has a needle at one end and a loop at the other.
-
Step 2
Take any old pain off the day before piercing and massage cuticle oil in again. Leave it on for the night. When the day of awesomeness arrives, paint your nails with the strengthener again and, when dry,put your hand in some warm water. This will stop the drilling motion of the needle from burning your nails.
-
Step 3
Choose the spot you want to pierce and place the tip of the needle on the underside of the nail, still in the water. Slowly, very slowly, start turning the needle until it goes right through your nail. This will take a while for us with thicker nails. Make sure to go through the hole again from the top to make sure it's clean and properly open.
-
Step 4
Take your hand out of the bowl, dry it and file down the hole very carefully with a buffer to smooth the top of the hole.
Use the pliers to open a jump ring and slip a charm on, slip that through the hole in your nail and close it very tightly :)
Comments


