


About
Big old mustache for your bed!
I seen this first on youtube but couldn't find the original video i viewed so very sorry but not my idea! Wish i could give proper credit.
And sorry for the lack of pictures my camera was acting up like a right plonker. Any questions just ask and i will try to help ^_^
Tags
-
 Elizabeth T. added Mustache Pillow Cases to Random Ideas
11 Jan 02:12
Elizabeth T. added Mustache Pillow Cases to Random Ideas
11 Jan 02:12
-
 WaterAngel added Mustache Pillow Cases to Gifts
08 Oct 08:19
WaterAngel added Mustache Pillow Cases to Gifts
08 Oct 08:19
-
 Zombie Babe favorited Mustache Pillow Cases
05 Aug 03:33
Zombie Babe favorited Mustache Pillow Cases
05 Aug 03:33
-
 LilKitten2000 favorited Mustache Pillow Cases
29 Dec 23:52
LilKitten2000 favorited Mustache Pillow Cases
29 Dec 23:52
-
LilKitten2000 commented on Mustache Pillow Cases
29 Dec 23:52
You Will Need
-
Step 1
Start off by washing and ironing your pillow cases, this gives the paint the best chance to stay on the pillows :)
-
Step 2
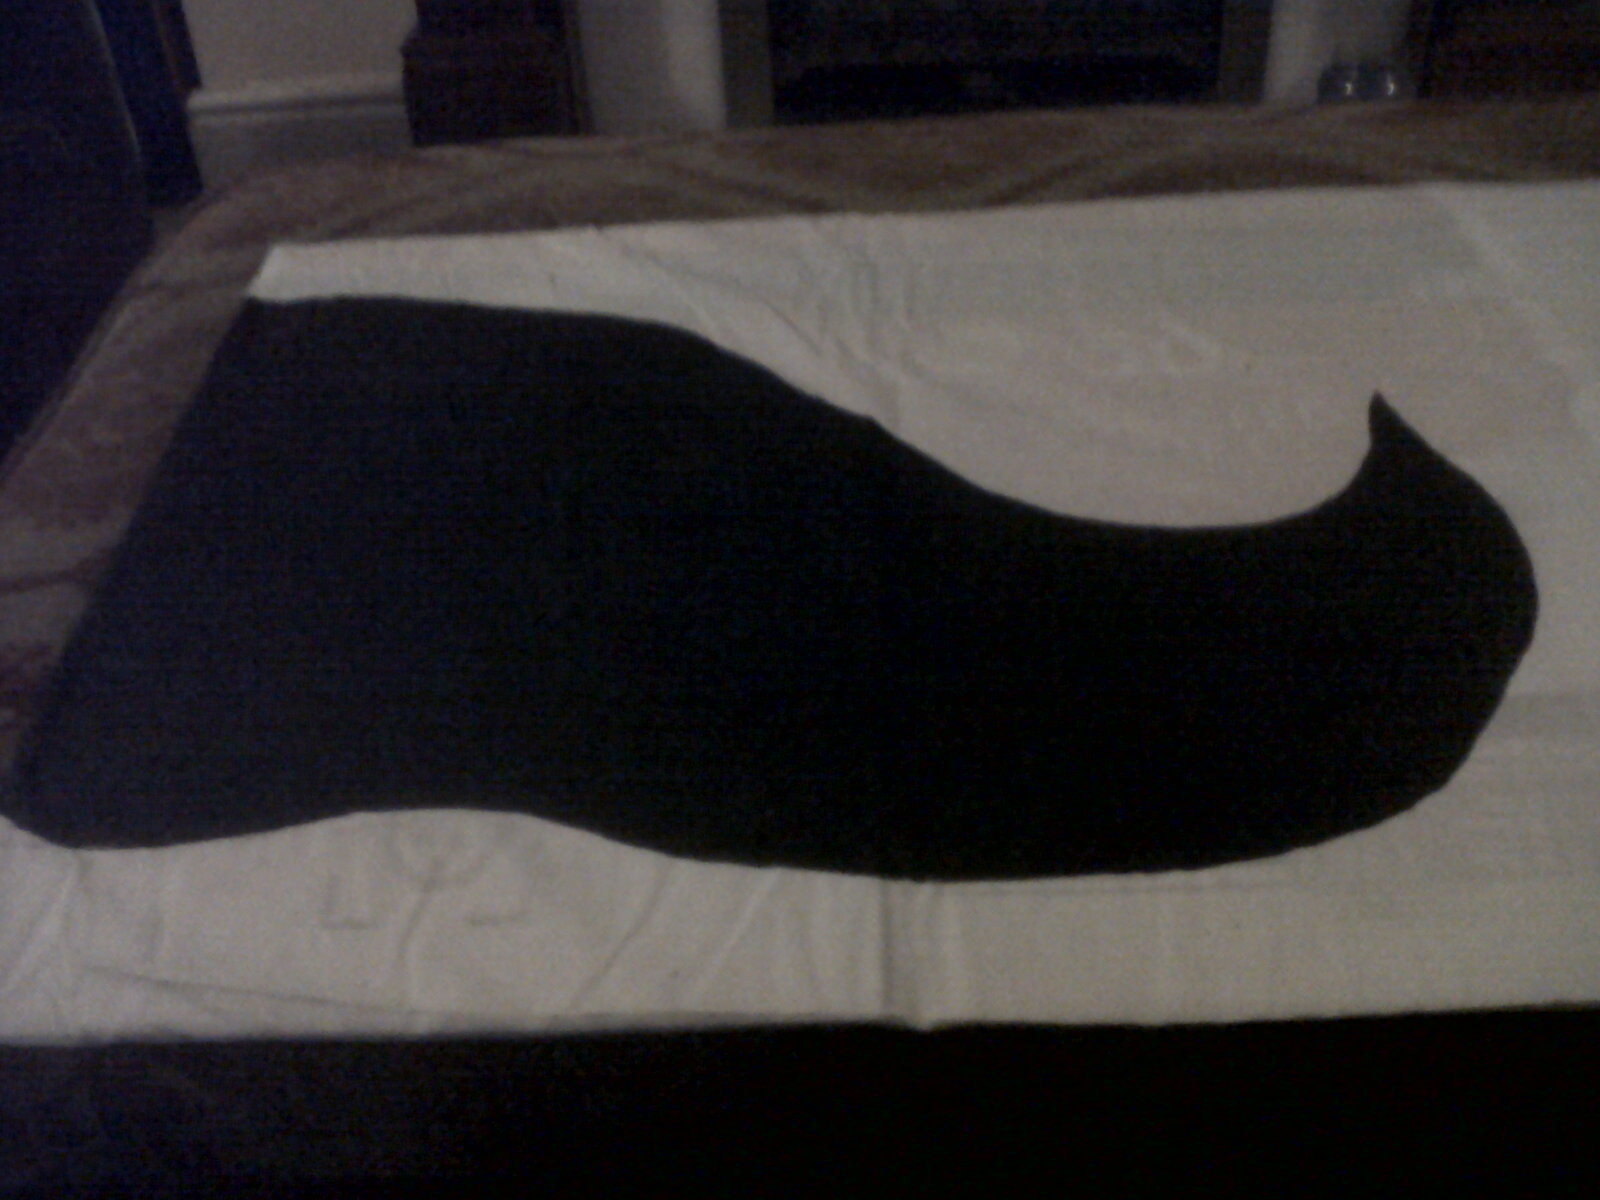
After that you need to draw a template. I used a big piece of old card i had lying around and drew a rough shape of half the mustache and perfected it. Your card needs to be as big as or a little smaller than your pillow cases, you can use card, paper, cardboard anything.
Also drawing only half the mustache saves time and ensures an even mustache -
Step 3
So when you have your mustache template ready either pin it down to your first pillow case or hold it down while you draw around it.
-
 Step 4
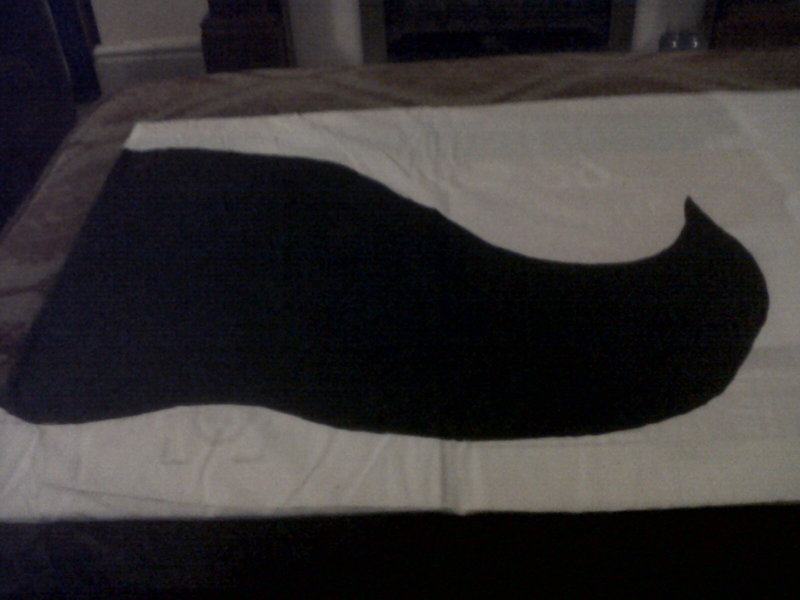
Now your ready to paint!
Personally i used Dylon fabric paint because i feel it gives the best outcome, it remains soft after drying and gives a great look. Haven't yet found a better one. Also remember when painting to put something in between the fabric to keep it from leaking to the the back.Also i used around 3/4 pots of dylon fabric paint, but it depends on size and thickness of your mustache :)
-
 Step 5
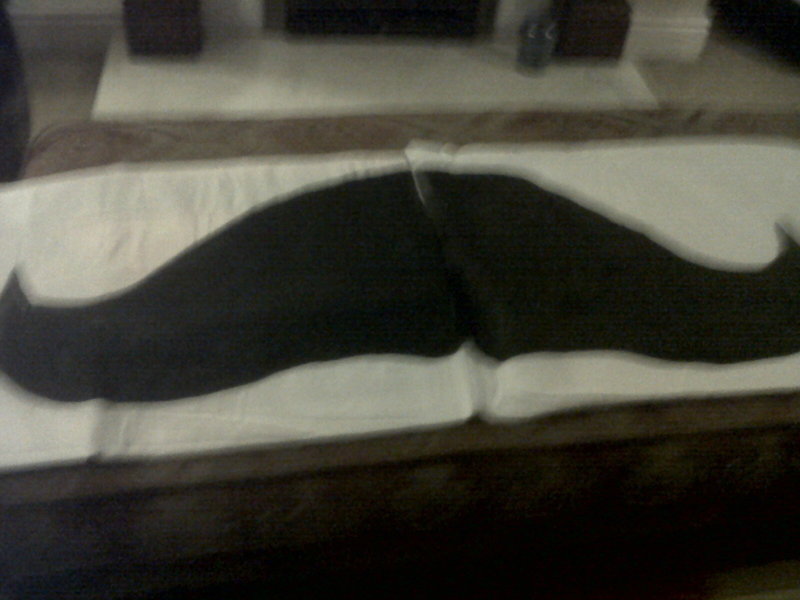
Now flip the template and draw the template on the other pillow case and then paint. Its that simple!
Also i had my mustache meeting at the opening on the pillow ends. if that makes sense, but you can do it either way.
-
 Step 6
All thats left is it left to dry :) keep something in between the pillow cases while they dry to make sure theres no leaking :)
While waiting for them to dry i messed about as seen.
After dry, wash iron to fix the colour and put pillows in! Yay!!!
-
Step 7
Now be awesome with your pillows and try not to explode from too much amazingness!

Comments

