


About
Sew Cute Creatures
Miranda goes on a voyage of discovery every day. She explores the most mysterious places under the sea and on land, finding beautiful shells for her friend Sally Seahorse.
Length:
50cm (20in)
Tags
Downloads
- 2018-02-27-172543-Sew+Cute+Creatures+31-8-17.pdf 402 KB [ Download ]
-
 Saskia v. favorited Miranda Mermaid
22 Jan 21:31
Saskia v. favorited Miranda Mermaid
22 Jan 21:31
-
 Kimber C. added Miranda Mermaid to Mermaid and sea decor
03 Feb 04:56
Kimber C. added Miranda Mermaid to Mermaid and sea decor
03 Feb 04:56
-
Kimber C. favorited Miranda Mermaid
03 Feb 04:56
-
 CraftyCat added Miranda Mermaid to Crafts
29 Nov 07:13
CraftyCat added Miranda Mermaid to Crafts
29 Nov 07:13
-
CraftyCat favorited Miranda Mermaid
29 Nov 07:13
-
 The Little Craft House favorited Miranda Mermaid
08 Nov 08:58
The Little Craft House favorited Miranda Mermaid
08 Nov 08:58
-
 Tammy W. favorited Miranda Mermaid
06 Nov 23:12
Tammy W. favorited Miranda Mermaid
06 Nov 23:12
-
Shirl S. favorited Miranda Mermaid
14 Sep 19:26
-
 Emma H. favorited Miranda Mermaid
13 Jun 14:23
Emma H. favorited Miranda Mermaid
13 Jun 14:23
-
 Kylie L. favorited Miranda Mermaid
19 May 17:32
Kylie L. favorited Miranda Mermaid
19 May 17:32
You Will Need
-
 Step 1
Trace the patterns (see attachments). Draw the pattern pieces for the head, arms and torso on to the skin-tone fabric, as shown right: draw the pattern piece for the head once, the arms four times (twice as they are and twice reversed) and the torso twice (once as it is and once reversed).
-
 Step 2
Draw the pattern pieces twice for the tail on the green fabric (once as it is and once reversed).
-
 Step 3
On the orange fabric, draw the head once and the ponytail twice (once as it is and once reversed). For the fringe, see the next step. Cut out the pattern pieces with a seam allowance of about 1cm (½in).
-
 Step 4
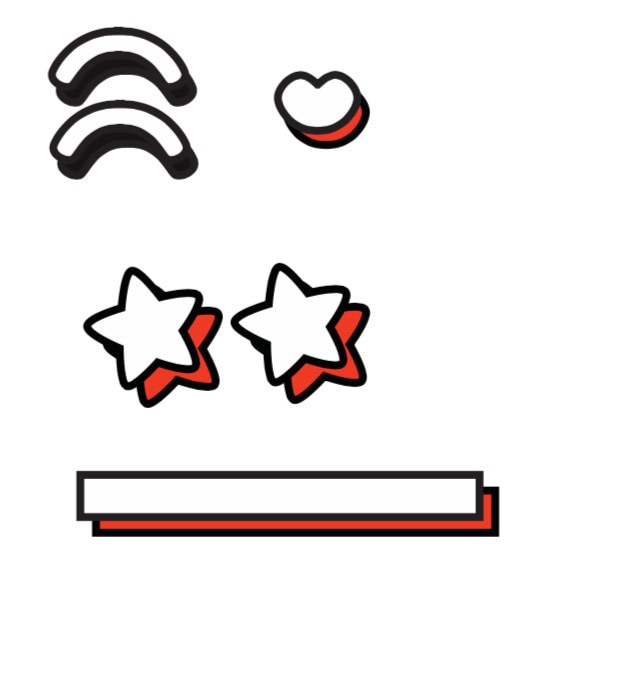
Cut out the pattern pieces for the eyes, mouth, starfishes and hairband from the felt without a seam allowance.
-
 Step 5
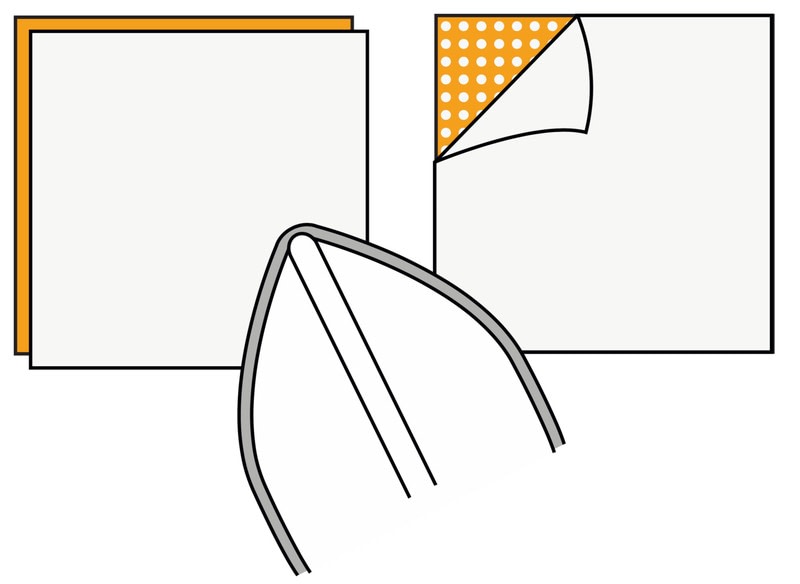
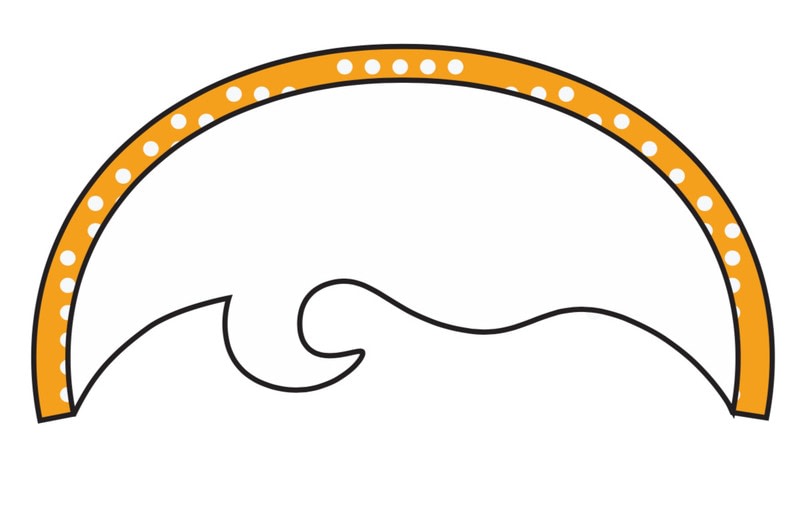
Iron the fusible web on the reverse of the orange fabric for the fringe. The rough side is the side that should be on the fabric. Draw the pattern piece for the fringe on the reverse of the fabric in mirror image.
-
 Step 6
Cut the hair out with a seam allowance of 1cm (½in) on the top curved edge, then peel off the backing paper.
-
 Step 7
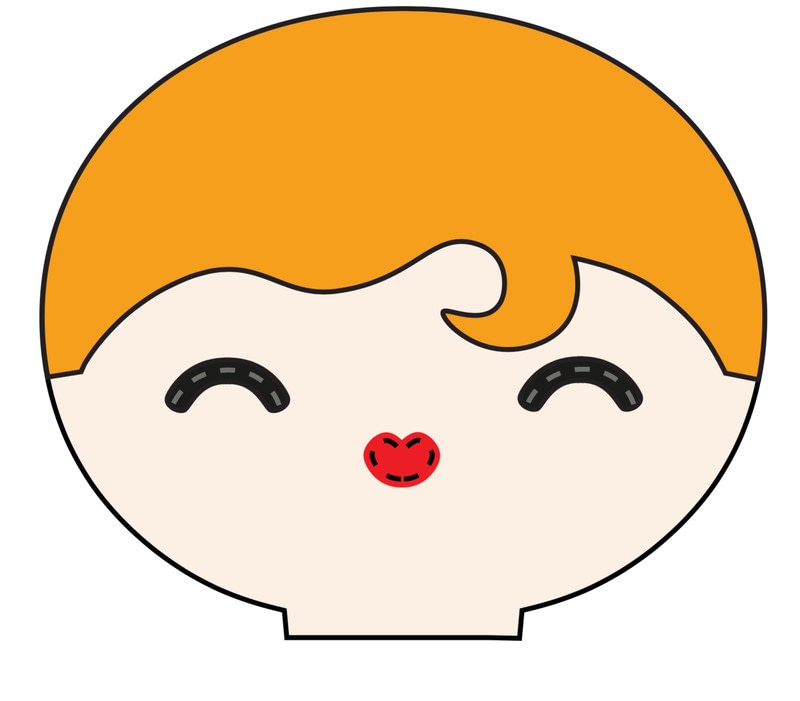
Iron the fringe on to the face and let it cool.
-
 Step 8
Sew the fringe in place using a straight stitch or a zigzag stitch. You can use a very narrow zigzag stitch to create a satin stitch.
-
 Step 9
Now sew the eyes and mouth on the face.
-
 Step 10
Sew the starfishes on the front of the body.
-
 Step 11
Place the arms together in pairs with right sides facing and pin. Sew each arm, but leave an opening at the top edge. Trim the seam allowance, turn the arms right side out and stuff with toy filling.
-
 Step 12
Do the same for the ponytail.
-
 Step 13
Pin the pattern piece for the front of the body (with starfishes) on the face, with the right sides of the fabric facing. Sew the neck seam.
-
 Step 14
Pin the pattern piece for the back of the body on the orange pattern piece for the head (without the eyes), with right sides of the fabric facing; sew.
-
 Step 15
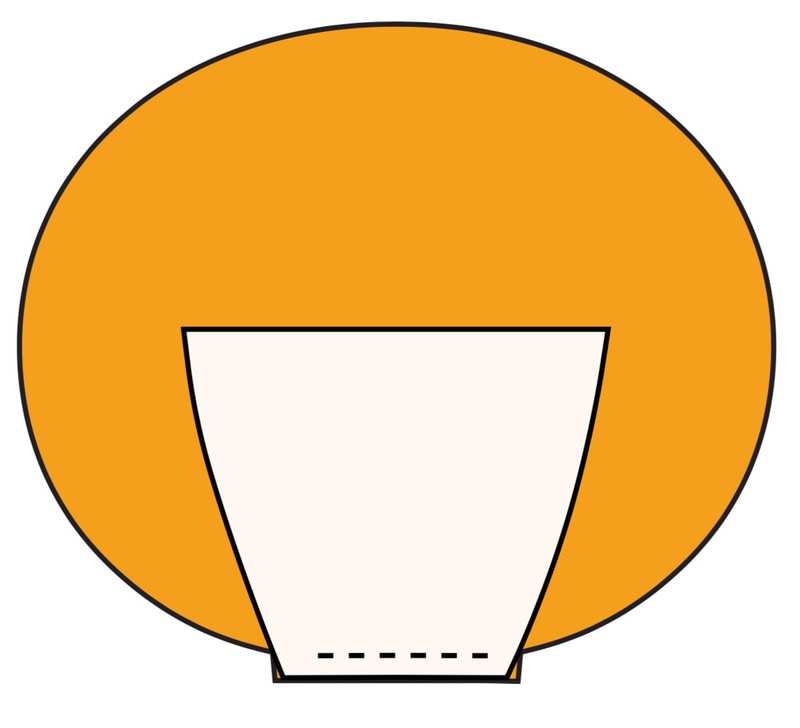
Place the tail and the torso together with right sides facing and pin. Sew the waist seam. From the illustrations you can see which tail piece goes with which torso piece. Do the same for the other tail and torso pieces, but this time sew as illustrated: sew a small section, then leave a section open before sewing another small section together again. This creates a gap for stuffing.
-
 Step 16
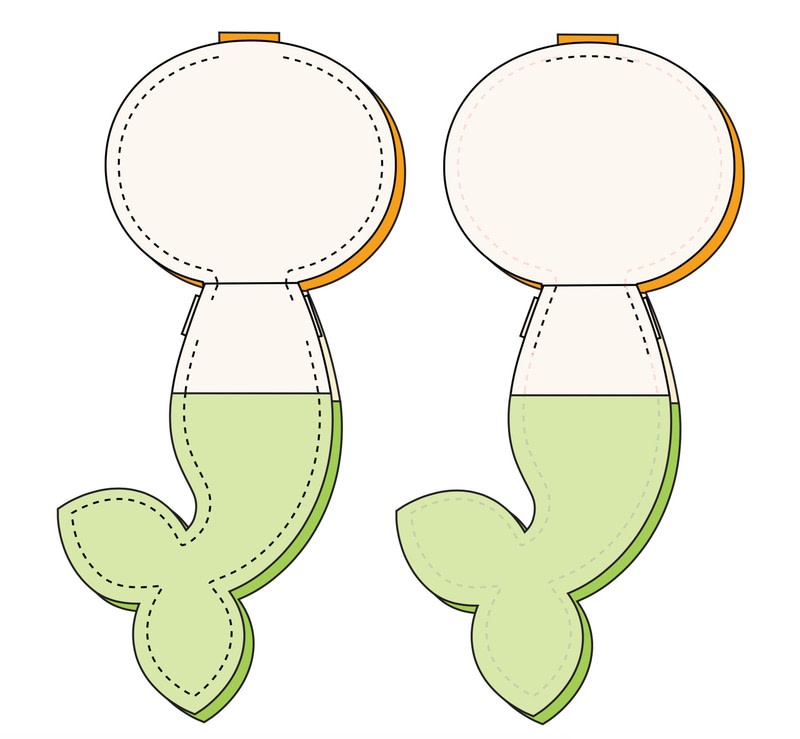
Now pin both body pieces together and sew all the way around them, leaving openings for the arms and the ponytail.
Place the arms and the ponytail in the openings and sew them firmly on.
-
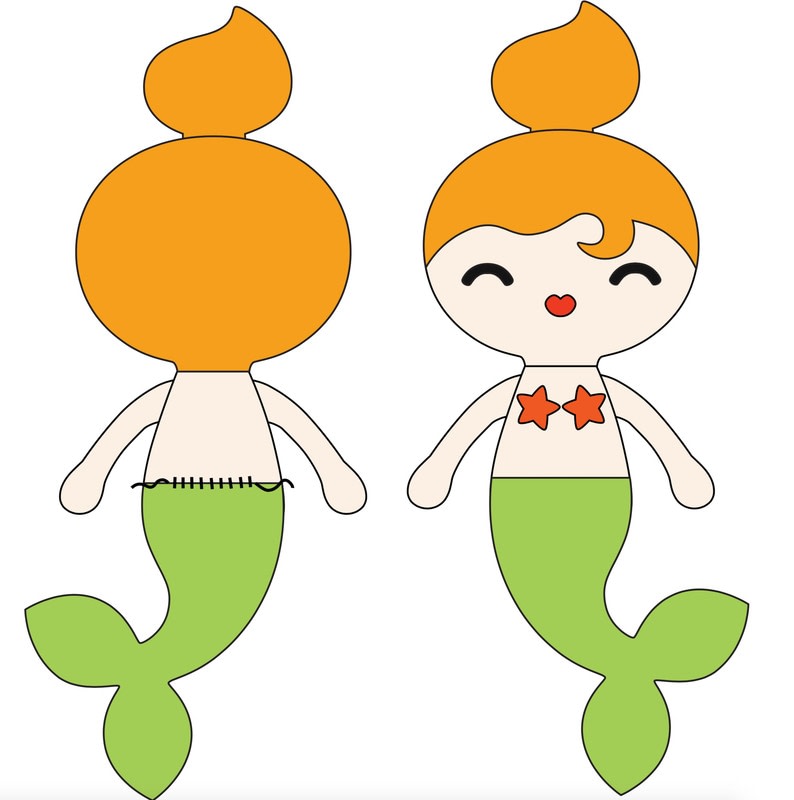
 Step 17
Trim the seam allowance of the body and turn the body right side out. Fill the body with stuffing. Start at the points of the tail and, when these are well filled and have a good shape, you can continue with the rest of the body. Now sew the hole at the back of the body closed using ladder stitch.
Ladder stitch:
This stitch is sewn by hand. Use it to sew the parts on the soft toy and to sew up the openings. You will need to do this even if you make your cute creature with a sewing machine, but don’t worry – none of the toys require much hand stitching. Follow the diagrams shown right or look on the internet, where videos will clearly show you what to do. Alternatively you may want to use a slipstitch.
Appliqué
1. Iron the fusible web on the reverse of the material from which you want to cut the appliqué. The rough side is the side that should be on the fabric. Let the fabric cool. Now draw the pattern (as a mirror image) on the back of the fusible web (see the example of the pattern of the heart in the images below). Cut out the pattern and then peel off the backing paper. You can easily draw on the fabric using a soft pencil (4B).
2. Iron the appliqué shape on to the fabric and allow it to cool. If you are machine sewing you can now sew around the appliqué using a straight stitch or a zigzag stitch; you can use a very narrow zigzag stitch to create a satin stitch effect. It is a good idea to work on a test piece first, so that you can practise your stitching.
Tip: sew very slowly to get the best results.
If you would like to sew the appliqué on to your soft toy by hand, then use running stitch or blanket stitch. A blanket-stitch option can also be found on most sewing machines. If you want to make your stitches really stand out, it is best to use double thread or embroidery thread.) -
 Step 18
Fold the felt hairband around the hair and sew it on by hand.
-
 Step 19
Your mermaid is finished!


Comments


