

About
How to make fast and easy minature books for different occations!
Books are amazing and they come in all sorts of shapes and colours. They're also pretty expensieve for most parts, so why not make one your self?
They make for great personal gifts, or for the cherry on the top of the Ice-cream!
Personally I intend to make a necklase out of miniature books.
-
 Jen J. favorited Mini Books!
12 Apr 22:26
Jen J. favorited Mini Books!
12 Apr 22:26
-
 Conner W. added Mini Books! to book crafts
16 Jul 17:10
Conner W. added Mini Books! to book crafts
16 Jul 17:10
-
 The Downtown Fiction favorited Mini Books!
22 Feb 04:45
The Downtown Fiction favorited Mini Books!
22 Feb 04:45
-
 Rachael H. added Mini Books! to Books/Journals
16 Dec 17:08
Rachael H. added Mini Books! to Books/Journals
16 Dec 17:08
-
 Katie's Crafts favorited Mini Books!
25 Nov 08:09
Katie's Crafts favorited Mini Books!
25 Nov 08:09
-
Crystal M. favorited Mini Books!
08 Aug 13:26
-
ellie j. favorited Mini Books!
20 May 09:13
-
 rlee.cardshark favorited Mini Books!
19 Jan 14:35
rlee.cardshark favorited Mini Books!
19 Jan 14:35
-
 Quickanimator favorited Mini Books!
09 Jan 16:59
Quickanimator favorited Mini Books!
09 Jan 16:59
-
 Lia fangirl of scotland! added Mini Books! to got to make!
22 Dec 23:36
Lia fangirl of scotland! added Mini Books! to got to make!
22 Dec 23:36
You Will Need
-
 Step 1
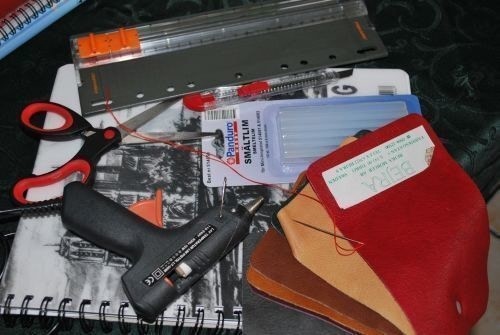
What you need:
Scissor
Paper
Needle and thread
Medium soft leather
Glue (a glue-gun not needed, but I prefer using one, as it works fast and is quite practical)
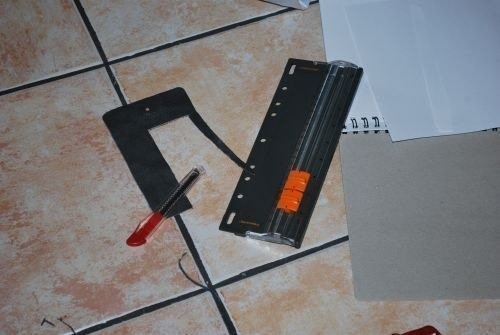
A ruler
Knife to cut through the leather -
 Step 2
I would advice for your paper to be medium thick, and not the one you use for your printer. I used some coarse drawing paper, it gives the texture some nice feeling as well as it's somewhat sturdier.
Use your ruler and line up twice the size of your desired pages. My smallest book so far is the size of a stamp. You continue to do this until you've got a fair share. If you got some extra pages, all the better.
Fold the pages in two, and put three and three pages inside of each other.
When you're done, make a slightly longer and slightly broader slip of paper than the size of your pages. only a few mm is needed.
-
 Step 3
Find your needle and thread. I'd advice on using a thread that's not too easy to rip apart, but if you don't got any other, just make sure to do some extra stitches.
Take one of the three pages that are folded together and start at the backside of the three pages. Make sure to make a small knot on your thread, though it might just pass through the paper. Use a finger to aid you. Doing simple tack sitches works quite perfectly.
Make up to max three stitches on the back of the book (mostly depending on how large you want your book). It's important that each three fold of papers have the same look of the stitches on the inside. When you're done you wont see the backside of it anyway!
When you're done with the first batch of three folded papers, pick up your next batch and stitch them the same way right next to the first one without cutting the thread, so they become interlinked beside eachother and gets stuck like usual pages. Do this until you've got your desired amount of pages.
-
 Step 4
How mine looks on the inside.
Once you are finished stitching together your pages, and it looks like the heart of a book. Put it under something heavy and press it down while you do the rest.
-
 Step 5
It's time to cut the leather.
Take that slightly bigger piece of paper you made at the beginning and put it upon your leather. Cut around it with your knife so it fits exactly on the paper.
Take out your glue(-gun!) and glue that slip of paper together with the leather. Do it slowly though, and make sure that the glue will allow you to bend the leather afterwards without any of the dried glue breaking off.
-
 Step 6
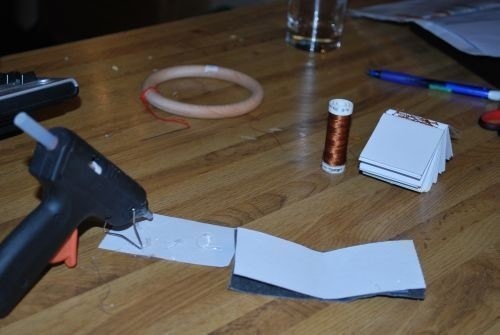
Like this.
I usually take a line of glue at the time, press it down while bending around the middle so I know it wont be ruined.
-
 Step 7
Take out your knife again, or your scissor depending on the quality of your leather and modify the cover until the white paper that might be showing on the sides are not so obvious.
Though! Do not cut on the leather, you want the cover to be slightly bigger than your pages. And try to avoid cutting away the paper on the inside of your cover, as that helps making the book stiff.
Next step is to take out the glue gun again, and your pages. Fit the cover around the book evenly.
Glue the first and the last page onto the white surface of your cover.
Put it under press again for a few hours.
-
 Step 8
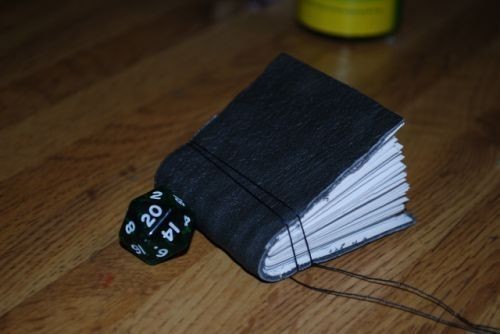
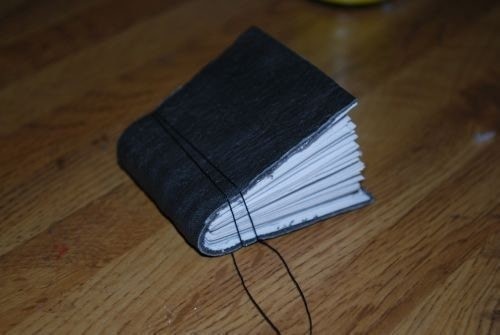
And Voilá!
The only thing that's missing now is the details such as a title and contents.
Do note though that the book wont hold it self together on it's own.
There are a few ways you could do to hold them together. A ribbon is one way, get a hold of an old lock from a children's diary is one way. Use jewlery locks or just simply your own creativity!


Comments

