


About
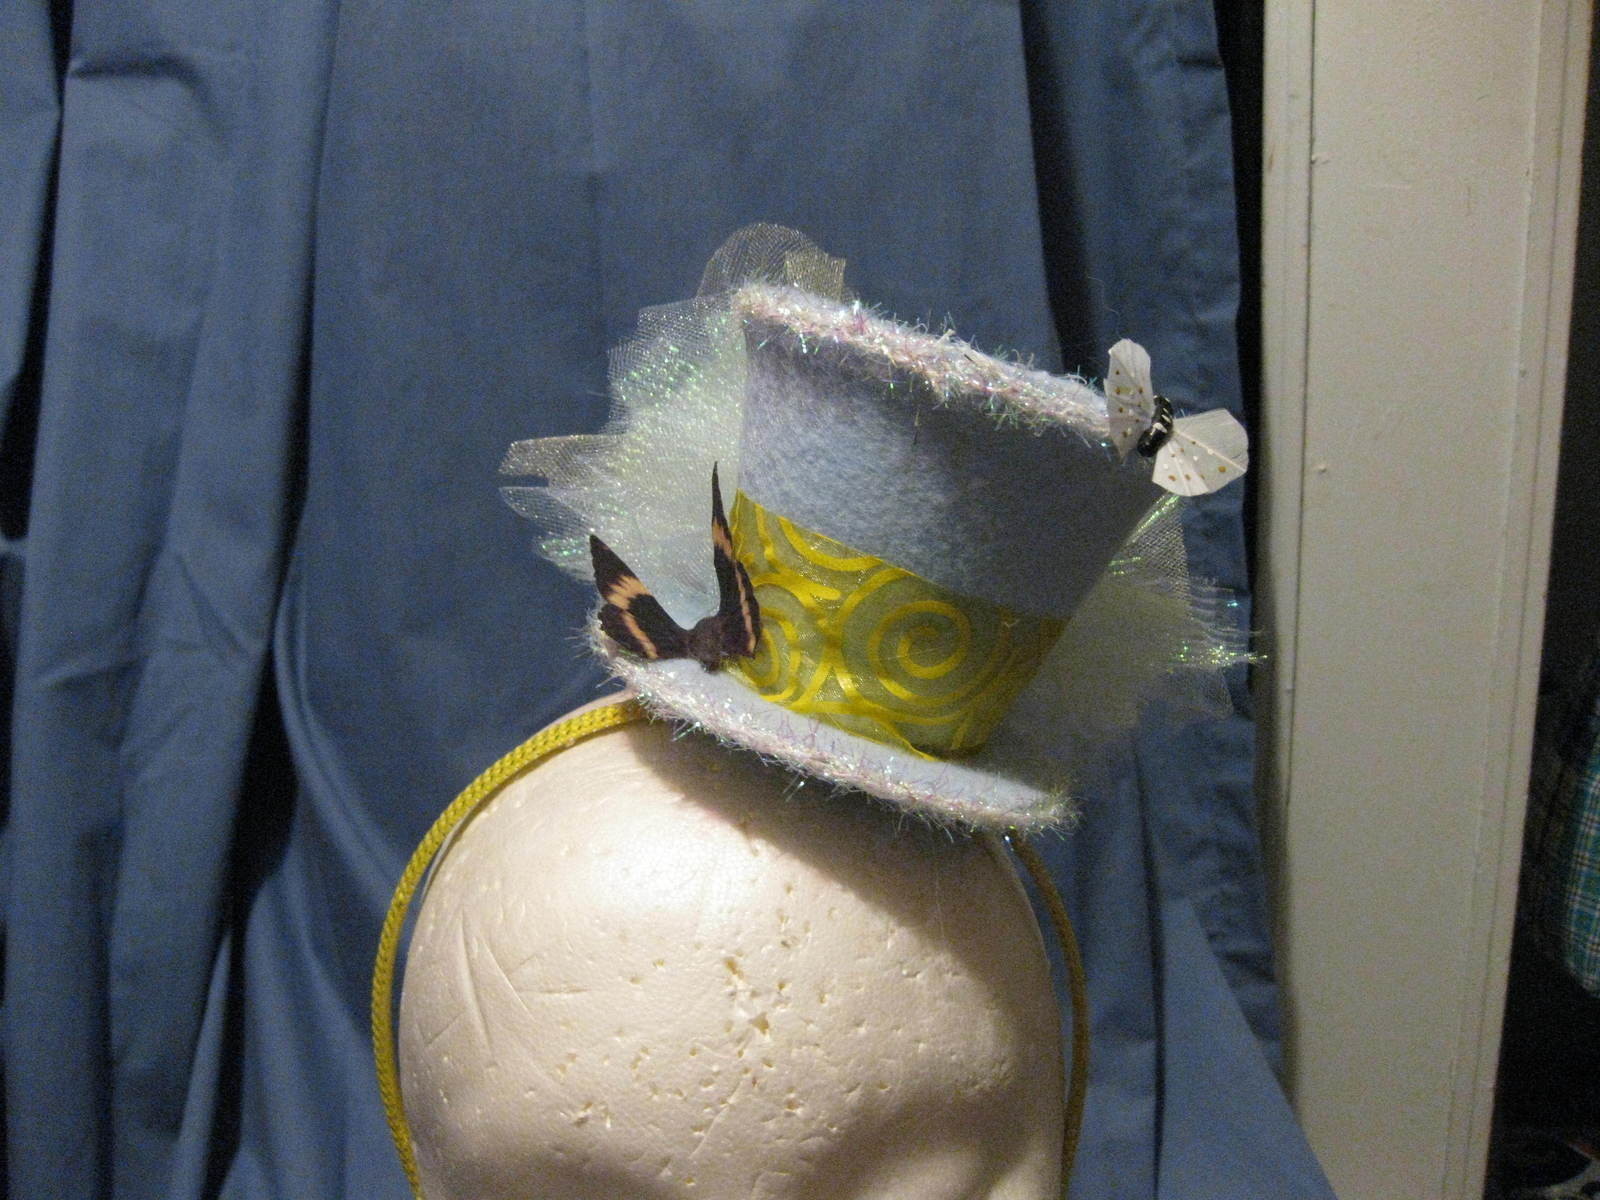
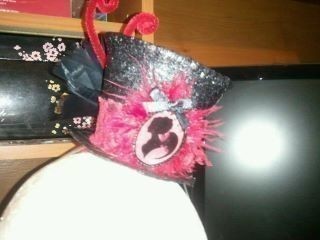
hat
did alot of looking around on line and stores for mini hats and though mmm i can do that. and it be one of akind hat. . if you like these check out my mini witch hats made out of party hats.
for all my mini hat fan i update this page for easy how to.
-
 Barbara M. favorited Mini Top Hats
01 Nov 07:31
Barbara M. favorited Mini Top Hats
01 Nov 07:31
-
 Key West Witch favorited Mini Top Hats
12 May 16:49
Key West Witch favorited Mini Top Hats
12 May 16:49
-
Key West Witch added Mini Top Hats to Top Hats, Witch Hats, Hats & Fascinater’s
30 Jun 13:46
-
 Delia I. favorited Mini Top Hats
04 Sep 07:30
Delia I. favorited Mini Top Hats
04 Sep 07:30
-
Julie C. added Mini Top Hats to costume ideas
09 Sep 00:38
-
Julie C. favorited Mini Top Hats
09 Sep 00:37
-
 Ruby Autumn favorited Mini Top Hats
19 Jan 22:54
Ruby Autumn favorited Mini Top Hats
19 Jan 22:54
-
PH W. favorited Mini Top Hats
11 Apr 15:29
-
 MagicalGirlMaya added Mini Top Hats to Tea Party
28 Feb 23:19
MagicalGirlMaya added Mini Top Hats to Tea Party
28 Feb 23:19
-
 mmotse03 favorited Mini Top Hats
30 Mar 09:58
mmotse03 favorited Mini Top Hats
30 Mar 09:58
-
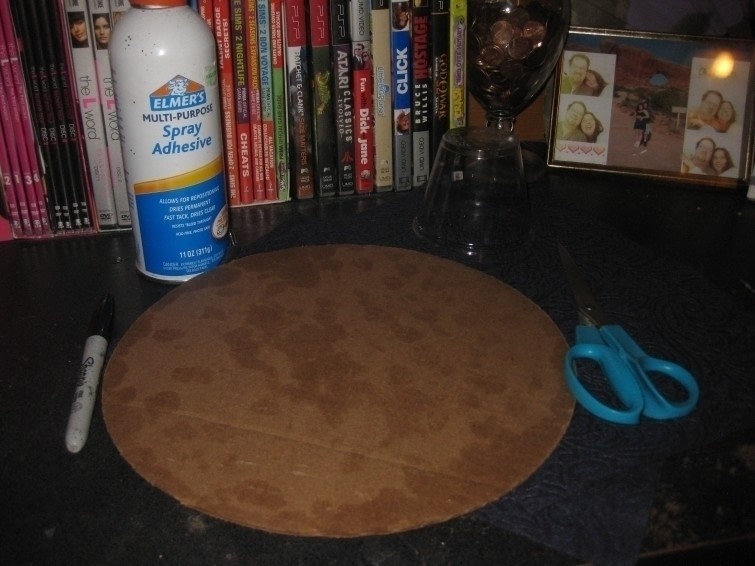
 Step 1
you going need 2 sheet of flet. spary adhesive, card borad i'm using a pizza borad. marker.
-
 Step 2
trace out two circles and then cut them out
-
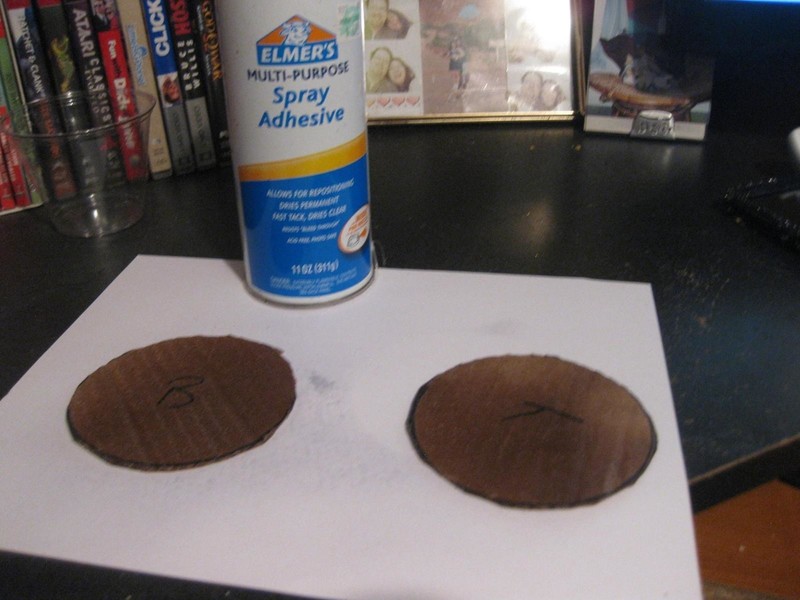
 Step 3
this is the spary abesive i use it 7 dallor but it go a very long way you can make like six hats with this. this is a easyer way to then a hot glue gun.
-
 Step 4
now this going to get sticky so use paper or something to protect your desk. now spary adesive on the circle
-
 Step 5
and stick it to your flet. press down and let dry this stuff dry fast so may two minutes
-
 Step 6
cut it out but leave a left over like the picture.
-
 Step 7
then cut slits around the circles, and see good just click on picture. now sat them a side
-
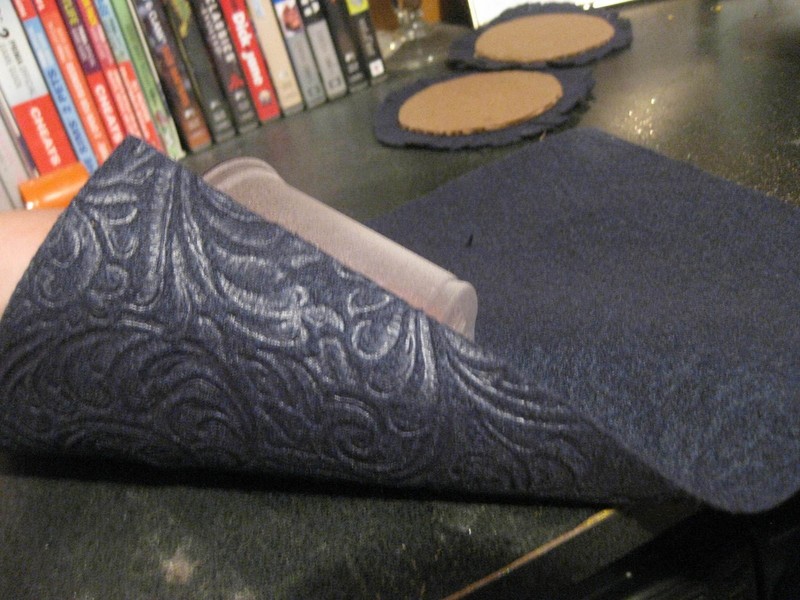
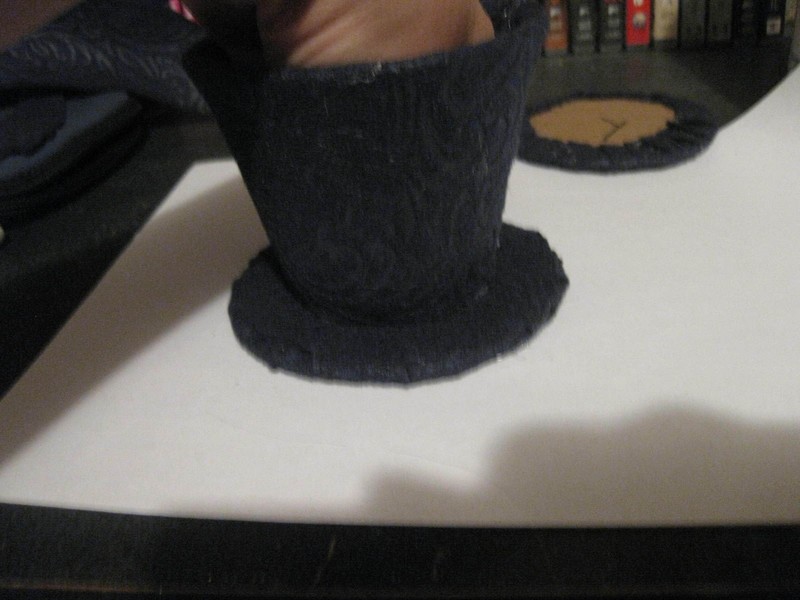
 Step 8
and get you cup out and spary the out side of the cup all round it like photo
-
 Step 9
sticky sticky. now lay it on your flet and start to warp flat around your cup
-
 Step 10
press as you go with your hands. now if you mess up the abesive is forgiving just undo and try agine. smooth it over the hole cup side don't worrie about it looking like a cone.
-
 Step 11
cut the bottom of the cup flet and fold it over the bottom like photo. sorry this just hard to tell about
<---- -
 Step 12
maybe this is better
-
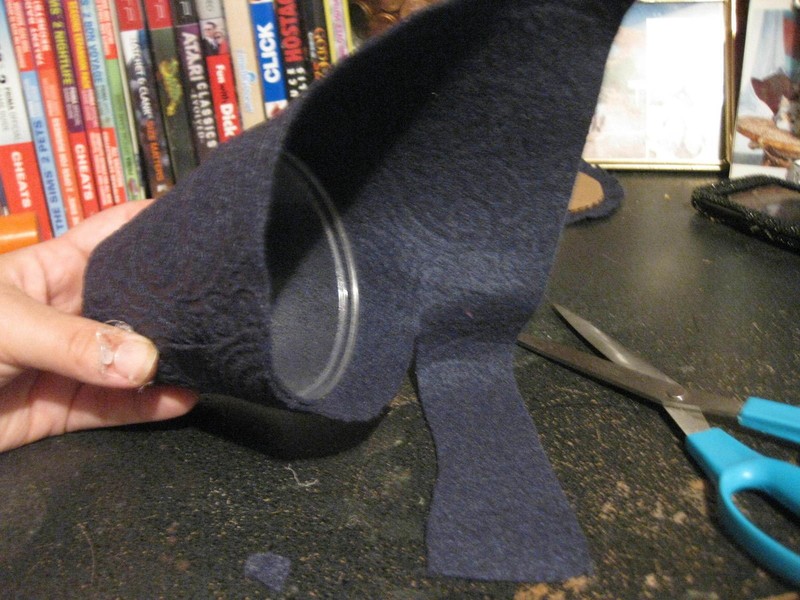
 Step 13
now cut around the top, leave some room for some slits later.
-
 Step 14
now take that opening and hot glue it
-
 Step 15
cut slips like photo
-
 Step 16
hot glue slips and fold into cup
-
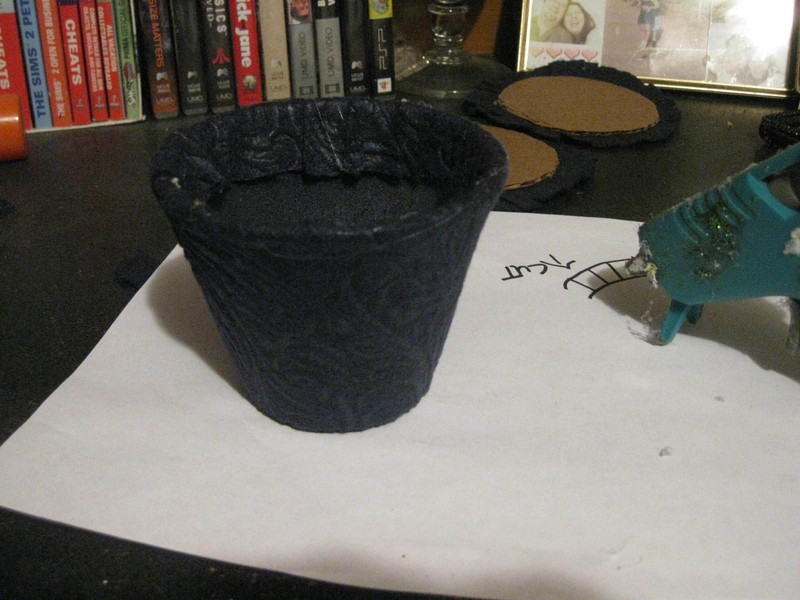
 Step 17
now it looks like a cover cup
-
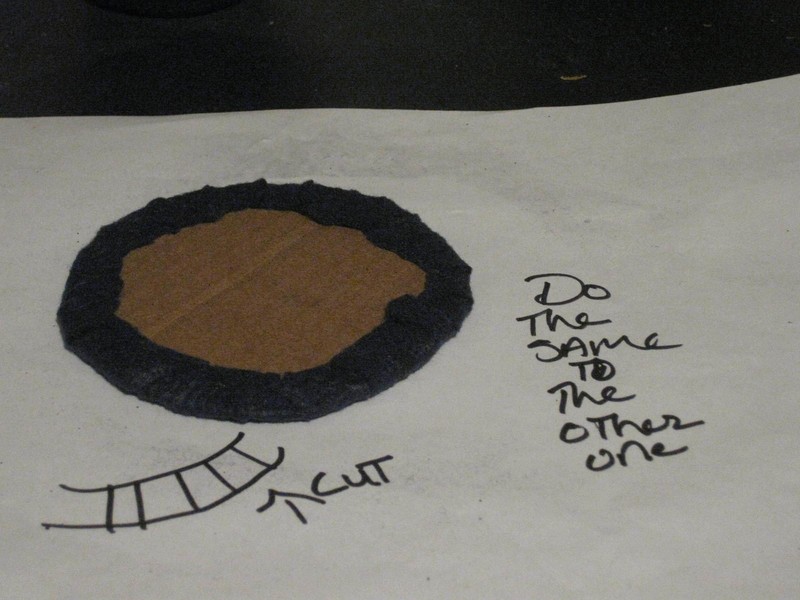
 Step 18
now for those circles do the same like you did with the cups. hot glue the slips and fold over and press all the way around
-
 Step 19
do the same to the other circles
-
 Step 20
take left over felt and trace a circle and cut that out
<-- i miss a step do this before you glue felt onto cut out circles and spary abesive on the bottom side of the circle so both side of one circle is covered on both sides -
 Step 21
take your cup and hot glue bottom and press it down on the middle of the rim.
-
 Step 22
allmost done take the last rim and hot glue it on top of cup. hot glue around the top of cup. and press rim down on cup.
-
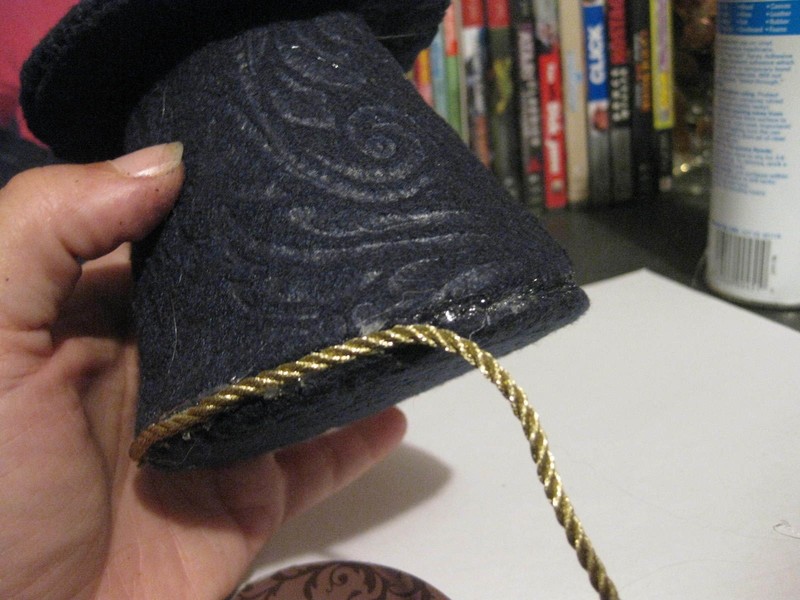
 Step 23
now you got your hat. i like to hide the glues mess so i have this trim im going to glue it around the rim and top
-
 Step 24
i make the hat look neater. not so messy don't use a lot of glue take your time.
-
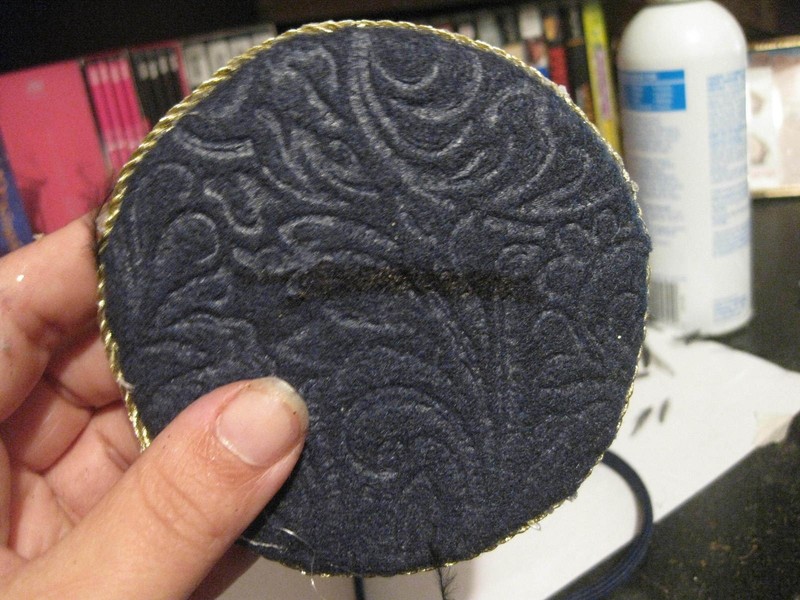
 Step 25
pick the best side you want showing
-
 Step 26
and make sure it face up and mark were you want you headband that. it heard for me to tell you this part i hope photos are working
-
 Step 27
hot glue that mark line and glue your headband to it side way alittle press and hold wait for the glue to cool down.
-
 Step 28
to me headband don't hold hat on head so i like to use comb that i got that hoddy loddy. hot glue comb to the middle of headband. and cut out a small pice of flet and glue it on like photo
-
 Step 29
now you got a cut hat. it not that hard as i make it look it really easy just take time because you thinking what to put where.
-
 Step 30
i use a over side fether and tulle i use felt from hoddy loddy. they have lots.


Versions
See all 10 »


Comments


