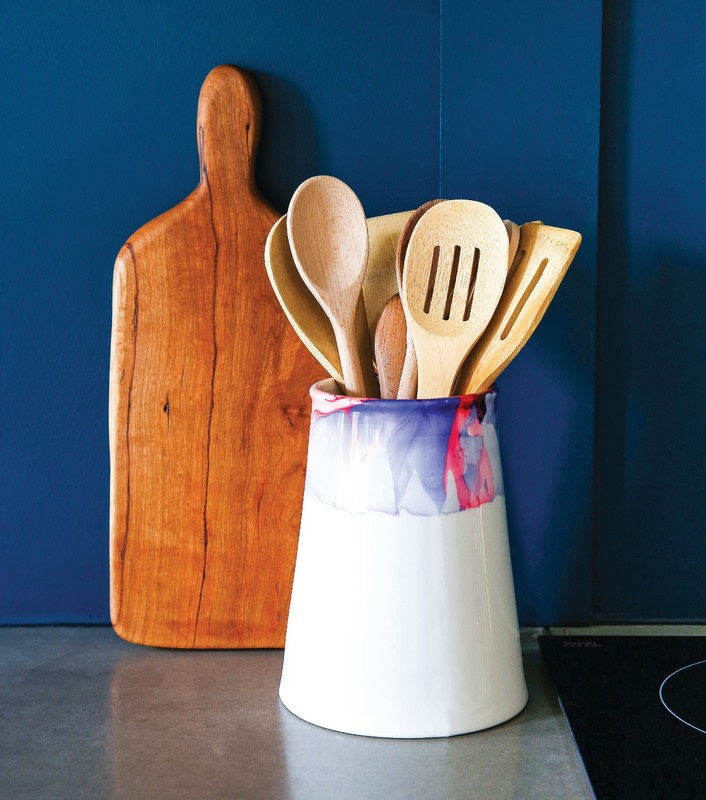
Marble Dipped Utensil Holder
Extract from Hello Color • By Rachel Mae Smith • Published by Quirk Books

About
Hello Color
Everyone has a utensil holder on the kitchen counter, and for the most part we think nothing of them. But just because they serve a purpose doesn’t mean you have to settle for a plain, colorless container! If you want to add some unexpected color to your countertops, then this project is the way go. Plus, once you learn to marble, it’ll be really hard to stop!
The trick to successful marbling is working fast. I’ve found that it helps to take the cap off all the nail polishes, then pour them into the hot water at the same time with one hand as you swirl a pattern with the other. I suggest doing a couple test runs before marbling your utensil holder. Finally, be sure to work in a well-ventilated area because there will be fumes!
-
 Elin H. favorited Marble Dipped Utensil Holder
12 Jul 23:50
Elin H. favorited Marble Dipped Utensil Holder
12 Jul 23:50
-
 Caden Kaslik favorited Marble Dipped Utensil Holder
25 May 20:53
Caden Kaslik favorited Marble Dipped Utensil Holder
25 May 20:53
-
 Crafterella featured Marble Dipped Utensil Holder
19 May 23:00
Crafterella featured Marble Dipped Utensil Holder
19 May 23:00
-
 Libby W. favorited Marble Dipped Utensil Holder
16 May 19:49
Libby W. favorited Marble Dipped Utensil Holder
16 May 19:49
-
 Pam favorited Marble Dipped Utensil Holder
16 May 00:49
Pam favorited Marble Dipped Utensil Holder
16 May 00:49
-
 Quirk Books published his project Marble Dipped Utensil Holder
13 May 13:01
Quirk Books published his project Marble Dipped Utensil Holder
13 May 13:01
-
 Step 1
Fill the tub, bowl, or bucket with hot water. Whichever vessel you use, make sure it’s deep enough to cover as much of the utensil holder as you want to marble. (If you’re marbling flatter objects, you’ll need something that’s only a few inches deep. Keep in mind for future projects!) Note that in the future you can use this container only for marbling/painting since the nail polish will drop to the bottom and stick there—so don’t use your nice baking bowls!
-
 Step 2
Pour the polish in the water and use your craft stick to gently stir and mix the colors to create a marbled effect. Immediately dip in your utensil holder. I suggest going straight down from the center of the polish bath to evenly coat all the way around.
-
Step 3
Pull the utensil holder out of the water and let dry. You can dab off excess water, just be careful not to smudge the design.
-
 Step 4
Let the container dry completely, then fill with utensils.