

Made In Cherry Quilt
Extract from Hand Quilted With Love • By Sarah Fielke • Published by CICO Books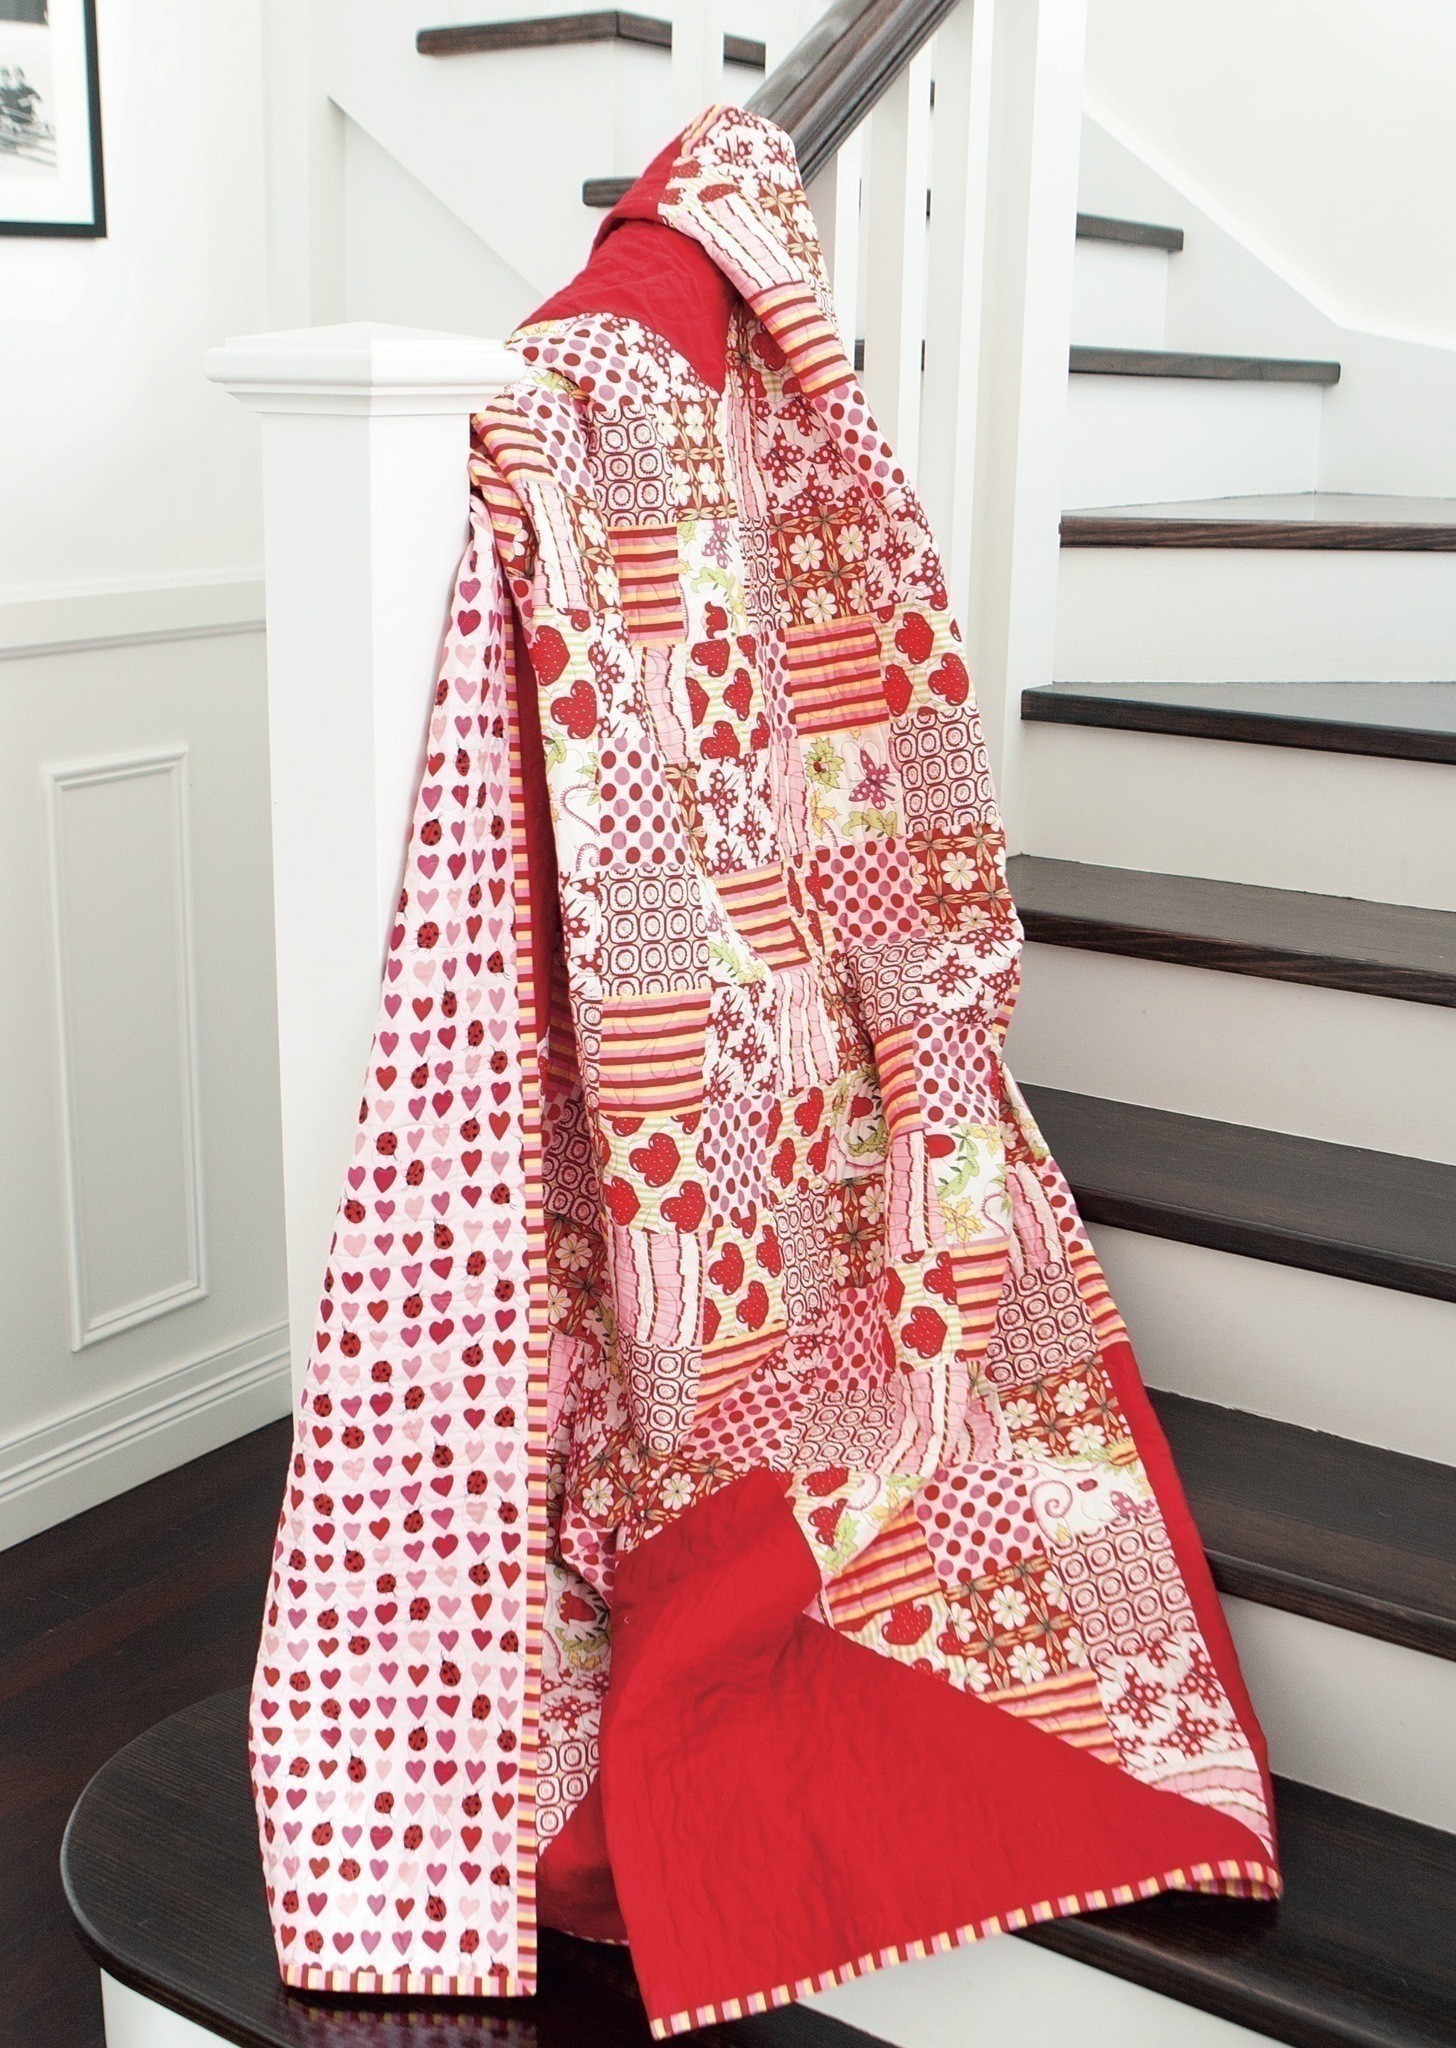


About
Hand Quilted With Love
This quilt is called Made In Cherry because it’s made in the Cherry colorway of one of my fabric ranges, St Ives. All the colorways are named after my favorite flavors of slushies when I was a kid—Cherry, Watermelon, Polar Purple Shiver, and Blue Vanilla. Remember how they used to change the color of your tongue? Cherry was always my favorite, though, because it made your lips red!
Finished size:
Double quilt, 80½ in. (2 m) square
-
 RareJewel favorited Made In Cherry Quilt
04 Jun 07:51
RareJewel favorited Made In Cherry Quilt
04 Jun 07:51
-
 C.J. M. added Made In Cherry Quilt to DIY The Room
23 Apr 17:51
C.J. M. added Made In Cherry Quilt to DIY The Room
23 Apr 17:51
-
 Banndit1 favorited Made In Cherry Quilt
21 Jul 04:25
Banndit1 favorited Made In Cherry Quilt
21 Jul 04:25
-
 Vanessa B. added Made In Cherry Quilt to Home DIY
21 Jan 06:39
Vanessa B. added Made In Cherry Quilt to Home DIY
21 Jan 06:39
-
 Falene M. favorited Made In Cherry Quilt
12 Jan 05:45
Falene M. favorited Made In Cherry Quilt
12 Jan 05:45
-
 molly.silva.946 favorited Made In Cherry Quilt
02 Jan 18:37
molly.silva.946 favorited Made In Cherry Quilt
02 Jan 18:37
-
 Ryland Peters & Small published his project Made In Cherry Quilt
29 Nov 12:07
Ryland Peters & Small published his project Made In Cherry Quilt
29 Nov 12:07
You Will Need
-
 Step 1
Cutting:
From each of the red-and-white fabrics, cut:
• Three strips, 41⁄2 in. (11.5 cm) wide. Cross cut these strips into 41⁄2-in. (11.5-cm) squares.
• One strip, 47⁄8 in. (12.5 cm) wide. From this strip, cut four 47⁄8-in. (12.5-cm) squares. Cross cut these squares on one diagonal to yield eight half-square triangles from each fabric.
(This amount of fabric will give you slightly too many squares and triangles, but then you have enough different fabrics to be able to shift things around to get your color balance right.)
From the red linen fabric, cut:
• Four 201⁄2-in. (52-cm) squares
• One 43-in. (109.25-cm) square. Cross cut this square on both diagonals to yield four quarter-square triangles.
From the pink-and-yellow striped binding fabric, cut:
• Nine strips, 3 in. (7.5 cm) wide -
 Step 2
Star block
1 Using a bed, the floor, or a design wall, lay out the squares for the center of the star in ten rows of ten squares each. Mix the colors well.
2 Next, lay out the star points, using the photo of the quilt on page 27 as a guide. The bottom row of the star point has four squares and a half-square triangle, the second has three squares and a half-square triangle and so on, until the point ends in one half-square triangle (see Diagram 1).
3 When you have laid all of the fabrics out, stand back and move them around until you are happy with the mix of colors and the spread of the patterns.
4 Begin by sewing the star points together in rows, starting at the point each time and working toward the wide end.
5 When you have pieced all eight star points, press them and set them aside.
6 Piece the star center, also in rows. Press. -
 Step 3
Assembly
7 Sew a star point to each side of a background quarter-square triangle with the diagonal edges toward each other, matching the inner points of the V (see Diagram 2). Press the seams toward the star points. The background triangles will be slightly too large for the star points to allow for different people’s piecing. When you have sewn the background triangle in, trim any excess fabric on the background triangle to 1⁄2 in. (12 mm) above the star points.
8 Repeat with another pair of star points and background quarter-square triangle and press.
9 Sew a star-point unit to the top and the bottom of the star center, taking care to match the seams (see Diagram 3). Press.
10 Repeat steps 7 and 8 with the remaining star points and background triangles and press. Sew a background square to both ends of these last two star-point units.
11 Sew the resulting strips to each side of the star center piece, taking care to match the seams, and press. Your quilt top is complete. -
Step 4
Backing, quilting, and binding
12 Cut the backing fabric crosswise into two pieces, each 21⁄2 yd (2.3 m) long. Remove the selvages (selvedges). Stitch the pieces together along one long edge. Press the seam allowance open and press the backing piece carefully.
13 If hand quilting, tape the backing fabric right side down to the floor or a very large table using masking tape, smoothing out any creases as you go. Lay the batting (wadding) on the backing fabric, with the quilt top right side up on top. Smooth any creases and hand baste (tack) the three layers together, using large stitches and working from the center out. The backing and batting (wadding) should be larger than the top for ease of quilting; don’t be tempted to trim them back.
14 Quilt, then bind the quilt, following the instructions on page 136–139.Note on quilting
Made in Cherry is machine quilted in a butterfly pattern, using red thread.Want to scale it down?
This quilt is so sweet made smaller. For a 40-in. (102-cm) square quilt, you will need:
• 6 in. (15 cm) each of eight different prints for the star, cut into 21⁄2-in.
(6.5-cm) squares and 27⁄8-in. (7.5-cm) squares for the half-square triangles
• 44 in. (112 cm) background fabric, cut into four 101⁄2-in. (27-cm) squares and one 191⁄2-in. (49.5-cm) square -
Step 5
Quilting
Quilting can be fairly rudimentary, its main purpose being to hold together the layers of the quilt, or it can be decorative and sometimes extremely elaborate. Machine quilting is quick, but nothing beats hand quilting for sheer heirloom beauty and a soft hand to the finished quilt.
Designs for hand quilting, or elaborate designs for machine
quilting, are generally marked on the quilt top before the quilt’s
layers are sandwiched together. On pale fabrics, the marking is done lightly in pencil; on dark fabrics, use a special quilter’s silver pencil. Pencil lines can be erased later.
If you intend to quilt straight lines or a cross-hatched design, masking tape can be used to mark out the lines on the quilt top. Such tape comes in various widths, from ¼ in. (6 mm) upward. Free-flowing lines can be drawn on with a chalk pencil.
If you intend to outline-quilt by machine, you may be able to sew straight enough lines by eye; if not, you will need to mark the quilt top first. -
Step 6
Hand quilting
Quilting by hand produces a softer line than machine quilting and will give a hand-loved quality to quilts. Most of the quilts in this book are quilted using perle cotton, since it is often easier for beginners to work with and stands out vividly against the fabric’s surface, although traditional waxed quilting thread can be used if you prefer.
To quilt by hand, the fabric needs to be held in a frame (also known as a quilting hoop). Free-standing frames are available, but hand-held ones are cheaper, more portable, and just as effective. One edge of a hand-held frame can be rested against a table or bench to enable you to keep both hands free.
Hand quilting, like machine quilting, should commence in the center of the quilt and proceed outward. To commence hand
quilting, place the plain (inner) ring of the frame under the center of the quilt. Position the other ring, with the screw, over the top of the quilt to align with the inner ring. Tighten the screw so that the fabric in the frame becomes firm, but not drum-tight.
For traditional quilting, choose the smallest needle that you feel comfortable with. (These needles are known as “betweens.”) For quilting with perle cotton, use a good-quality crewel embroidery needle (I use a No 9).1 Thread the needle with about 18 in. (45 cm) of thread. Knot the end of the thread with a one-loop knot and take the needle down through the quilt top into the batting (wadding), a short distance from where you want to start quilting. Tug the thread slightly so that the knot pulls through the fabric into the batting, making the starting point invisible.
2 With your dominant hand above the quilt and the other beneath, insert the needle through all three layers at a time with the middle or index finger of your dominant hand (use a metal thimble to make this
easier) until you can feel the tip of the
needle resting on your finger at the back.3 Without pushing the needle through, rock the needle back to the top of the quilt and use your underneath finger to push the tip of the needle up. Put your upper thumb down in front of the needle tip while pushing up from the back, as shown. This will make a small “hill” in the fabric.
4 Push the needle through the fabric. This makes one stitch. To take several stitches at once, push the needle along to the required stitch length, then dip the tip into the fabric and repeat the above technique. Gently pull the stitches to indent the stitch line evenly. You should always quilt toward yourself, as this reduces hand and shoulder strain, so turn the quilt in the required direction. You can protect your underneath finger using a stick-on plastic shield such as a Thimble-It. You can also use a leather thimble, although this does make it more difficult to feel how far the needle has come through, and thus more difficult to keep your stitches neat and even.
-
Step 7
Finishing a thread
1 Hold the thread out to the side with your left hand, and loop a one-loop knot using the needle.2 Slide the loose knot down the thread until it lies directly on the quilt top, and tighten the knot. Take the needle back down through the hole the thread is coming out of and slide it away through the batting (wadding), as shown. Bring the needle back up to the top of the quilt and give the thread a tug. The knot will follow down into the hole and lodge in the batting. Cut the thread close to the surface.
-
Step 8
Machine quilting
You may want to machine quilt your quilt yourself, but I use and recommend a professional quilting service for a couple of good reasons.
First, finished quilts are usually quite large and, consequently, rather cumbersome. It really is a fairly tricky job to manipulate the bulk of the quilt on a domestic sewing machine, even using a specialized walking foot. Having pieced your precious quilt so carefully, it would be a shame to spoil it now with puckers and distortions.
Second, professional machine quilters offer a large range of quilting patterns to suit every need and taste and can also advise you on a design that will enhance all your careful work.
If you want to learn to machine quilt, I recommend taking a class at your local quilt shop or online.


