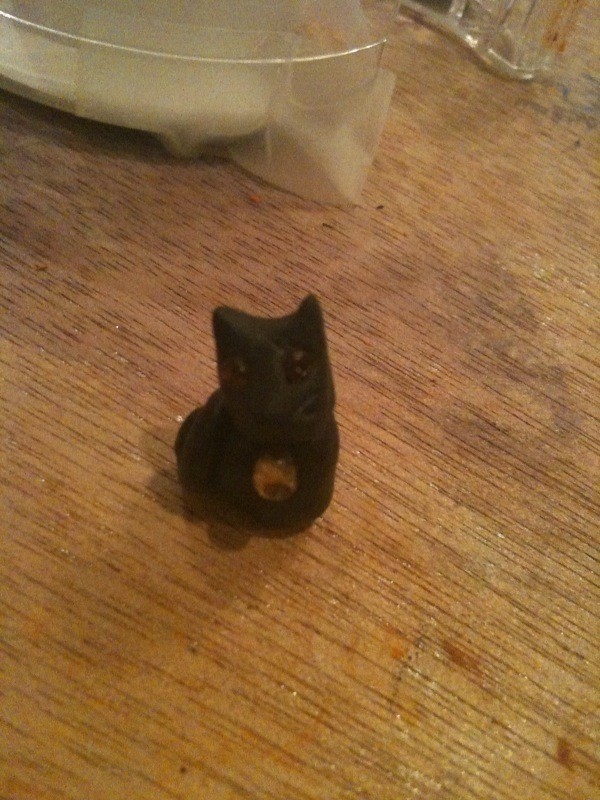

About
Cute little clay kitty! ^^
I had a lot of black and orange clay left over, so I decided to make some Halloween themed charms~
You don't have to use black, but I like black kitties ^^
Also, as far as the different beads/sizes go, you want iiiitty bitty beads for eyes, and a slightly bigger glass bead (a lot of times their called Rocailles beads? I think?) for the "bell", haha.
Also, push pin and paper clip are gonna be used to make holes/markings.
You don't need the fancy clear urethane glue, it's just what I use and like and seems to attach everything - also, I used it to glaze my beads and charms, haha. It is/dries clear and it's not sticky after it dries, so I like it.
Tags
-
 Darcy favorited Little Clay Kitty Charm
05 Apr 18:51
Darcy favorited Little Clay Kitty Charm
05 Apr 18:51
-
Rebecca C. favorited Little Clay Kitty Charm
23 Aug 04:55
-
 Step 1
Start with a small piece of black clay (or whatever color your kitty will be) and shape it kind of like a Hershey's kiss, but off to the side, if you know what I'm saying - haha. Taper off the top part so it will be able to fit into the head shape.
This is going to be the body.You can make this however thick you want, but just remember that if you make this really big/thick, it might not cook all the way through, or worse... DUN DUN DUNNN.
-
 Step 2
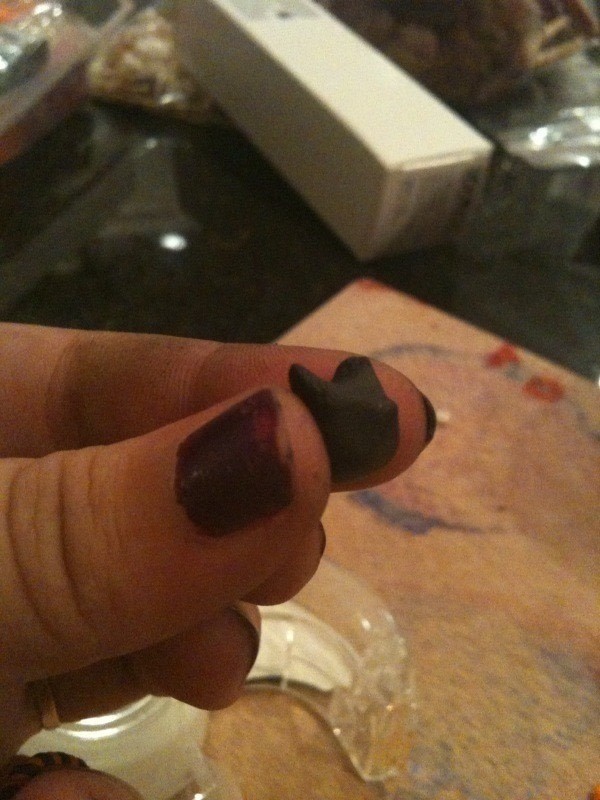
Take a ball of the same kitty color at about 1/3 the height of your body shape (before you start shaping ears/face). Pinch a well in the top to shape the ears, then pinch horizontally to make the initial nose shape, then vertically to give it a bit more face definition.
-
 Step 3
Poke a hole with your pin or paper clip at the base of the head shape behind one of the ears, doesn't matter which.
Stretch open the hole a bit to fit the top of the body-shape in (that sounded kinda weird, sorry ^^; )
-
 Step 4
Poke a hole with your paperclip (that will be a bit easier to put the tail into) on the backside of the body that the head leans towards. This is where the tail will go.
-
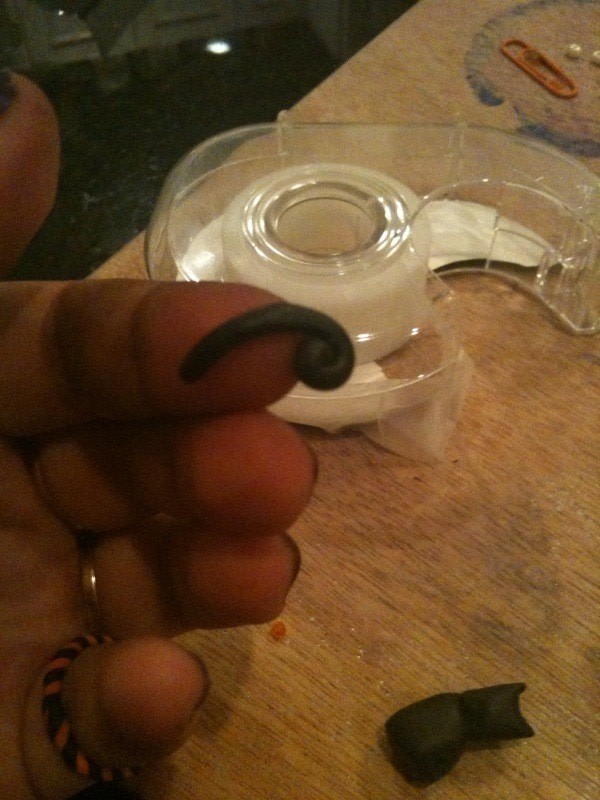
 Step 5
Roll of a piece of clay to about an inch long. Curl one side in to make a cute little swirl. Taper the other side a little bit so it fits into the hole you poked.
-
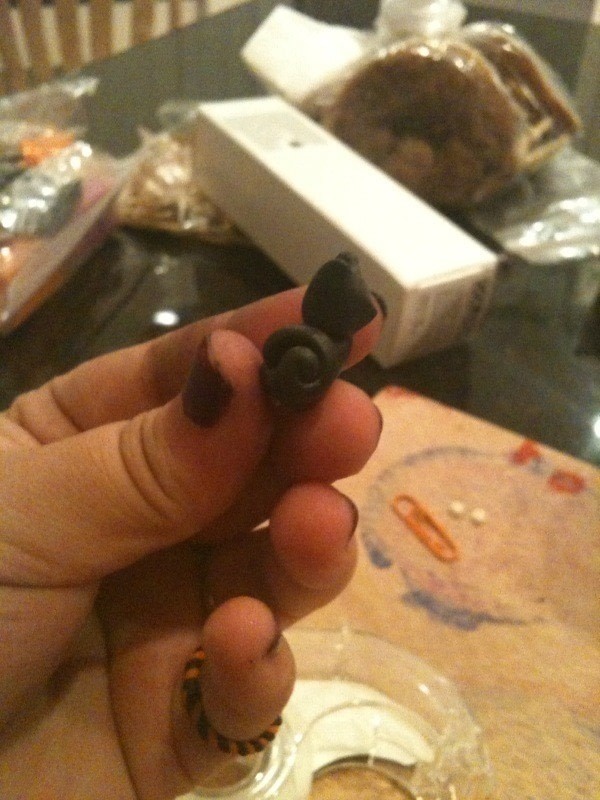
 Step 6
Put the tail piece into the hole and shape the tail around the body - cuuute!
-
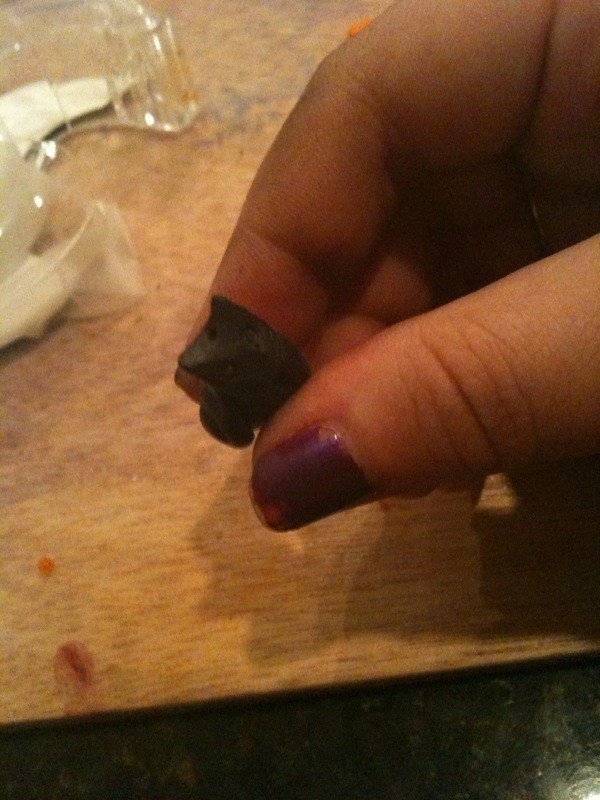
 Step 7
Carve or press a couple of lines on each side of the nose for whiskers. Also, poke a couple holes to see where you want your eye beads to be. Or, if you don't have/want beads for your kitty, either draw out some eyes, leave the little pin pricks, or just leave the face blank!
-
 Step 8
Poke in the two eye beads and the bell/collar bead so that you get the indent in the clay.
-
 Step 9
Take out the beads so you have the indents - you don't want to leave them in during baking. After baking, you'll reattach the beads with glue.
-
 Step 10
Now, if you want this to be a charm, poke a hole in the top of the head that goes maybe halfway through the head of your kitty. This will be where you insert a piece of wire or one of those little pins with a loop at the top.
If you want this to be a bead, push a needle or a paperclip through the head horizontally under the ears or through the (perceived) shoulders.
Bake or let dry~
-
Step 11
After it has cooled, glue the eyes/bell back on, glaze if you'd like, and use a little bit of glue if you're attaching wire or the o-topped pin thing.
String and be full of joy at your most adorable kitty charm/bead!(final pic coming soon ^~)