Lidded Coil Pot
Extract from Make it With Air-Dry Clay • By Fay De Winter • Published by Search Press

About
Make it With Air-Dry Clay
Make a functional vessel to hold your precious possessions or store your favourite items. Whatever you choose to put in it, it will add
a unique handmade touch to your home.
-
 Rebecca favorited Lidded Coil Pot
15 May 10:17
Rebecca favorited Lidded Coil Pot
15 May 10:17
-
 Key West Witch favorited Lidded Coil Pot
24 Aug 03:59
Key West Witch favorited Lidded Coil Pot
24 Aug 03:59
-
 Pamela M. favorited Lidded Coil Pot
22 May 16:15
Pamela M. favorited Lidded Coil Pot
22 May 16:15
-
 RareJewel favorited Lidded Coil Pot
13 Mar 09:32
RareJewel favorited Lidded Coil Pot
13 Mar 09:32
-
 Elena B. favorited Lidded Coil Pot
17 Feb 22:19
Elena B. favorited Lidded Coil Pot
17 Feb 22:19
-
 Search Press published her project Lidded Coil Pot
13 Feb 09:00
Search Press published her project Lidded Coil Pot
13 Feb 09:00
-
 Step 1
Prepare five individual coils by hand, using 90 g (3 oz) of clay for each one, rolling from the centre out towards the ends to create an even coil about 1 cm (. in.) in diameter.
-
 Step 2
Roll out about 180 g (6 oz) of clay to a slab about 1 cm (. in.) thick.
-
 Step 3
Using a circular cutter or bowl, press out two shapes to form a base and lid.
-
 Step 4
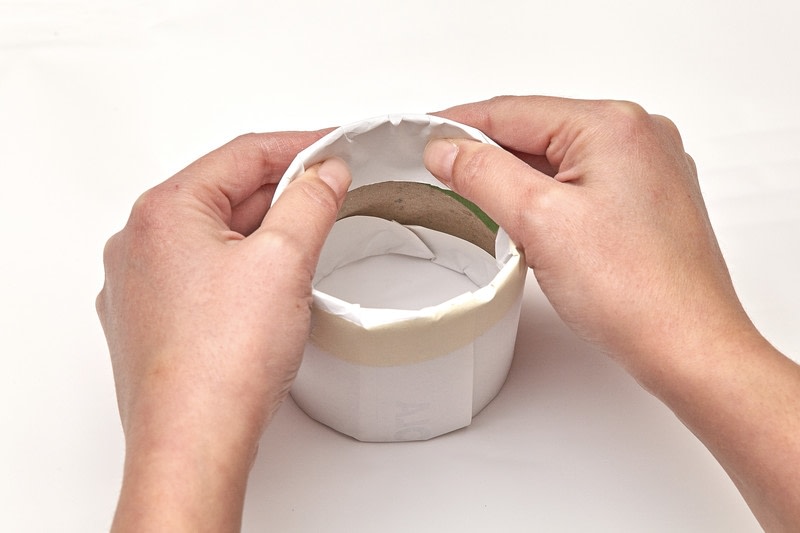
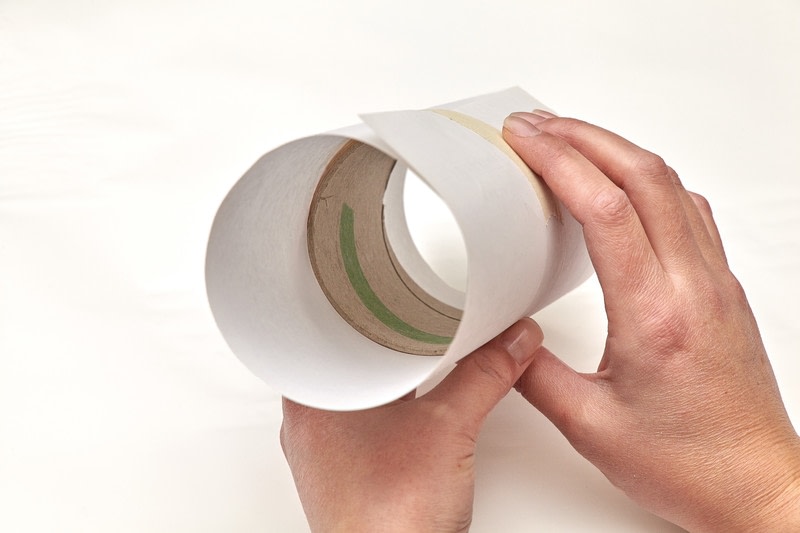
Wrap paper around the cardboard tube and hold it in place with masking tape. (The paper will make it easier to release the tube later.)
Tuck the excess paper inside the tube and secure again with masking tape.
-
 Step 5
Place the cardboard tube over the centre of the clay base, leaving about 1 cm (. in.) of clay around the edge.
-
 Step 6
TIPS AND IDEAS
• Use bowls covered in clingfilm as a former, to create different shapes and sizes of vessels.
• Experiment with leaving some of the coil joins visible and merging others so they
create an intrinsic pattern within the pot. -
 Step 7
Brush the coils with clean water on the edges to be joined.
-
 Step 8
Place the first coil firmly on the base slab around the tube. Overlap the ends of the coil and cut straight through them to get an accurate fit around the tube.
-
 Step 9
Using your fingers and clean water, smooth the end of the coil together.
-
 Step 10
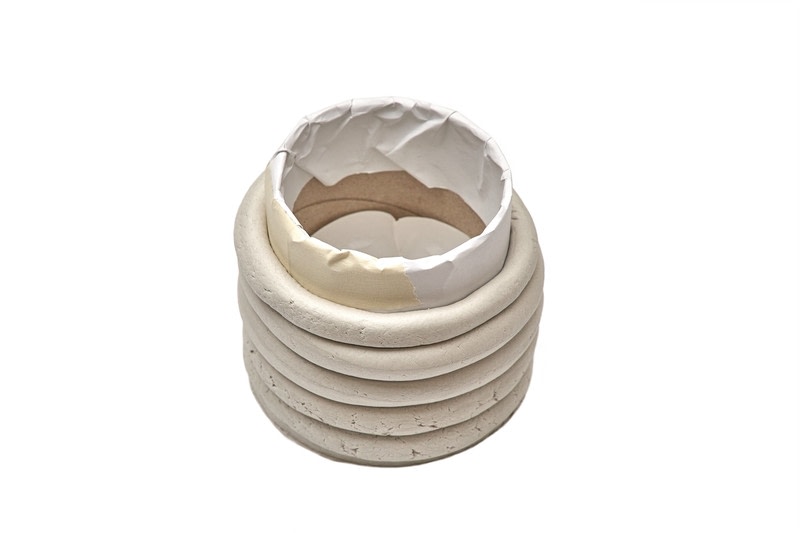
Add the remaining four coils in the same way, building the vessel up to a height of about 7 cm (3 in.).
-
 Step 11
Tear away the paper and then carefully remove the tube.
-
 Step 12
(If you leave it in place, the piece will shrink and crack.)
-
 Step 13
Place work on a plastic sheet to dry and after 24 hours turn the coil pot on its rim to help the base dry evenly.
-
 Step 14
Make a small ball of clay, about 2 cm (. in.) in diameter, for the knob of the lid by rolling it in your hands. Gently
press it onto the centre of the wetted lid that you cut out in Step 3. -
 Step 15
Dip a brush in clean water and brush around the base of the knob to attach it to the lid.
-
 Step 16
Use a damp sponge to gently smooth and tidy the surface of both the coiled pot and the slab lid.
-
 Step 17
DECORATION
Using masking tape, block out the areas you don’t want sprayed.
-
 Step 18
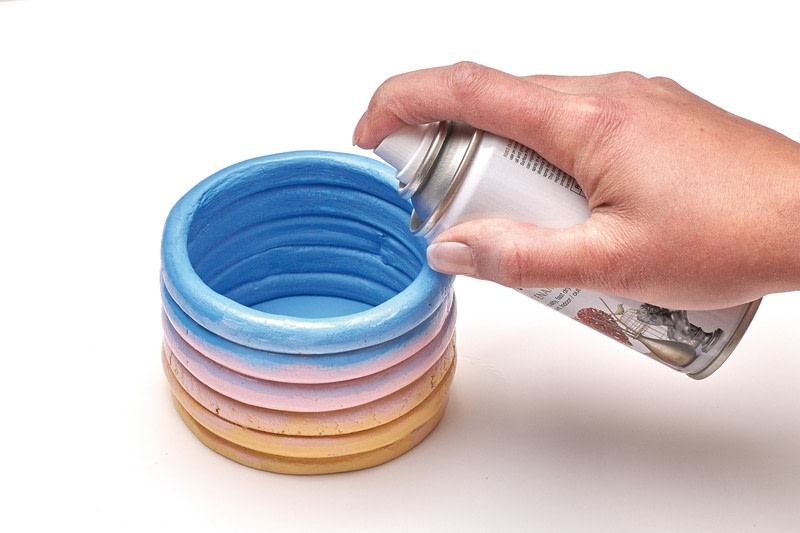
Spray paint the base and bottom coils first with
the lightest colour, i.e. yellow -
 Step 19
Once dry, remove the masking tape and re-mask over the sprayed colour and continue with the next lightest
colour – in this case, pink. -
Step 20
If preferred you can spray freehand to achieve a more gradated look.
-
 Step 21
Once dry, apply the final colour, blue, to the top coil and interior of the piece.
-
 Step 22
DECORATING THE LID
Spray paint the lid with the light colour first and then mask to create a pink handle.
-
 Step 23
The underside of the lid can be
decorated, too, once the top is completely dry.TIPS AND IDEAS
• You can develop different surface decoration techniques by, for example, experimenting with merging sprayed colours
or using masking tape to create crisp straight lines of contrasting colour.
• Create a hole in the centre of the lid and, instead of attaching a ball of clay, attach a large bead as an added decorative detail.