

Liberty Style Wall Hanging
Extract from Quiltopedia • By Laura Jane Taylor • Published by Apple Press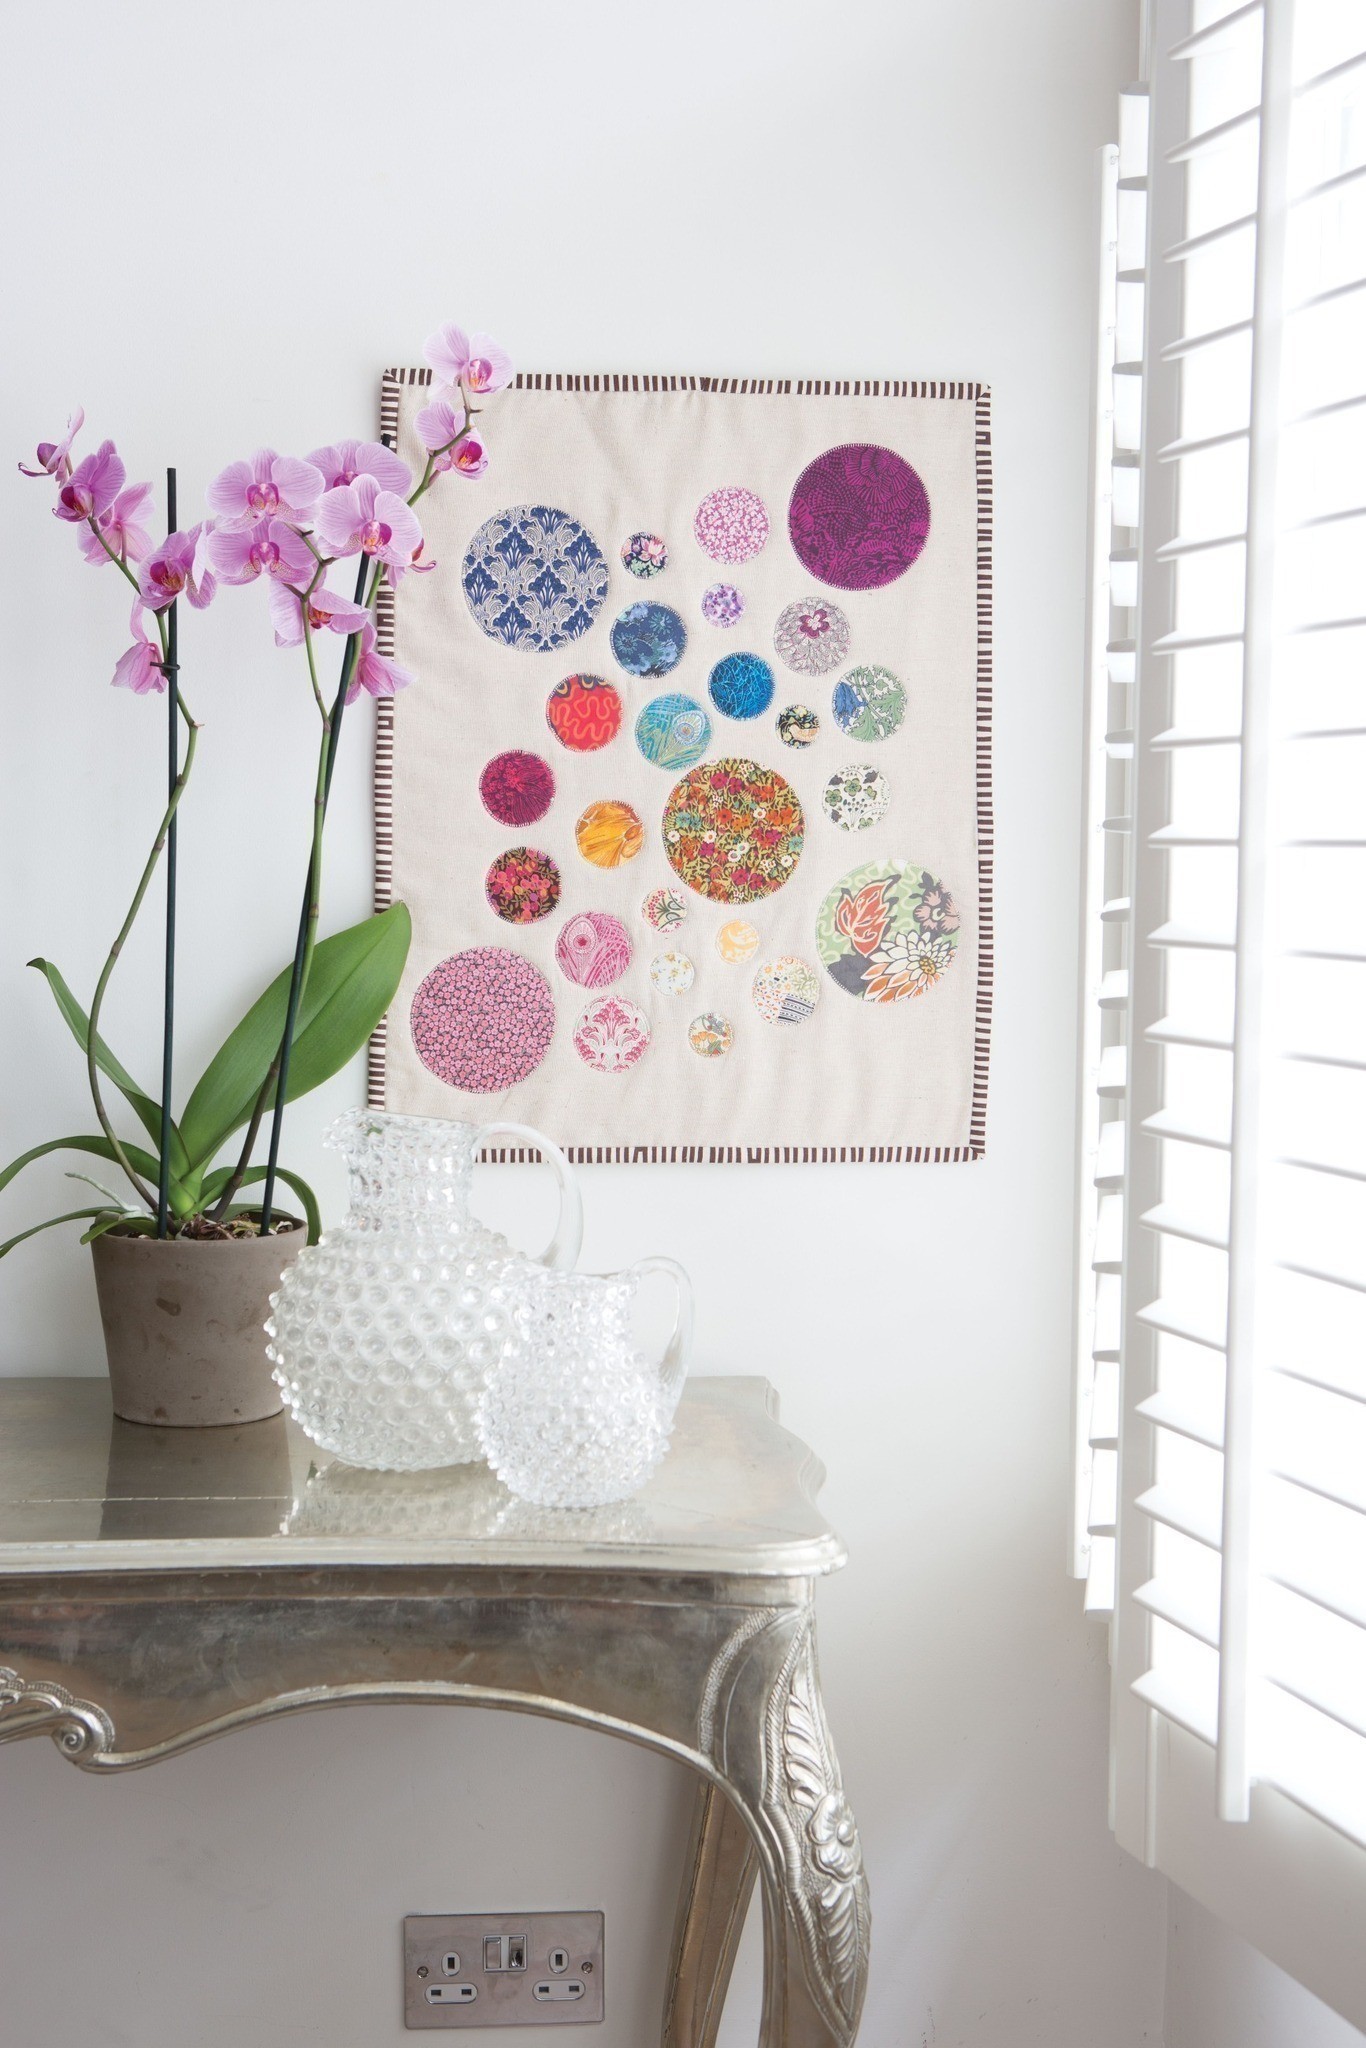


About
Quiltopedia
I love working with Liberty prints, even teeny tiny pieces because they feel so special. I made this wall hanging with my new sewing room in mind – I love how the disorganised nature of composition is made more cohesive through colour and scale, and I can’t wait to hang it above my sewing machine for inspiration.
Finished Measurements
• 17 x 19 inches
Downloads
- 103151_2F2014-07-10-102602-07+liberty+wall+hanging.ai 55.2 KB [ Download ]
-
 rene c. favorited Liberty Style Wall Hanging
02 Jul 23:07
rene c. favorited Liberty Style Wall Hanging
02 Jul 23:07
-
Chenna H. favorited Liberty Style Wall Hanging
11 Jan 23:45
-
 prusakcornell favorited Liberty Style Wall Hanging
17 Aug 22:26
prusakcornell favorited Liberty Style Wall Hanging
17 Aug 22:26
-
Maddi L. favorited Liberty Style Wall Hanging
09 Aug 02:45
-
 mahi.khan.9883739 favorited Liberty Style Wall Hanging
05 Aug 16:41
mahi.khan.9883739 favorited Liberty Style Wall Hanging
05 Aug 16:41
-
 Apple Press published her project Liberty Style Wall Hanging
10 Jul 10:23
Apple Press published her project Liberty Style Wall Hanging
10 Jul 10:23
-
Step 1
Using the template, trace five large circles, 14 medium circles and seven small circles on to the paper side of your fusible web.
-
Step 2
Divide the Liberty prints roughly into the following colours: Pink, Yellow/Orange, Green, Blue and Purple, and cut out the following shapes from each group: Pink: one large, four medium Yellow/Orange: three medium, four small Green: two large, two medium, one small Blue: one large, three medium Purple: one large, two medium, two small.
-
Step 3
Arrange circles following the layout in the image (or as desired) and fuse to the linen FQ following the instructions for your fusible web.
-
Step 4
Baste wall hanging top on to the batting and backing using spray baste.
-
Step 5
Using an appliqué stitch of your choice, such as zigzag or blanket, sew around the edge of each shape.
-
Step 6
Press hanging corner sqs in half on the diagonal and pin to the back of the top left and right corners of the wall hanging. Bind as desired.
