


About
super easy and super cheap!
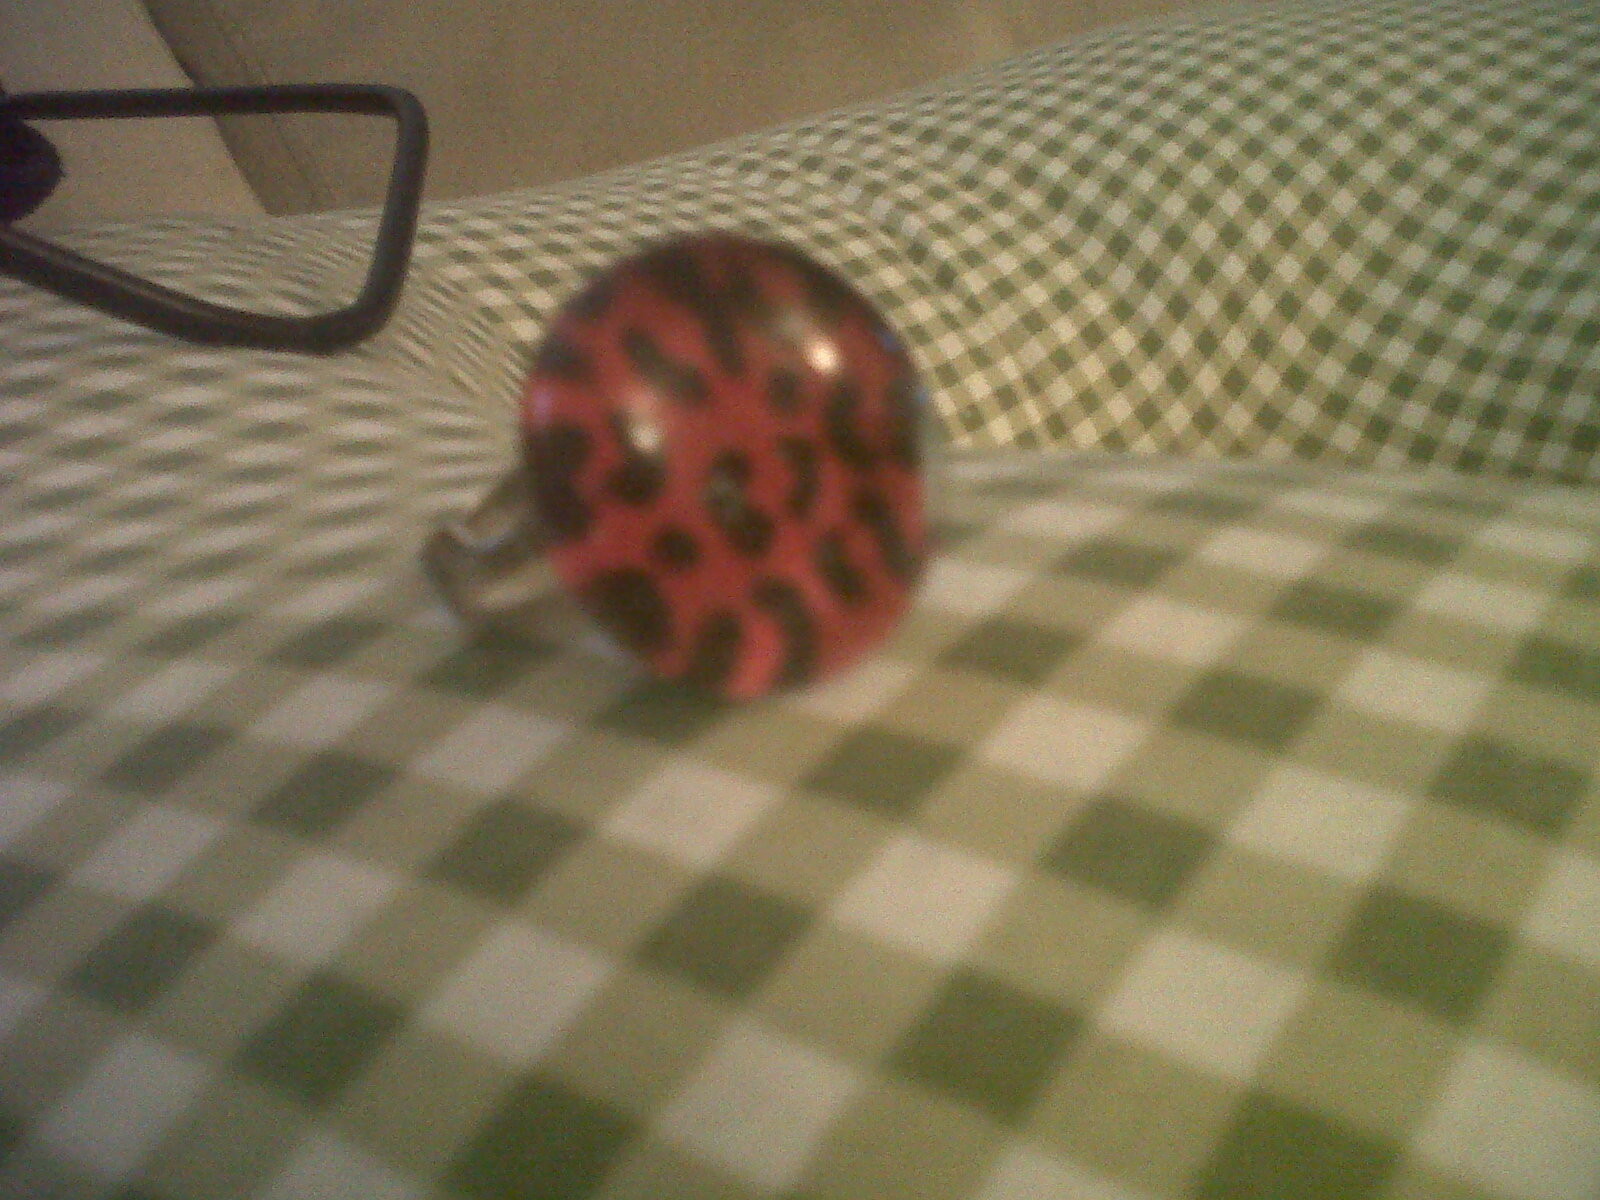
A cute ring with your own personal illustration!
I got all my stuff from the dollar store. I wasn't able to find a bag full of the glass bead things but the store I went to conveniently had a little ring making kit that included them, a ring with a flat surface, glue, paint, and a little brush. The paint is cheap so it didn't work when I tried to use it.
(You'll notice I posted two main pictures, one with the ring alone, the other with the ring on my finger and my baby in the background...if you've watched Kids in the Hall you'll understand what it is I am doing to Gunnar. hint: i'm crushing your head)
Tags
-
 Key West Witch added Leopard Print Ring to Rings
30 Jun 07:23
Key West Witch added Leopard Print Ring to Rings
30 Jun 07:23
-
 AnthemFlashback favorited Leopard Print Ring
25 Aug 20:27
AnthemFlashback favorited Leopard Print Ring
25 Aug 20:27
-
 KellBell added Leopard Print Ring to Head to Toe
28 Jun 05:06
KellBell added Leopard Print Ring to Head to Toe
28 Jun 05:06
-
 Broken Bownes favorited Leopard Print Ring
01 Nov 20:50
Broken Bownes favorited Leopard Print Ring
01 Nov 20:50
You Will Need
-
 Step 1
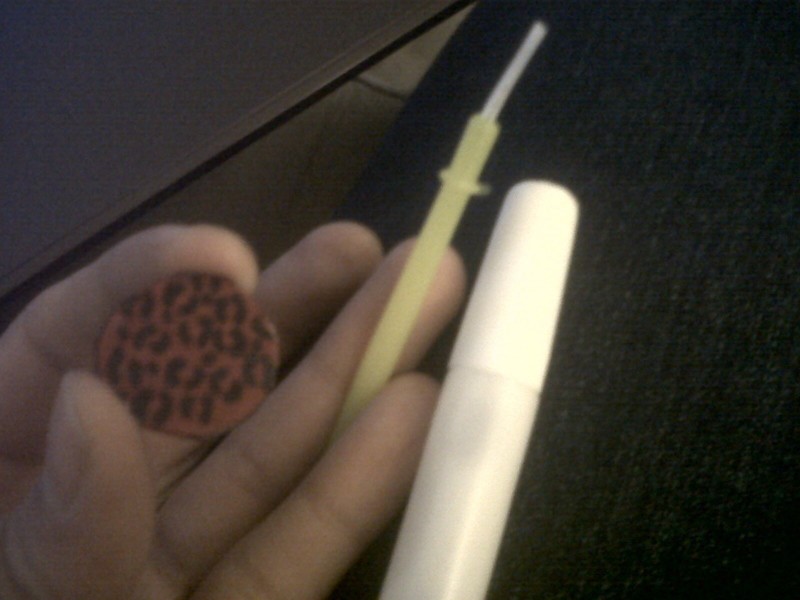
This is the glass bead thing I'm talking about. I have no clue what you'd call them. I see they are usually used for vases.
-
 Step 2
Trace the cardboard with the glass thingy(use the flat kind of cardboard, not the kind with the zig zag bit in the middle.
Then draw something you'd like. I did leopard print because it's easy to draw and really fun! (also ponx)How to draw leopard print:
Basically you'll be drawing two brackets, the messier they are the more leopardy they become. They don't have to be perfect.
Then put messy dots in the spaces between the double brackets, or not, it's up to you how you want it to look.I just used permanent marker, but I'm sure any kind of marker is good or anything else you might have to draw with.
-
 Step 3
Cut it out.
-
 Step 4
Colour it in! I used the method of stippling (drawing with dots) because I didn't want any creases or streaks from dragging the marker back and forth.
Let the ink dry afterwards so it doesn't get messed up by the glue.
-
 Step 5
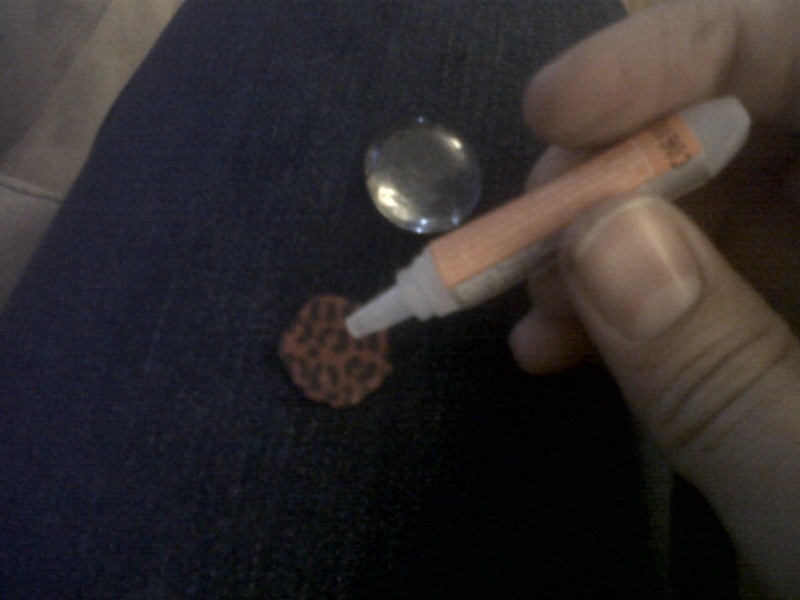
Just to make sure the crazy glue doesn't mess up your illustration paint on a thin layer of white glue.
Let the glue dry.
-
 Step 6
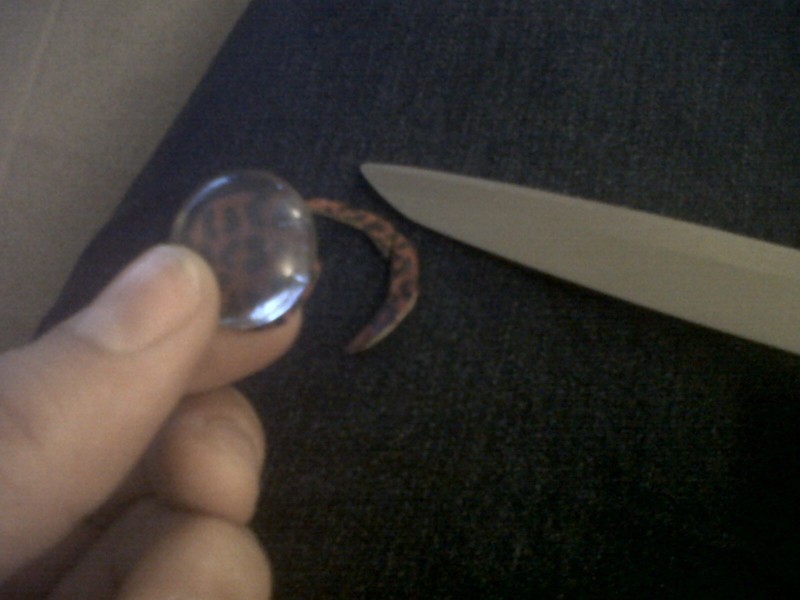
Hold the bead thingy where you like it best on the illustration then cut off the excess cardboard.
-
 Step 7
You'll have a smaller illustration than you started out with. Keep that in mind when you make you're little piece of artwork.
-
 Step 8
Cover the illustration with crazy glue, but not excessively or else things will get difficult.
-
 Step 9
Carefully place the cardboard on the bead thingy and leave it upside down to dry (crazy glue doesn't take long to dry but the cardboard will slide around until it dries).
-
 Step 10
This is what I mean by a ring with a flat surface.
-
 Step 11
CAREFULLY add some crazy glue to the flat surface of the ring. The first time I did it I got crazy glue all over my fingers YEEEEY.
The second time I applied the glue to the illustration instead of the ring (I ended up putting the first ring away because it was covered in glue and I was too lazy to clean it off, so I grabbed a second one).
It doesn't matter which way you do it, just be careful because crazy glue has a mind of its own apparently.
-
 Step 12
BAM. You have a cute little ring.


great tute, i did this idea as fridge magnets instead about a year back, they turned out awesome!