


About
a cosy nest for all your little treasures !
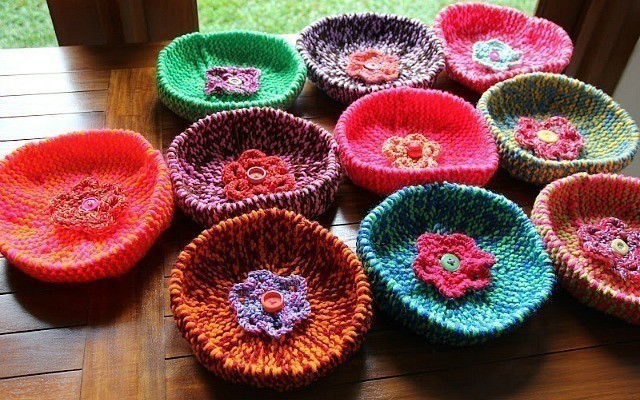
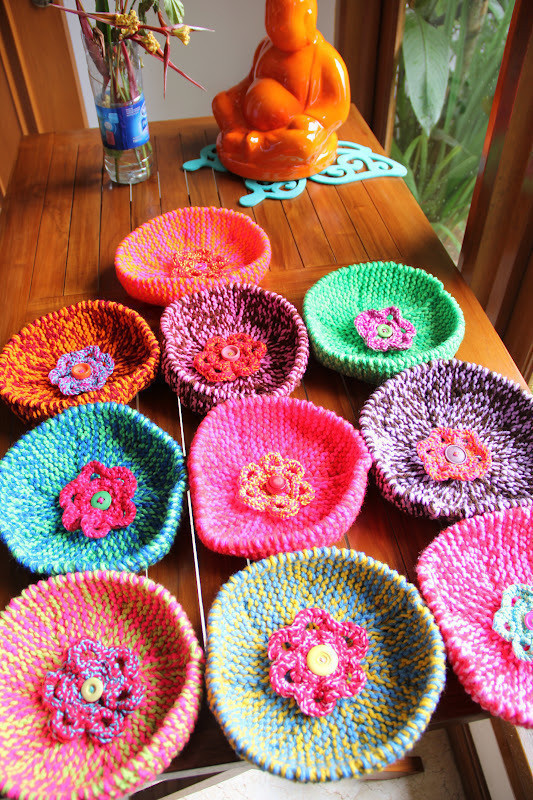
A knitted bowl is both useful and decorative. We all need one or more as a cosy place to store our little possessions. It doesn't require a lot of time to just knit one or a big amount of yarn! Once you add even a little knitted flower or a lovely button in its centre, you may even decide to leave the bowl empty and simply enjoy it as a decorative object ! ;oD
-
 BH3 favorited Knitted Bowl Tutorial
18 Dec 15:29
BH3 favorited Knitted Bowl Tutorial
18 Dec 15:29
-
 Jen S. favorited Knitted Bowl Tutorial
02 Mar 20:55
Jen S. favorited Knitted Bowl Tutorial
02 Mar 20:55
-
 mbubanj m. added Knitted Bowl Tutorial to To-make list
27 Jun 15:36
mbubanj m. added Knitted Bowl Tutorial to To-make list
27 Jun 15:36
-
Kris N. added Knitted Bowl Tutorial to Knotty Knit
16 Jun 03:58
-
 WerewolfCas favorited Knitted Bowl Tutorial
29 Mar 10:17
WerewolfCas favorited Knitted Bowl Tutorial
29 Mar 10:17
-
 Ms. Yoki favorited Knitted Bowl Tutorial
14 Mar 04:07
Ms. Yoki favorited Knitted Bowl Tutorial
14 Mar 04:07
-
 paula.lee.716 favorited Knitted Bowl Tutorial
10 Feb 01:55
paula.lee.716 favorited Knitted Bowl Tutorial
10 Feb 01:55
-
Jeanne G. favorited Knitted Bowl Tutorial
09 Feb 18:25
-
Moira A. favorited Knitted Bowl Tutorial
08 Feb 09:08
-
 greenstyle added Knitted Bowl Tutorial to Yarn crafts
07 Feb 17:19
greenstyle added Knitted Bowl Tutorial to Yarn crafts
07 Feb 17:19
-
 Step 1
The knitting pattern to follow (repeat it 7 times) is:
cast on 15 stitches
ROW 1 : knit all stitches
ROW 2 : slip first stitch, knit 13 stitches, turn
ROW 3 (5,7,9,11,13,15,17 and 19, that are all short rows) : knit all stitches
ROW 4 : slip first stitch, knit 12 stitches, turn
ROW 6 : slip first stich, knit 11 stitches, turn
ROW 8 : slip first stitch, knit 10 stitches, turn
ROW 10 : slip first stitch, knit 9 stitches, turn
ROW 12 : slip first stitch, knit 8 stitches, turn
ROW 14 : slip first stitch, knit 7 stitches, turn
ROW 16 : slip first stitch, knit 6 stitches, turn
ROW 18 : slip first stitch, knit 5 stitches, turn
ROW 20 : slip first stitch, knit 14 stitchesThe pattern is completed after row 20, but remember : you have to repeat it other 6 times!!
Please note that you can have a bowl just after knitting 4 "wedges"! So, if you knit some bowls in different sizes (4, 5, 6 and 7 wedges) you will a set of nesting bowls! Nice idea for a gift, right? ;oD
-
 Step 2
To start the pattern, you have to put a slip knot (is your first stitch) on the needle. While placing this loop on the needle, tighten it by pulling on both ends of the yarns to form the slip knot . Now, you are ready to cast on the needle the other 14 stitches (total : 15). I usually follow the method that use the two needles togheter ( knit-stitch cast on method ), because it creates the neatest finish, as you can see in the picture.
-
 Step 3
From this point, follow the given pattern :
ROW 1 : knit all 15 stitches -
 Step 4
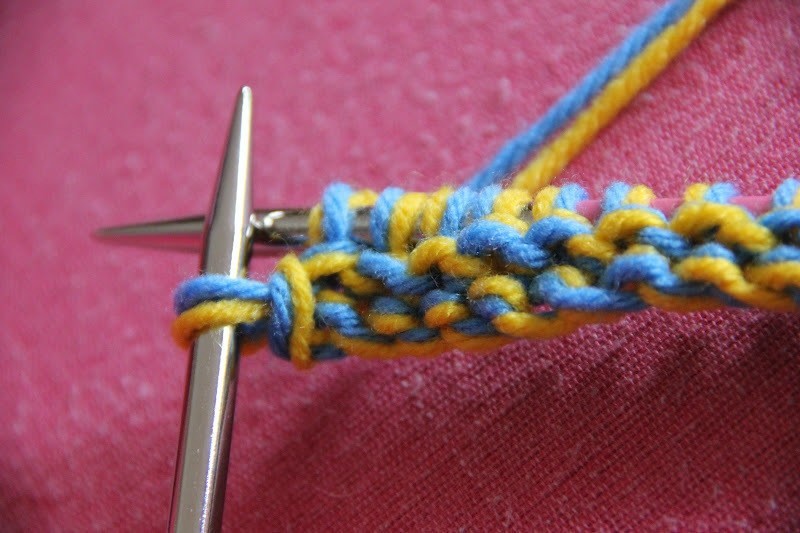
ROW 2 : slip first stitch (insert the tip of the right needle through the front of the loop on the left needle and slide the stitch onto the right needle without working it!), knit 13 stitches and leave the last stitch on the left needle (without working it)
-
 Step 5
Now, bring the yarns ( from back) between the needles to the front
-
 Step 6
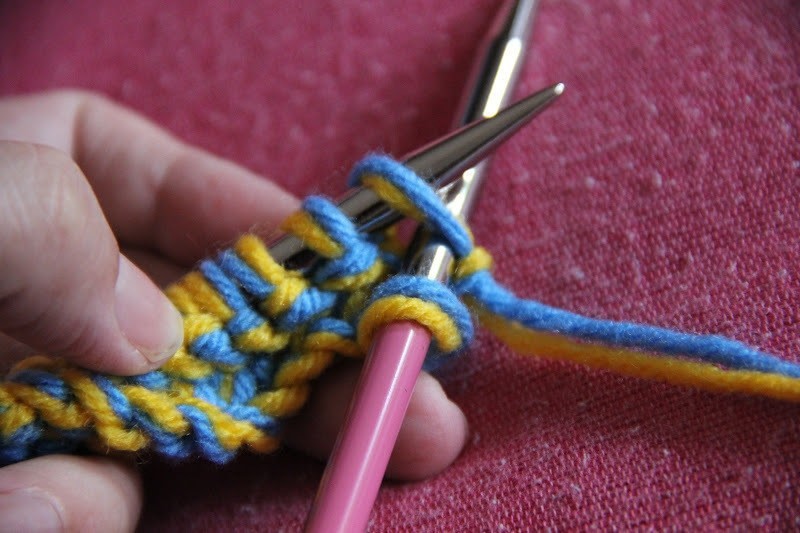
Turn the work and the needles, so that the former left needle is now the right needle and the former right needle is now your left needle! The actual right needle has one stitch on ( the non-knitted one) and the actual left needle has, instead, the 14 knitted stitches (to be correct : 1 slip stitch and 13 knitted stitches!), as you can see in the pic (note the yarns now are in the back of the work!):
-
 Step 7
Begin to knit your first short row (ROW 3) as you normally knit, inserting the tip of your right needle in the first loop of your left needle
-
 Step 8
Knit it and you'll have 2 stitches on your right needle
-
 Step 9
In the same way, finish to knit all the stitches you have on your 3rd row. Very easy, don't you think? As you can see from the pic, the 2nd stitch from the right is bumpy (black arrow) because this is where you had to turn your work and to twist your stitch! Look even at the low edge of your work and how it starts to curve (red arrow).
-
 Step 10
ROW 4 : slip first stitch
-
 Step 11
and knit the following 12 stitches. This time you will leave 2 stitches on the left needle (and 13 on the right one)
-
 Step 12
pass both the yarns in the front, between the two needles
-
 Step 13
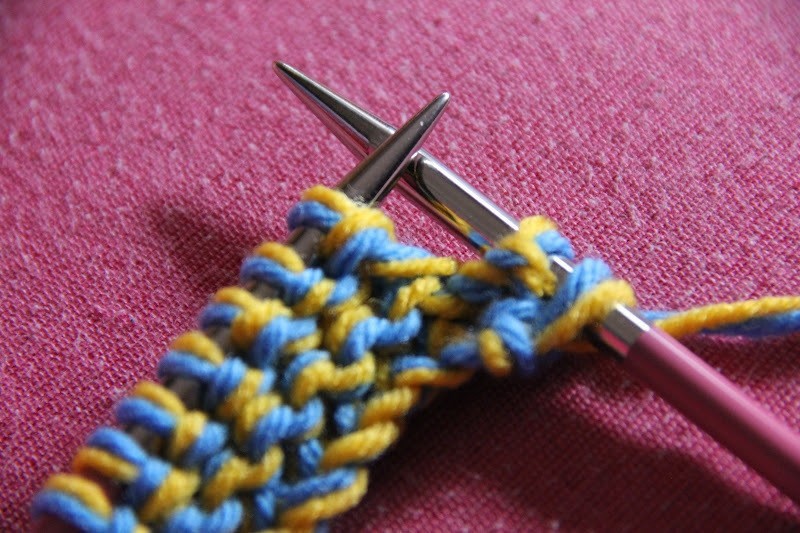
Turn the work. You'll have 2 stitches on the right needle and 13 stitches on the left one.
-
 Step 14
Knit the 13 stitches and you will have : see pic.
The pic shows you what you will have at the end of ROW 5 : 2 bumps and a more curved low edge. -
 Step 15
Continue to follow this repetitive pattern, till you have completed the first 19 rows. From right to left (looking at the right side of the work, or the inside of your future bowl, as you prefer) you'll see:
1 stitch never knitted (the first one)
9 bumpy stitches (from 2nd to 10th)
5 stitches regularly knitted in all rows -
 Step 16
On the other side (the outside of our bowl), the view will be the following one (see pic)
-
 Step 17
Knit ROW 20: slip first stitch,knit all the other 14 stitches. After the 5th stitch, you will encounter different gaps between the last stitches. No worries about that : this happens simply because of the stitches that have experienced the effect of the turn and wrap method! When row 20 is all knitted, you will have something like this:
-
 Step 18
OK??? If "yes", start again to knit the given pattern. If "no", please re-read the tutorial from the beginning again or contact me!
After knitting row 1 , you'll discover on the external side of the bowl, that the gaps created before with "steps" of stitches not knitted all the times, are now filled in ! -
 Step 19
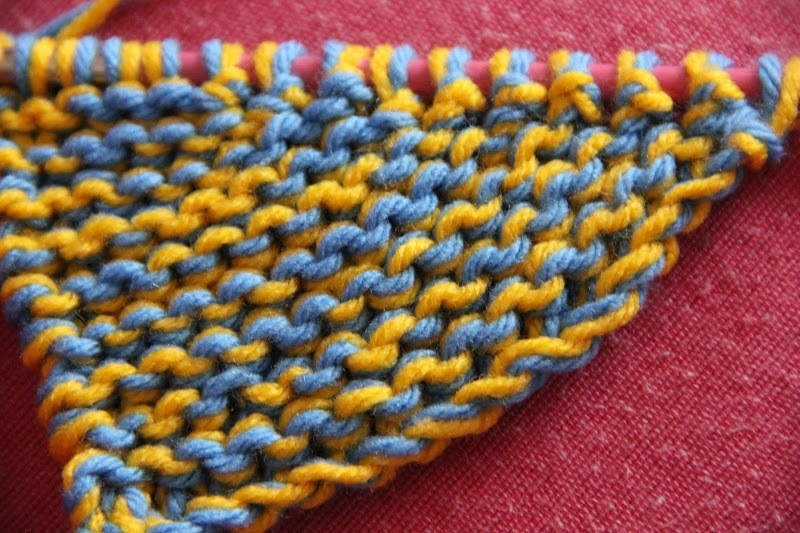
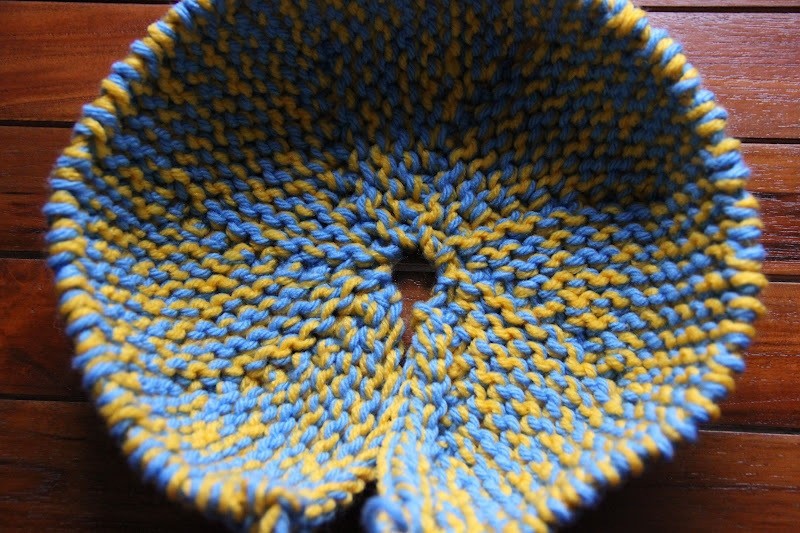
And another interesting thing you surely will notice is that in correspondence of that strange filled "row", the work starts to arch and gives you an idea of the bowl curvy shape :
-
 Step 20
Amazing, eh? So you can distinguish a convex side and a concave one!!
-
 Step 21
The picture show you what happens after the pattern is knitted 3 times :
-
 Step 22
After 5 times :
-
 Step 23
And, eventually(!!!), the end of the 7th repetition of the pattern:
-
 Step 24
Remember to bind off (knitwise) your work, just after row 20 completed and leave a long tail for the sewing seam.
-
 Step 25
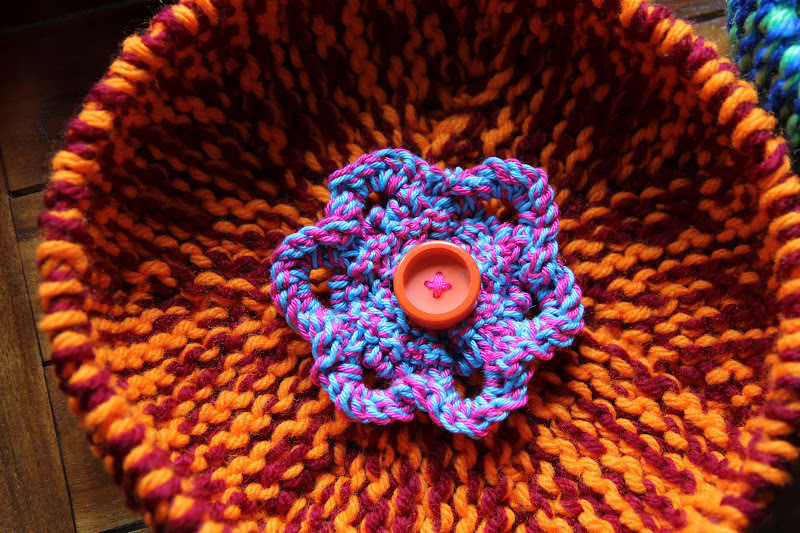
....and add a nice knitted flower (or another cute embellishment your fantasy suggests you) at the bottom of your bowl...even a cute button...
-
 Step 26
This is it!!!!!!
I hope you enjoyed this tutorial and your lovely knitted bowl as your prize! Please let me know how easy/difficult or well/bad explained are the instructions given here! Thank you!!!Notes :
about weaving in the ends of the yarns and the mattress stitch seam to sew together the ends of the bowl: I warmly suggest you to refresh this basics on knitting books or You Tube or other sources on internet, thank you!