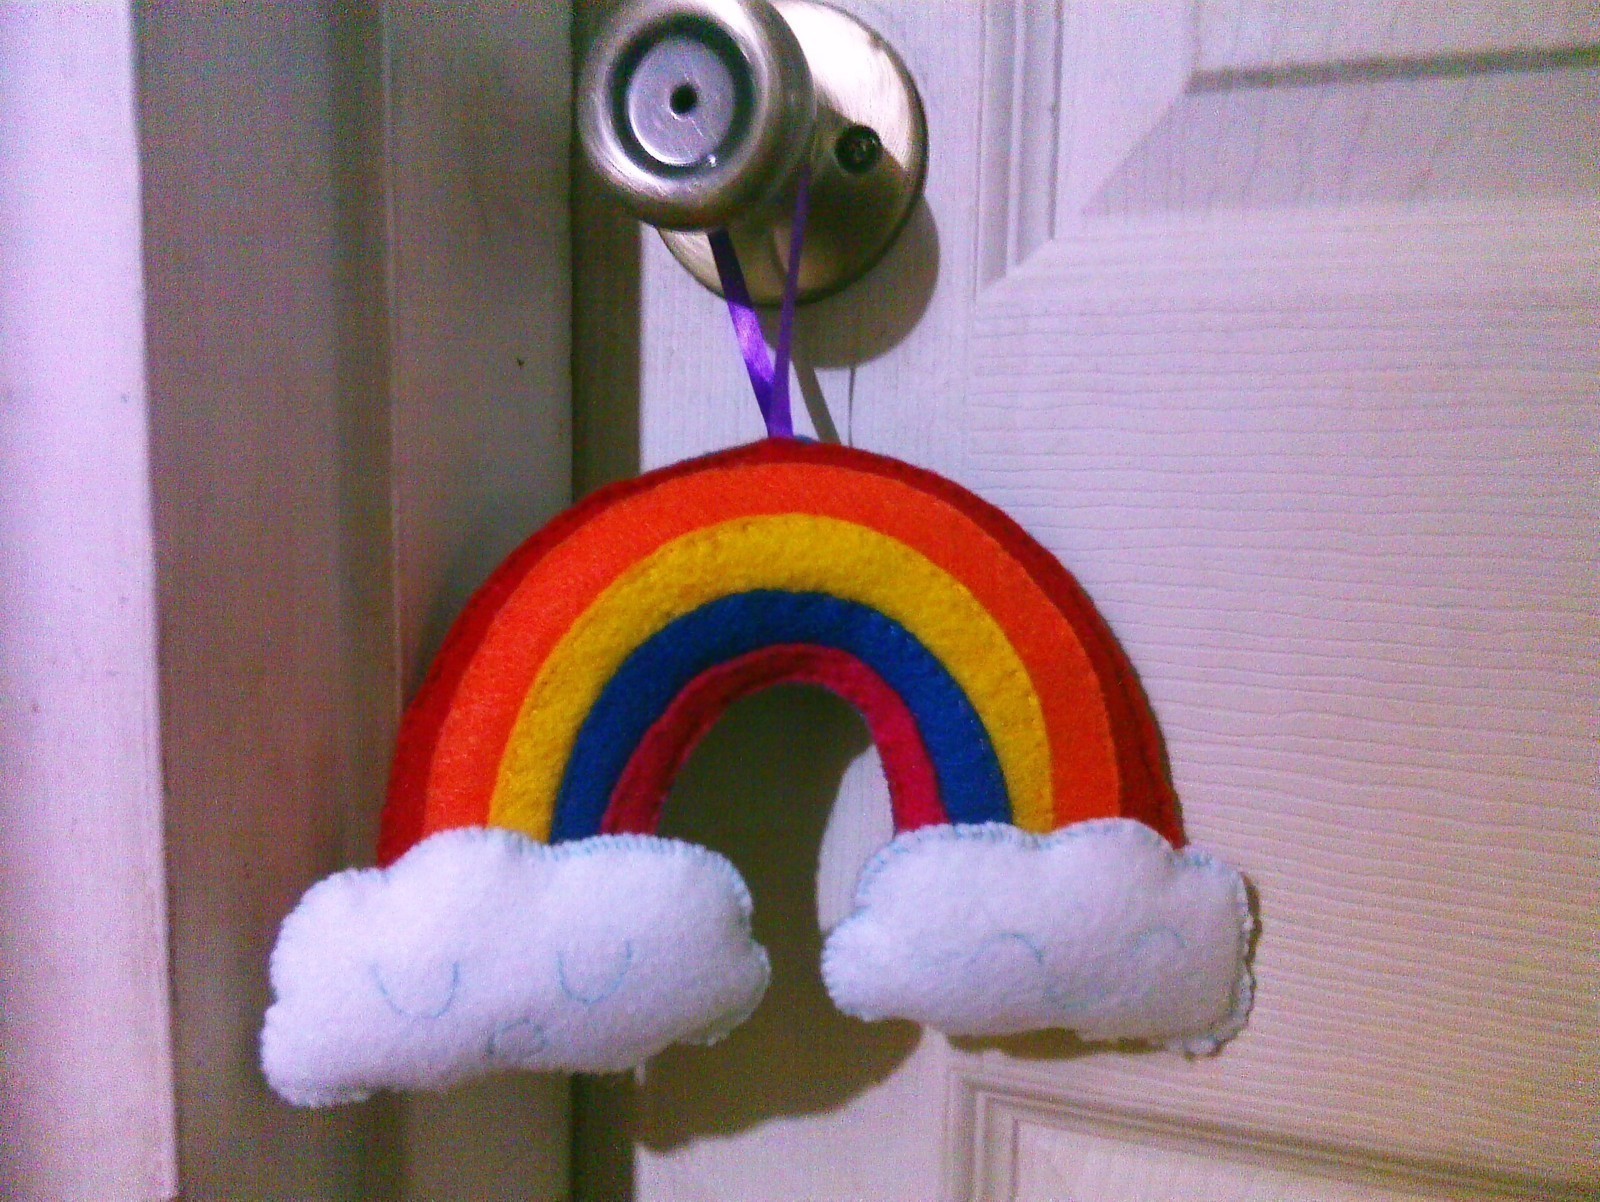


About
Cute!! Can hang on things!
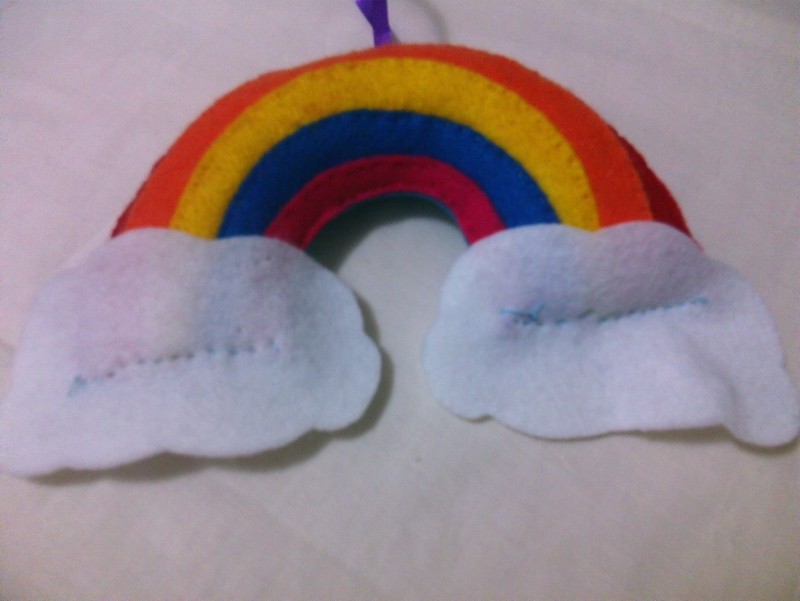
This is a cute rainbow/cloud felt plush I made for a swap. I used my own pattern and I think it came out quite nice. Took me quite awhile to finish because I hand-sewed the whole thing. Added a ribbon so it can hang from a doorknob or somewhere else.
Tags
-
 Liza W. added Kawaii Rainbow And Clouds to Plushie Ideas
14 Dec 15:19
Liza W. added Kawaii Rainbow And Clouds to Plushie Ideas
14 Dec 15:19
-
 Neko-San K. favorited Kawaii Rainbow And Clouds
31 May 21:48
Neko-San K. favorited Kawaii Rainbow And Clouds
31 May 21:48
-
 Leia B. favorited Kawaii Rainbow And Clouds
20 Mar 22:44
Leia B. favorited Kawaii Rainbow And Clouds
20 Mar 22:44
-
 Conner W. added Kawaii Rainbow And Clouds to wall ideas
12 Feb 02:32
Conner W. added Kawaii Rainbow And Clouds to wall ideas
12 Feb 02:32
-
 mmotse03 favorited Kawaii Rainbow And Clouds
14 Apr 10:43
mmotse03 favorited Kawaii Rainbow And Clouds
14 Apr 10:43
-
Alexandria C. added Kawaii Rainbow And Clouds to Projects to Try
29 Dec 04:26
-
 Xandrianne K. added Kawaii Rainbow And Clouds to Kawaii
21 Aug 16:39
Xandrianne K. added Kawaii Rainbow And Clouds to Kawaii
21 Aug 16:39
-
 itscthere favorited Kawaii Rainbow And Clouds
25 Apr 16:34
itscthere favorited Kawaii Rainbow And Clouds
25 Apr 16:34
-
 Lauren W. added Kawaii Rainbow And Clouds to Plushie
11 Apr 14:51
Lauren W. added Kawaii Rainbow And Clouds to Plushie
11 Apr 14:51
-
Lauren W. favorited Kawaii Rainbow And Clouds
11 Apr 14:50
-
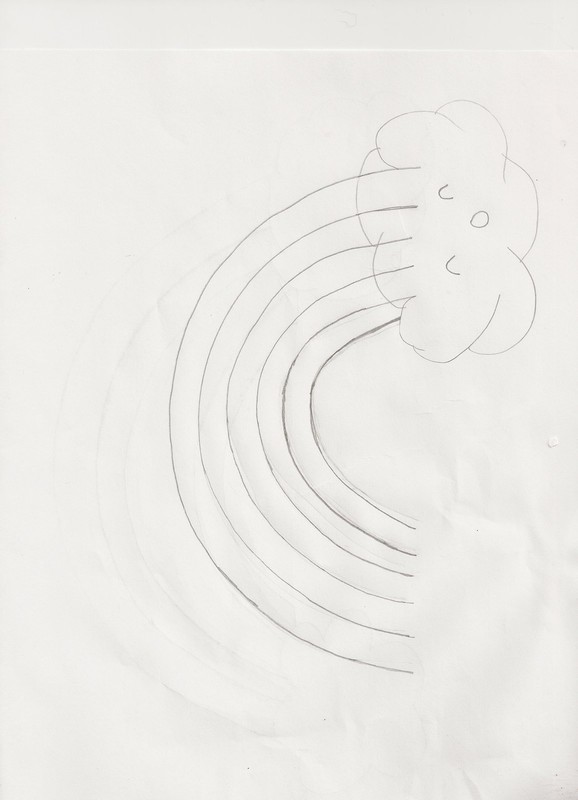
 Step 1
Print out my (very rough) rainbow pattern. You'll need to cut the rainbow and cloud out separately.
Start by cutting the rainbow for the color of felt that will be the top arch of the rainbow. Also cut out your back side piece for the back of the rainbow now.
Then cut the top arch off the pattern and cut the next rainbow arch's color on felt. Cut off the 2nd arch on the pattern and cut the rainbow for the 3rd piece of felt, etc., until you have cut all 5 arches of the rainbow.
you'll need to cut two clouds.
-
 Step 2
You should be able to layer all your colors on top of each other now with the largest (1st) piece of felt on the bottom and so on.
Sew the 2nd biggest piece on top of the first one (biggest), and so on until you have all the pieces sewn together. So for my rainbow I sewed the orange onto the red, the yellow onto the orange, blue onto yellow, pink onto blue in that order.
Then sew the whole piece onto the background piece leaving the bottom side edges of the rainbow open to stuff later. Make sure at the top middle of your rainbow you add the ribbon! (I forgot and had to un-sew and re-sew.)
Note that the bottom side edges of the rainbow do not need to perfect as you'll be covering those up later anyway.
-
 Step 3
Stuff your rainbow, but don't over-stuff as it will get too bulky and may not look right like in this picture. (I took out stuffing after taking this picture.)
-
 Step 4
Sew on both backs of the clouds. This will sew together your rainbow edges too. You may want to clip or trim to tidy up around the backside of the rainbow if any small spots of color are showing from the rainbow's edges.
It is important you sew on a middle line like in the picture or the clouds will look bad finished.
-
 Step 5
It should look like this when flipped over.
-
Step 6
Embroider on or sew on the faces in the cutest kawaii faces you desire on both remaining pieces of clouds.
-
 Step 7
Pin the cloud fronts onto the cloud backs. Sew along the sides leaving a small opening to add stuffing.
Note that around the top part of the cloud (as seen in picture) you do NOT want to sew through the rainbow! Only attach the top of the front cloud to the top of the back cloud NOT going through the rainbow.
-
 Step 8
Stuff the clouds and sew the opening shut and it should look like this.
All done!
You may want to add a small dab of hot glue gun glue behind the back of the clouds onto the rainbow (at a point that will not be visible) to more firmly secure the clouds to the rainbow without adding any visible stitching. This is so the clouds don't "sag".