


About
Super cute and sweet hair clips!
These are really easy and fun clips to make! You can customize them for outfits as simple or as colorful as you want. They are simple and pretty cheap to make instead of just buying them. If you don't have time to make them, I sell these styles and others on my Etsy shop (link under my profile page). Hope you all enjoy this tutorial!
Tags
-
 Sabrina Dee Berry entered her project Kawaii Alligator Hair Clips to TokyoTreat
05 Apr 13:53
Sabrina Dee Berry entered her project Kawaii Alligator Hair Clips to TokyoTreat
05 Apr 13:53
-
 Emma H. favorited Kawaii Alligator Hair Clips
27 Feb 22:20
Emma H. favorited Kawaii Alligator Hair Clips
27 Feb 22:20
-
 ElizabethJuddTaylor added Kawaii Alligator Hair Clips to Blythe
04 Nov 17:24
ElizabethJuddTaylor added Kawaii Alligator Hair Clips to Blythe
04 Nov 17:24
-
Sabrina Dee Berry entered her project Kawaii Alligator Hair Clips to StickerApp
04 Nov 12:53
-
Sabrina Dee Berry entered her project Kawaii Alligator Hair Clips to Alphabet Suitcase
27 Aug 13:59
-
Sabrina Dee Berry entered her project Kawaii Alligator Hair Clips to Bug Bingo & DIY Board Games
17 Dec 00:12
-
Sabrina Dee Berry entered her project Kawaii Alligator Hair Clips to Secret Santa
08 Dec 03:56
-
Sabrina Dee Berry entered her project Kawaii Alligator Hair Clips to The Confetti Bar
07 Oct 21:48
-
Sabrina Dee Berry entered her project Kawaii Alligator Hair Clips to Kawaii Box
07 Oct 21:30
-
 Dona Monstra favorited Kawaii Alligator Hair Clips
11 Apr 19:19
Dona Monstra favorited Kawaii Alligator Hair Clips
11 Apr 19:19
-
 Step 1
All of these items required for making the clips can be found for really cheap. You can find them on Etsy or eBay easily with costs less than $5 for clips and $1 or less for ribbons.
Just search first when buying your supplies so you can decide how you want to coordinate ribbons and the appliques/cabochons/rhinestones for decorations.
-
 Step 2
Decide how you want each clip to be decorated (i.e. which ribbon with which decoration).
Keep in mind you do not need to buy decorations. That is optional if you want to add something a little more to the clip. Patterns on most grosgrain ribbons are very cute as is.
-
 Step 3
*Please remember this project requires adult supervision for children.* Plug in your hot glue gun and wait for it to heat up. Add some hot glue to the inside of the TOP part of the clip (this part is if you were to put the clip flat on the table, the flat part is the BOTTOM), then add a no slip grip liner.
Place a knife in between the added grip part and the bottom part of the clip and close it over the knife. This ensures the grip is securely glued down but does not stick to the bottom part of the clip.
-
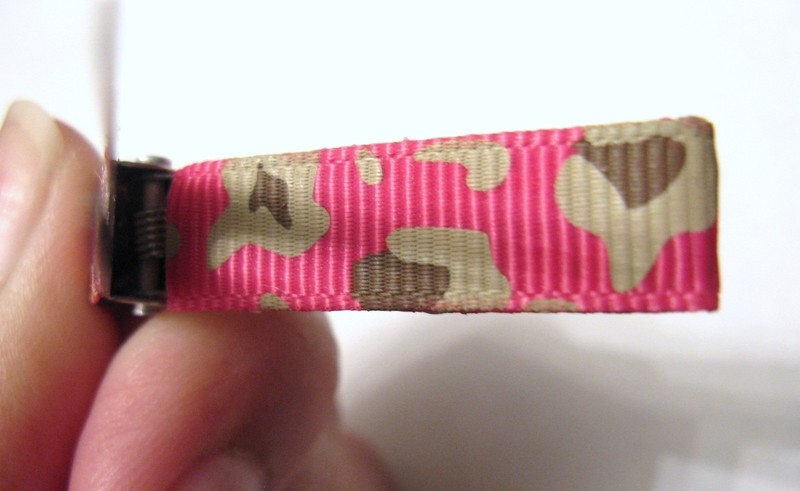
 Step 4
Next, on top of the grip, add some glue and slowly but carefully place the ribbon following the clip out (not towards the hinge, but away from it). Do not cut the ribbon "down to size"; use it as you bought it whether it is a roll or a yard, it will ensure you don't waste any.
NOTE: be aware of which way you are placing your ribbon! If you want the clip to be on the right side of your hair, the ribbon needs to go the opposite way so when it wraps around to the other side the pattern is the right way. It takes a few tries to get this right, but most ribbons have patterns all over them, so it doesn't matter.
-
 Step 5
Place glue around the top of the clip, and continue to follow the ribbon on top of the ribbon pressing it down (carefully - the glue is hot) as you go along.
-
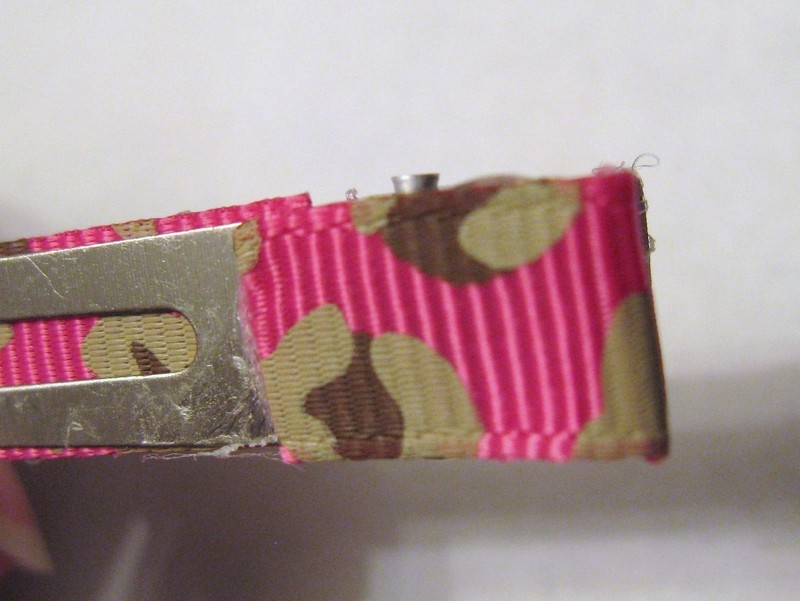
 Step 6
This is probably the trickiest part: in the hinge place the hot glue and tightly press the ribbon in and smooth it out following the shape of the clip.
-
 Step 7
You need just a little bit more of ribbon to finish off the clip, about 2cm (3/4in) or so, so you can snip off the ribbon now leaving this much extra. Apply a little bit of glue on the bottom of the clip, and press this last bit of ribbon down.
-
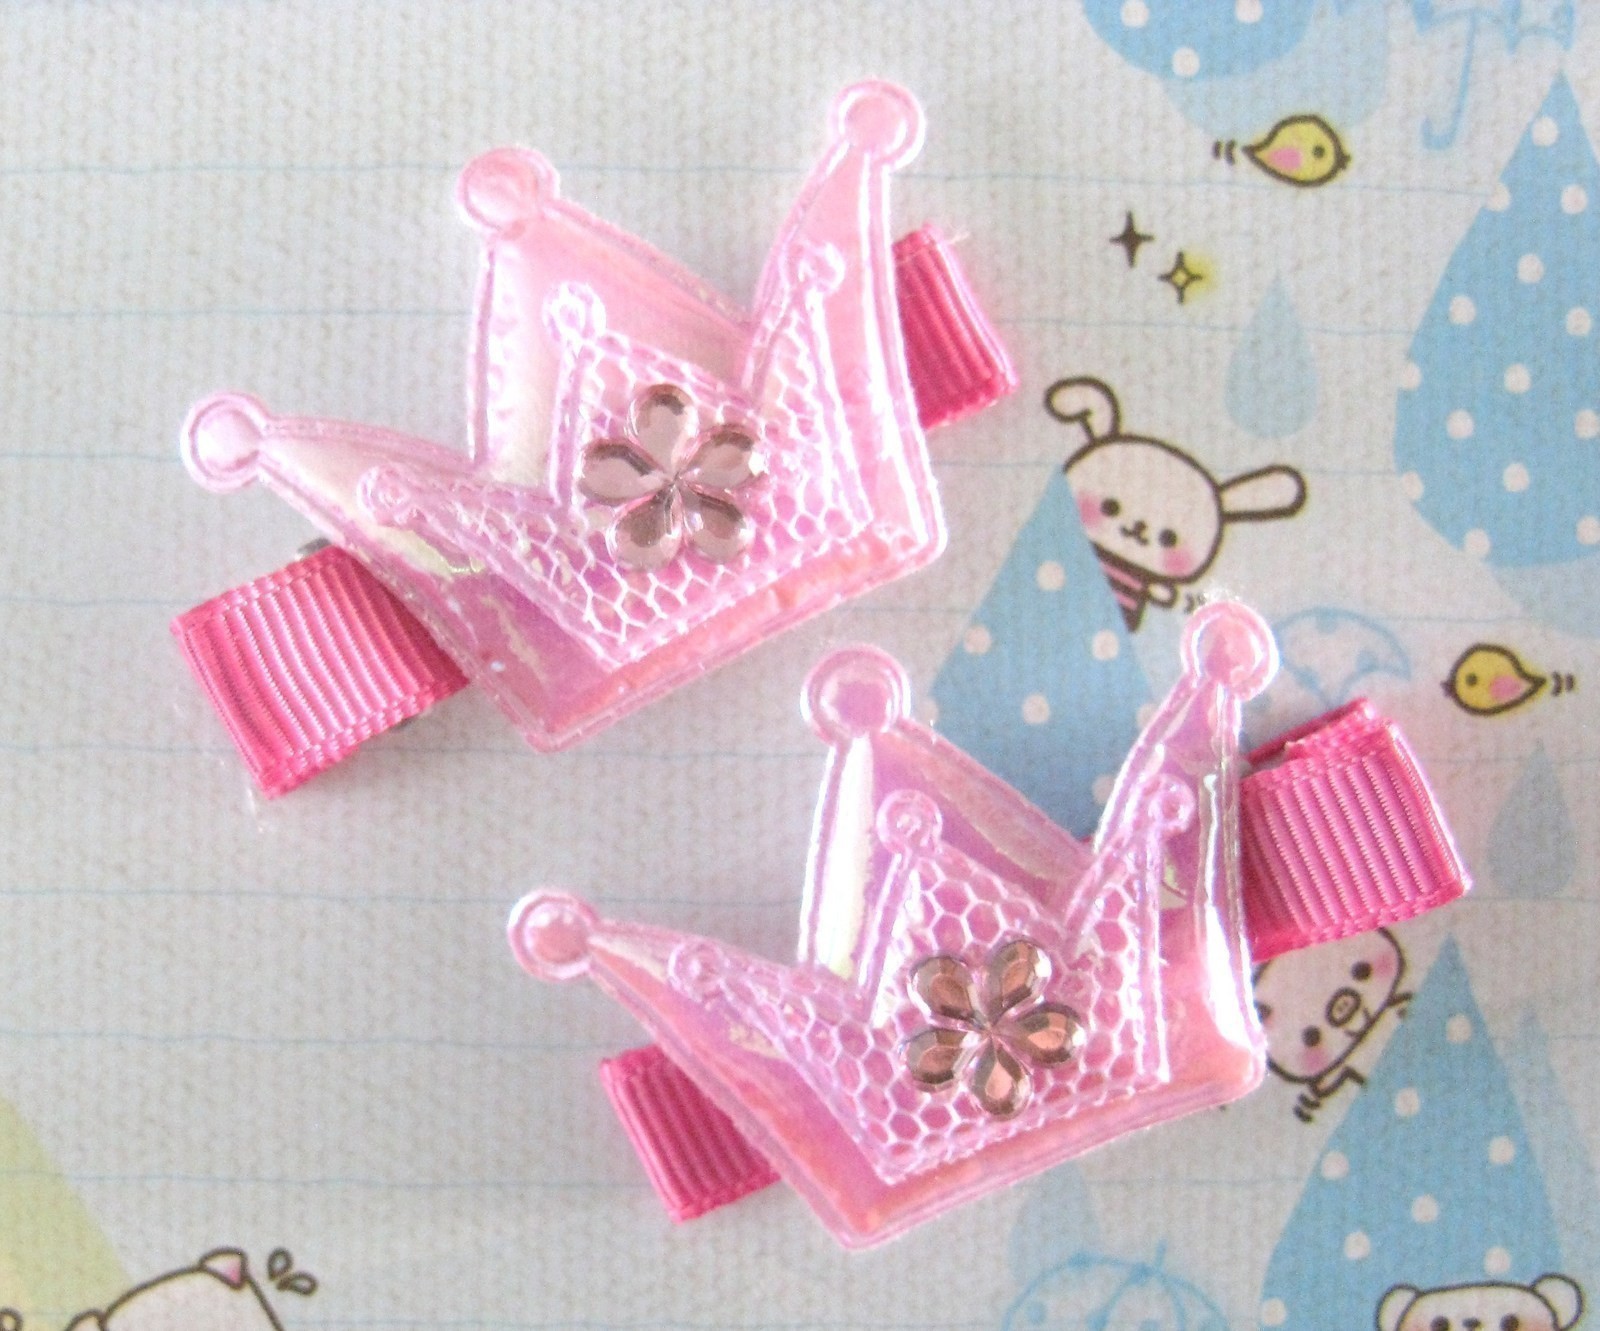
 Step 8
You can either leave the clip as is or decorate it! I find the best adhesive to attach your decorations is E6000.
You can add embellishments like:
- Cabochons/resin flatbacks (like the red strawberries and white and pink ice creams in the photos above)
- Rhinestones (like this pink star on the pink cameo print picture for this step)
- Felt appliques (like the doll head and pink strawberry in the photos above).


Comments


