Joining Pieces Of Flat Metal
Extract from Soldering for Jewellers • By Rebecca Skeels • Published by The Crowood Press

About
Soldering for Jewellers
The first example will explain the general principles
of soldering. The edge to edge joint is the
weakest of all joints and it is worth considering
how you would make this stronger for some
applications. For example, a ‘scarf joint’ is when
the metal is cut at an angle, allowing a larger
surface of the metal to be joined, and a ‘step
joint’ is when the ends are cut with two levels,
ov e r lapping the edges. These are sometimes
only possible with thicker sheets of metal and
with practice, as precise work is required. Other
options could be considered to strengthen the
joint that affect the aesthetics and it is worth
considering how the added details will add to
the overall design. For example, the edges can
completely overlap each other or an extra piece
added overlapping both ends; this is often called
a ‘strap joint’.
-
 JadeSucksAtLife favorited Joining Pieces Of Flat Metal
04 Mar 23:38
JadeSucksAtLife favorited Joining Pieces Of Flat Metal
04 Mar 23:38
-
 Alissa B. favorited Joining Pieces Of Flat Metal
23 Jul 19:24
Alissa B. favorited Joining Pieces Of Flat Metal
23 Jul 19:24
-
 Sarah Sylvia S. favorited Joining Pieces Of Flat Metal
18 Jul 00:54
Sarah Sylvia S. favorited Joining Pieces Of Flat Metal
18 Jul 00:54
-
 The Crowood Press published her project Joining Pieces Of Flat Metal
14 Jun 09:00
The Crowood Press published her project Joining Pieces Of Flat Metal
14 Jun 09:00
You Will Need
-
 Step 1
Joining pieces of flat metal
Scarf joint
Step joint
Butt joint
Lap joint
Strap joint
Strap jointA variety of joints.
Wet or dry the edges.
Wash your hands to ensure that the flux or
work does not get any gr ease or dirt on them.If needed pin the work to the heat r eflective
brick.Flux the joint.
Place the solder so it will be easier to clean up
later.Heat the work with a bushy flame, if your torch is
not adjustable start with it a little further away.Remove the heat when the solder has flowed.
Let the work cool before moving it.
Then cool completely in water.
Place the piece in warmed pickle solution.
Remove from pickle when oxides and flux
residue have gone.Rinse to remove any traces of pickle.
Use a bushy flame
Remember the equipment section of
this book, which stated ‘the lower flow
temperature of the pewter solder will
create a weaker bond more like glue’ when
using it to solder other metals. A pointy hot
flame heats silver solder too fast, creating
a similar bond. It causes the solder to flow,
but not permeate the surface of both pieces
of metal. This may be strong with a little
wiggle test but later one piece may break
cleanly away from the other. -
 Step 2
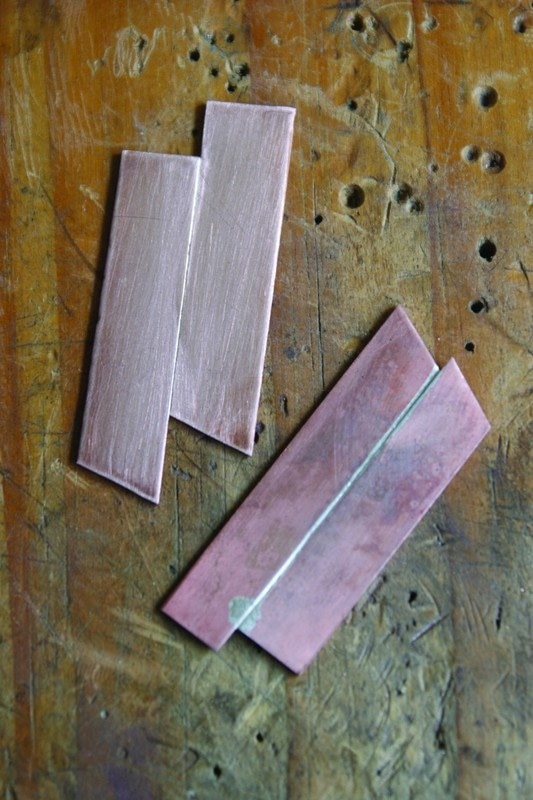
Ensure the edges that are going to be joined fit
together, file them if not. Even a small gap can
cause problems when soldering or result in an
unsightly flaw. I -
 Step 3
f you have filed them then this
will also clean any grease and dirt away. -
 Step 4
If the edges are flat you may still need to clean
them. For this example, wet or dry paper on a flat surface has
been used to keep the edges sharp and fitting
together well. -
 Step 5
Wash your hands to ensure you do not
contaminate the flux or work with any grease
or dirt for the next stage of the process. -
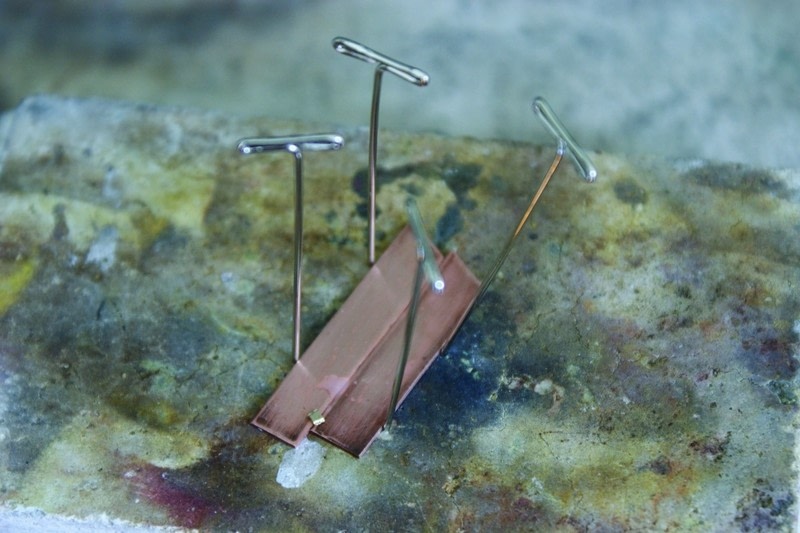
 Step 6
Put the work on the chosen heat reflective
surface. Here we are starting simply with a
standard heat reflective soldering brick. Pin
the pieces if they need to be held in place. This
will depend on size, the heavier the pieces the
less likely they are to move. -
 Step 7
Apply flux to the edges of the metal where it
is going to be soldered. For this example borax
is used. Borax may bubble and move when
first heated, but it will also take a while to burn
away, making it a good flux to practise with. -
 Step 8
Place a small piece of solder overlapping the
joint; take some time to think about this.
Consider where would be the easiest place to
clean up the solder if it flowed a little in the
wrong direction. For this example, the solder
is placed at one end of the joint, as it is easier
to clean the end of the finished item rather
than the middle. Hard solder is used as this is
the only joint that is going to be made on this
piece. -
 Step 9
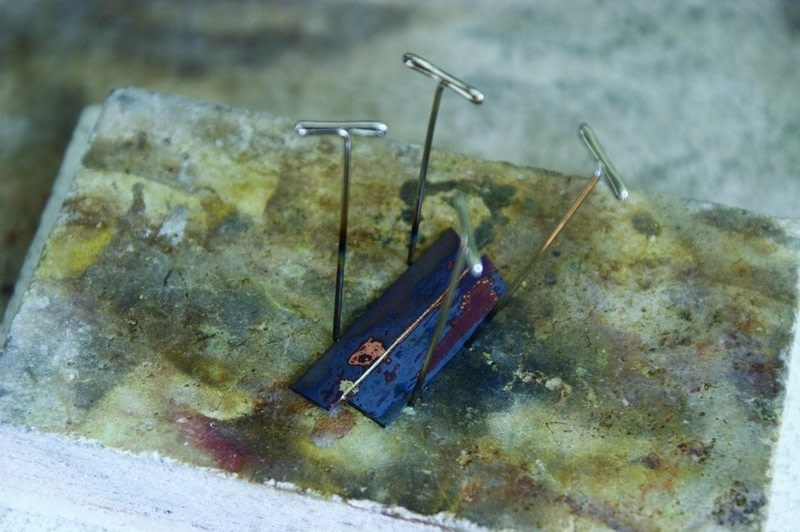
Heat the metal with a bushy flame; this is
known as a reducing flame, which means it is
using a lot of fuel and in turn absorbs the
oxides that stop the solder flowing. The
bushy flame will allow both pieces of metal to
be heated at the same time to the same
temperature. There is no advantage of
heating it up fast with a hotter flame. Apply
the heat to the whole piece, moving the
flame constantly across the work as if painting
the metal with the flame. Use the midpoint
of the flame rather than the tip or right up to
the torch end and move away a little if the
metal is heating up too fast. Remember to
heat the metal not the solder; the metal
should be able to transfer the heat to the
solder. If both pieces are the same temperature
the solder will flow along the joint. -
 Step 10
Remove
the flame when the solder has flowed. If you
have a longer join, heat the metal slightly
more where you want the solder to flow as it
will flow towards the heat. -
 Step 11
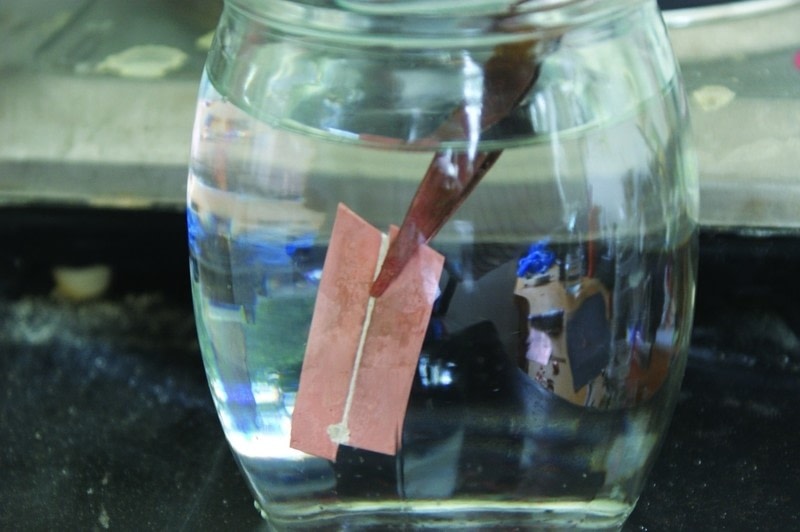
When the redness of the metal has dulled,
cool the work in water. It is advisable not to
put hot metal straight into the pickle. -
 Step 12
Place your piece in a warmed pickle solution.
Remember to use brass, copper, wooden or
plastic tweezers as steel may create a reaction
in the solution and plate the pieces with a
layer of copper. -
 Step 13
Remove the metal from the pickle when all
the oxides and flux residue have gone.
Copper will look a little pink while silver will
look white at this stage. -
 Step 14
Rinse your work thoroughly. You may want to
also scrub it a little with a nylon brush, water
and pumice to ensure all the dirt and pickle
has been removed.