


About
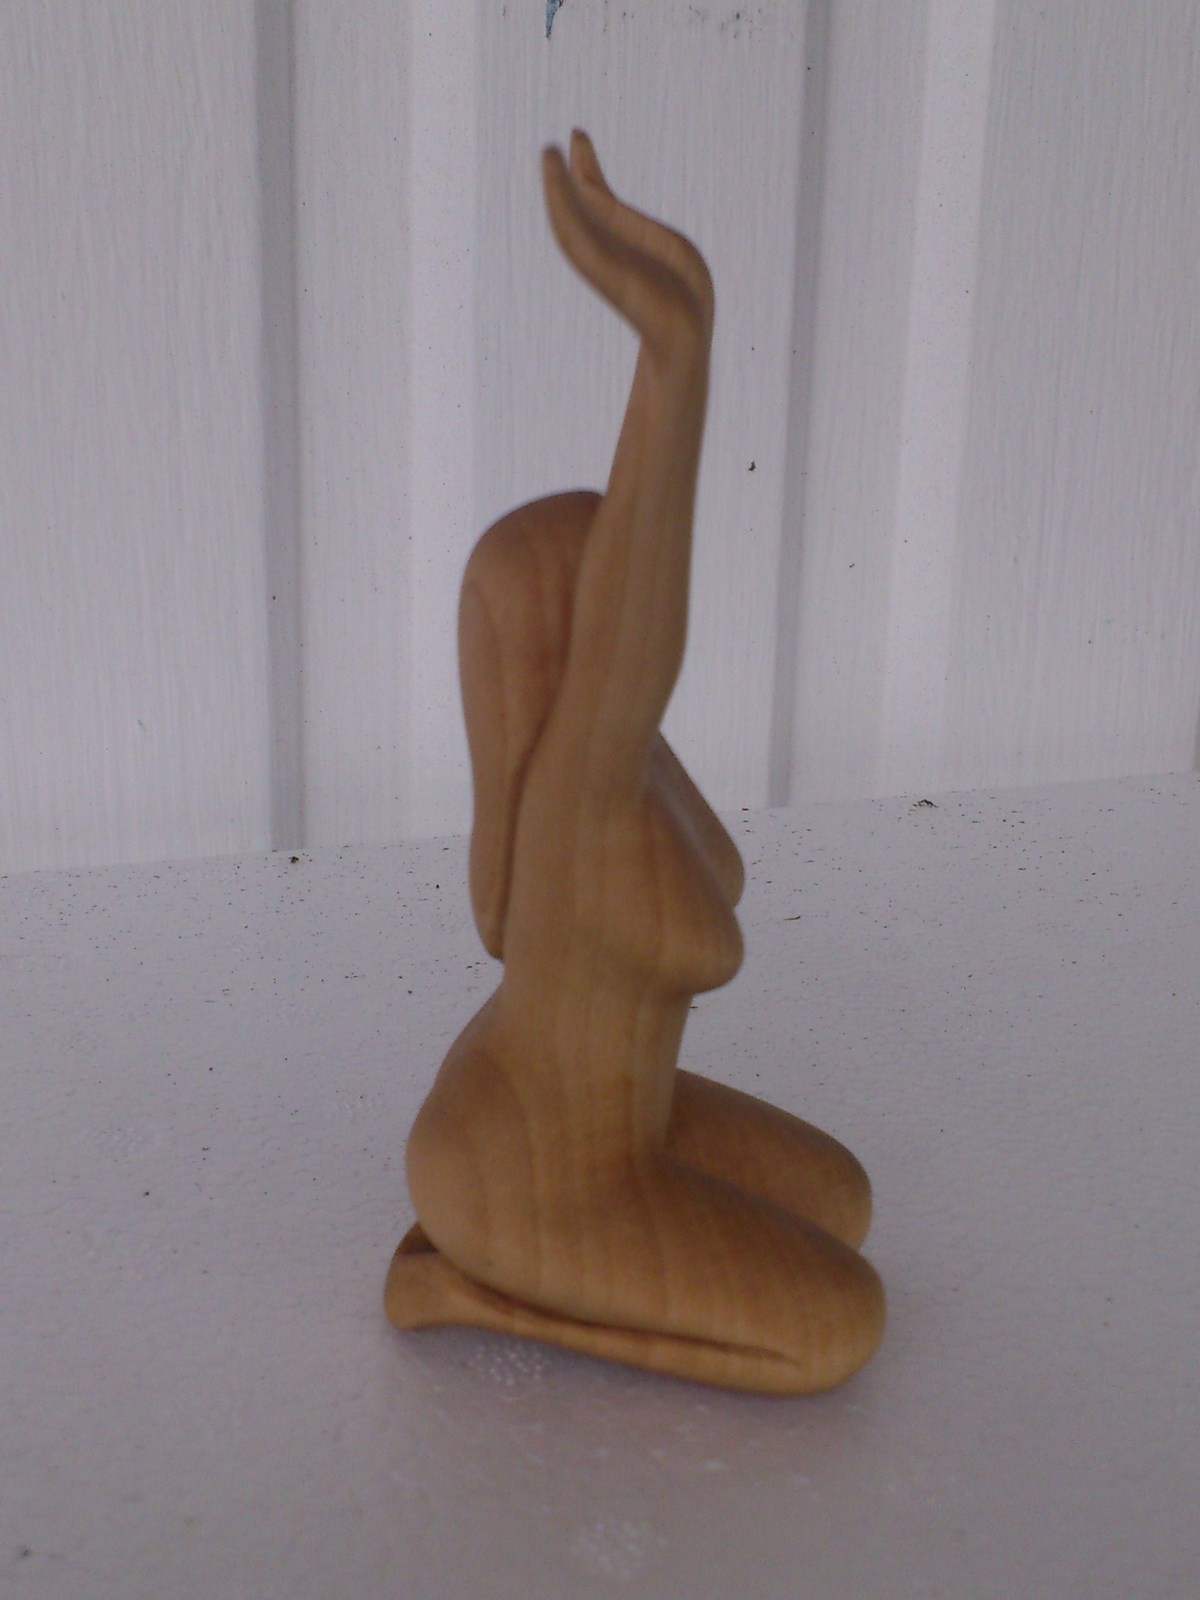
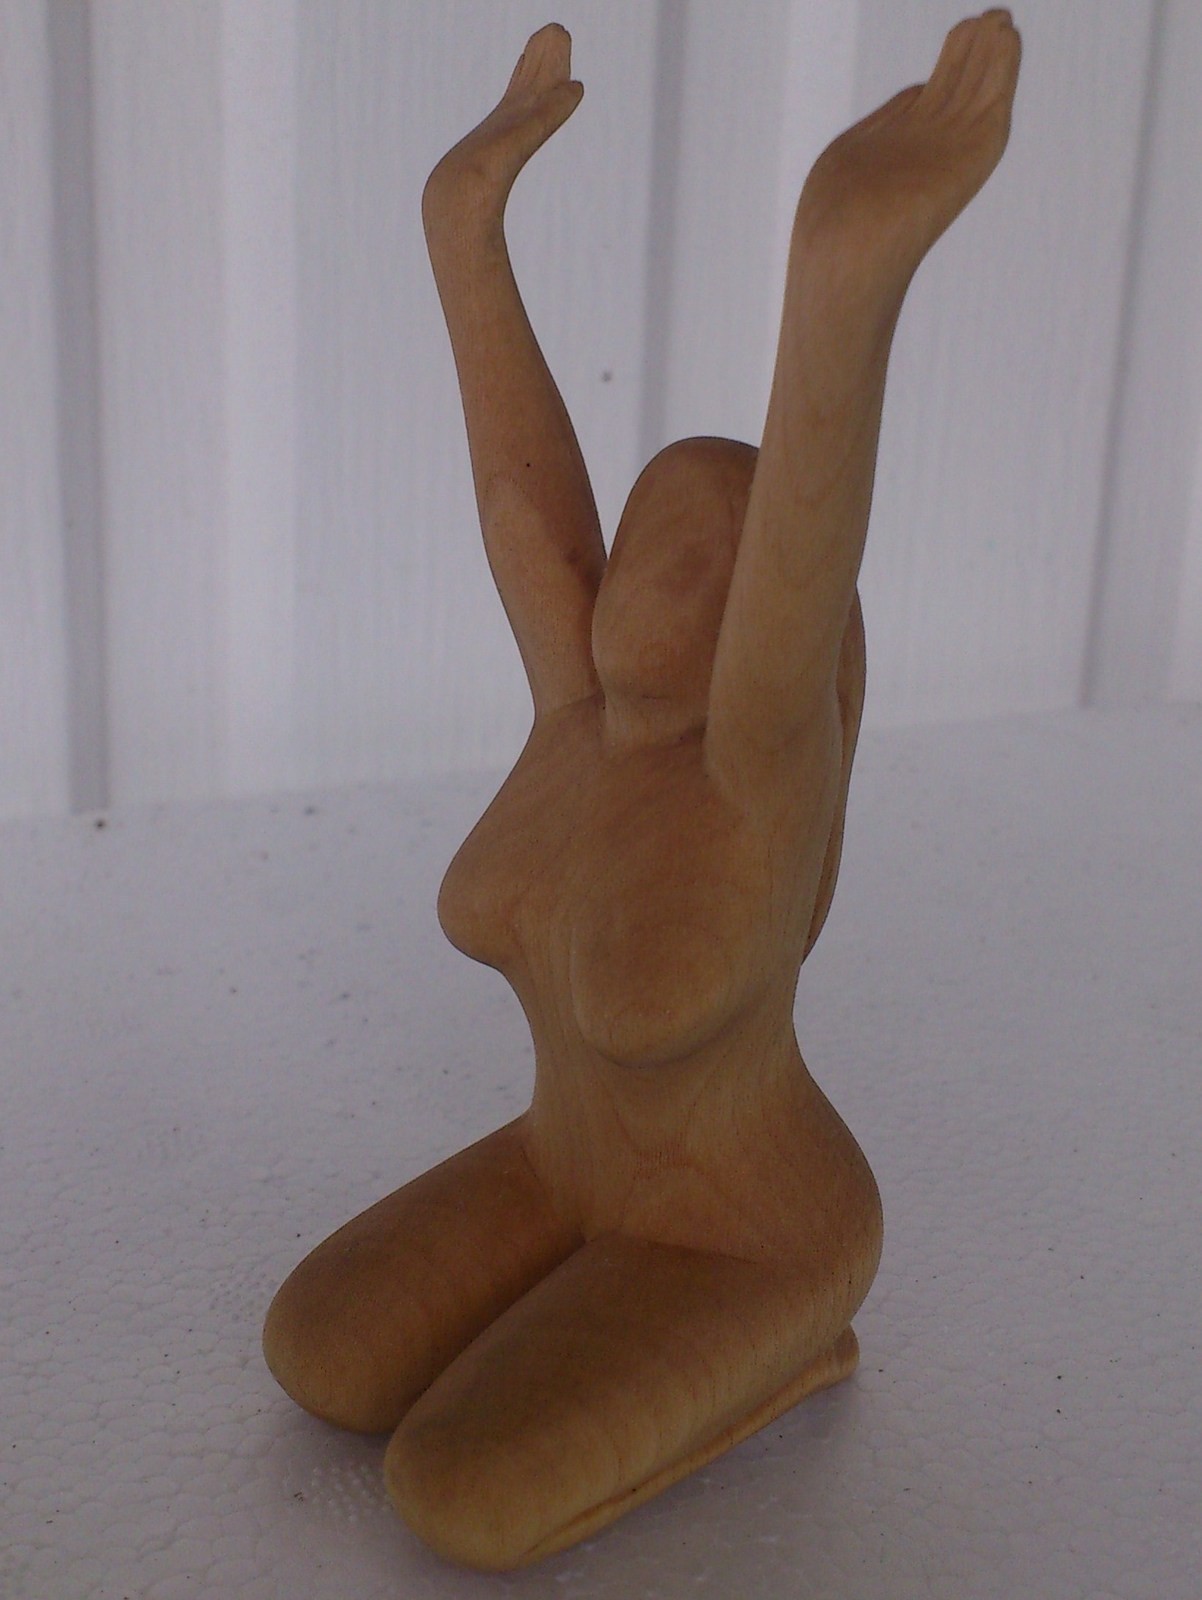
A hand-carved kneeling nude
A young woman kneeling with her arms raised to the heavens, invoking the spirit and the powers that be in Pagan supplication. She is an evocative and beautiful representation of joy and connection to the Divine.
She was finished the day after the Winter Solstice and has captured some of the energies of that magical rite within the wood.
Measuring 4" (10cm) tall, 2" (5cm) wide and 1 3/4" (4.5cm) front to back.
Made from English Lime and hand carved with gouge and knife.
-
 Cyrano B. favorited Invocation
20 Nov 12:58
Cyrano B. favorited Invocation
20 Nov 12:58
-
 Kimya J. favorited Invocation
22 Feb 02:00
Kimya J. favorited Invocation
22 Feb 02:00
-
 kasey week 2. favorited Invocation
26 Aug 08:54
kasey week 2. favorited Invocation
26 Aug 08:54
-
 Tami G. favorited Invocation
18 Aug 07:36
Tami G. favorited Invocation
18 Aug 07:36
-
 Rafael C. favorited Invocation
15 Aug 08:36
Rafael C. favorited Invocation
15 Aug 08:36
-
 Sean W. favorited Invocation
14 Aug 11:30
Sean W. favorited Invocation
14 Aug 11:30
-
 Gracey B. favorited Invocation
14 Aug 08:18
Gracey B. favorited Invocation
14 Aug 08:18
-
 Myrtle S. favorited Invocation
14 Aug 07:21
Myrtle S. favorited Invocation
14 Aug 07:21
-
 Carl M. favorited Invocation
12 Aug 08:04
Carl M. favorited Invocation
12 Aug 08:04
-
 Lucy A. favorited Invocation
12 Aug 06:09
Lucy A. favorited Invocation
12 Aug 06:09
You Will Need
-
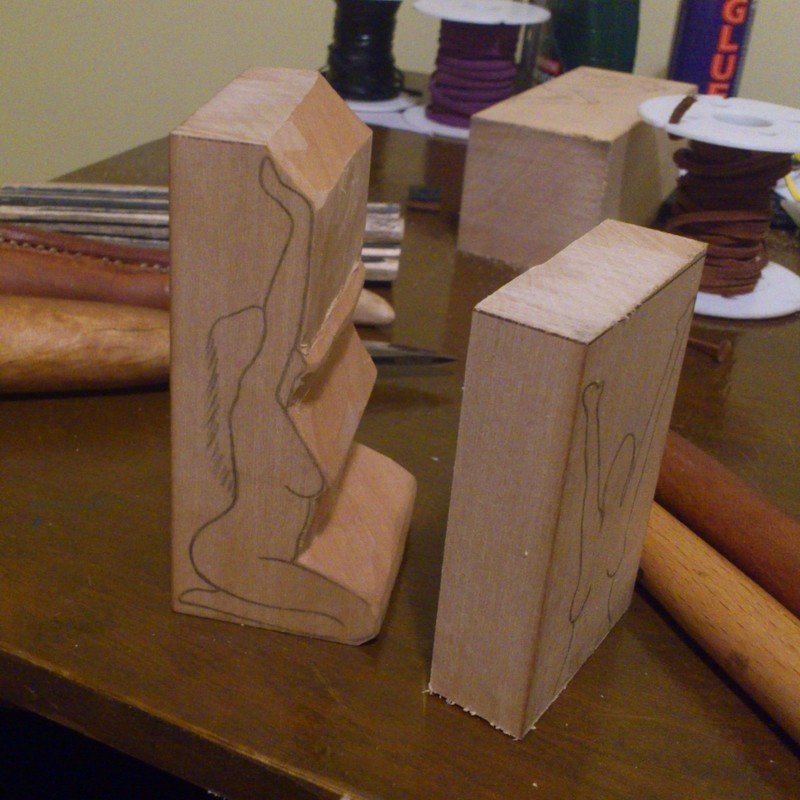
 Step 1
First off, decide on your design. You really want pictures from all 4 sides for a good starting point. I found this pose on a figure reference site.
One problem you will encounter is perspective. No matter how good the photos there will be differences between front and back views and each side just because of where the camera is. I usually trace the views and rationalise them so that the outlines at least match - this is important as you don't want to cut off a hand (or boob!) because the view you are cutting from doesn't match the outline of the opposite view. Ok, ask me how I know this... >sigh<
Draw the pose out on all 4 sides of the wood. Make card templates if the images for use later, especially if you don't have access to a bandsaw...
-
 Step 2
Remove the waste wood. There are various methods for this dependent on what tools you have. The easiest is to use a bandsaw and cut around the outline, tape the bits back on, turn it over and cut the other outline.
Unfortunately I don't have a bandsaw so I did what I could. I cut off the largest piece of waste from the front of the piece as you can see in the pic and started to carefully remove the rest of the waste from the front view, using the side views as guides. -
 Step 3
Eventually I got to this point - the front face of the carving is now a set of ridges matching (mostly, this is still in very rough stage!) the side profile. So far I have not made a single cut on the back of the carving, so the rear view is still there.
-
 Step 4
And as it's still there, you do the same with that as you did with the side profiles. I used the card template of the front view to remark the front of the carving so I could line things up right.
Carefully cut or saw away everything outside of the lines. I left the arms till very last as it is far too easy to break them at this stage.
-
 Step 5
And then use the side view template to remark the sides of the figure so you can start to remove the waste on the back of the carving
-
 Step 6
Once I got the waste off the back, I did the first part of removing the waste between the arms. From now on I have to be aware of how I hold the carving or these fragile limbs will snap, and we really don't want that!
So, the outlining is basically done, now it's time to start shaping. Pics from here to finished will be few and far between as I... erm... hadmyhandsfull... erm, yeah, that's right. Nothing to do with forgetting to take pics at all, really. Honest...
So, you take the templates and work out where the details are, like the shape of the face, the boobs, line of the ribs, hairline... etc...
-
 Step 7
Start to remove the areas of waste and begin to round off the edges. In the pic you can see where I've begun to separate the hair from the rest of the back
-
 Step 8
Now I've started to round off the bum, shape the boobs, work on the legs...
-
 Step 9
And a view from the front...
-
 Step 10
And then just keep on rounding, shaping, working, fettling, fussing, etc., etc., etc... (yes I forgot to take any more pics :( sorry) until you find you have finished! Or until a friend or partner drags it out of your crazed hands to the screams of, "But it just needs a tiny bit more work..."


HotPinkCrayola - if you do, post piccies please!