

About
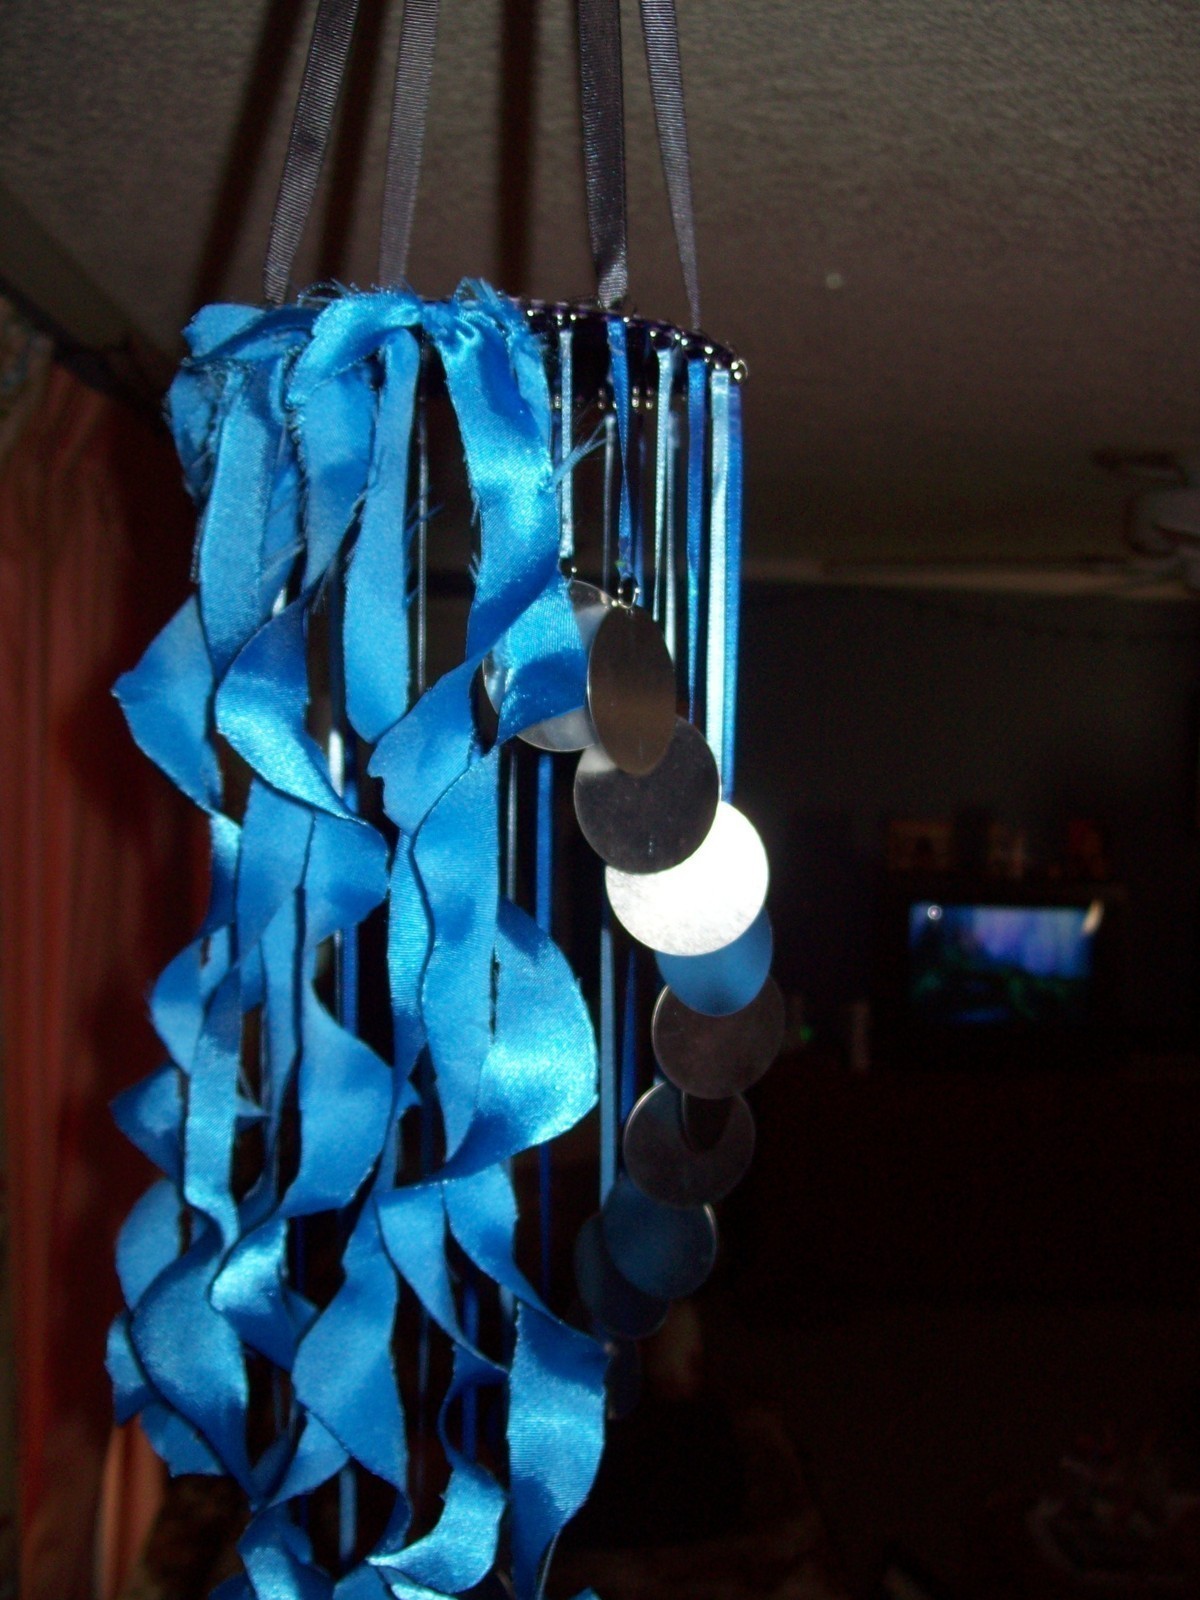
Swirly, Shiny, Fun!!
I have placed a link credited to Secretlifeofabionerd from Youtube. If you dont know her I highly suggest you look her up! She is also appearing on Threadbanger now!
It took me actually a few days to finish this with charging the drill and having to do other things so 5 hours is a rough estimate in time.
I hope you all like this and if have any questions or if I somehow left something out please feel free to comment or message me :D
Happy Crafting!
Much Love <3
-
 Marylou P. added Inside/Outside Wind Chime Hanging Piece to For the home
08 Apr 11:26
Marylou P. added Inside/Outside Wind Chime Hanging Piece to For the home
08 Apr 11:26
-
 Caaryn S. favorited Inside/Outside Wind Chime Hanging Piece
09 Mar 07:26
Caaryn S. favorited Inside/Outside Wind Chime Hanging Piece
09 Mar 07:26
-
 cassie n. favorited Inside/Outside Wind Chime Hanging Piece
25 Jul 12:02
cassie n. favorited Inside/Outside Wind Chime Hanging Piece
25 Jul 12:02
-
 LynnieAttackedByWeather favorited Inside/Outside Wind Chime Hanging Piece
05 Jul 19:54
LynnieAttackedByWeather favorited Inside/Outside Wind Chime Hanging Piece
05 Jul 19:54
-
 Trickypixie1208 P. entered her project Inside/Outside Wind Chime Hanging Piece to Hardware Store Decor Contest
16 Sep 19:08
Trickypixie1208 P. entered her project Inside/Outside Wind Chime Hanging Piece to Hardware Store Decor Contest
16 Sep 19:08
You Will Need
-
 Step 1
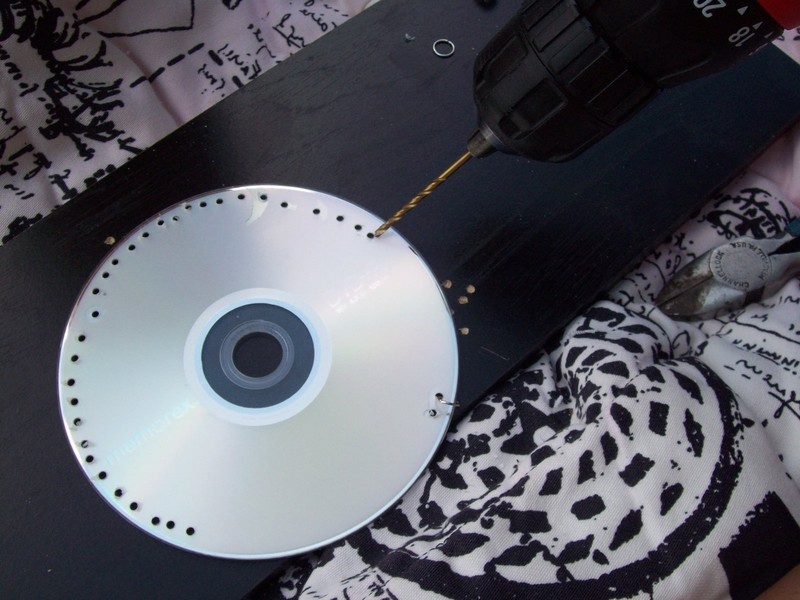
Get an old CD! or maybe an empty one and get ready to make some holes in it with your drill.
If you dont have one..ask your dad, mom, bf,gf,sister, brother..whoever and if you are too young to use it alone ask an adult or if you are an adult someone who knows how :D
-
 Step 2
Place your CD on a board or a hard steady surface that you dont mind if it gets holes in and start to carefully drill holes in about half an inch apart. Try to stay maybe 1cm into the CD enough so that a jump ring can still fit on.
I have a lot because at the time I didnt realize I didnt want them so close or so many and my plans and ideas changed as the project went on :D
-
Step 3
Then after that if your drill is still charged enough make one hole into your aluminum mirror pieces or whatever you want to have dangling from your ribbons.
I dont have a picture of this step sorry but its pretty self explanatory I hope :D
-
 Step 4
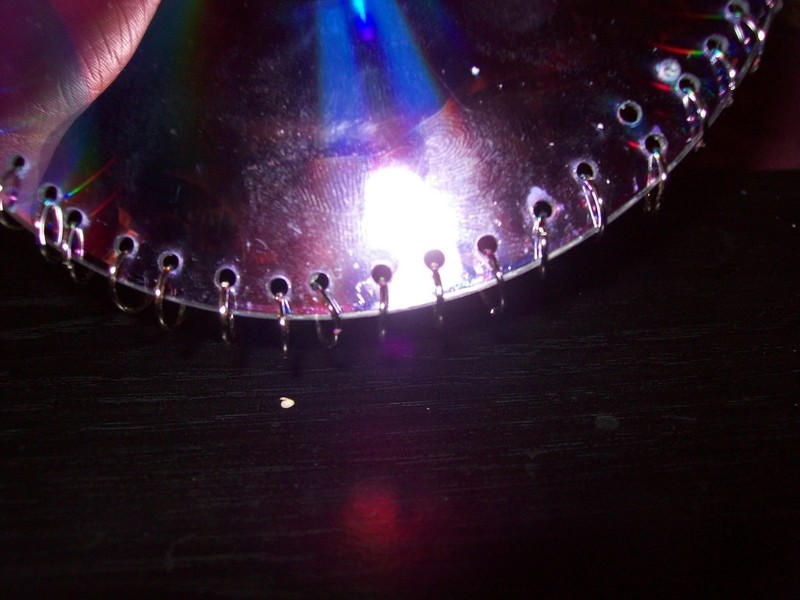
Insert your jump rings into all the holes you have made. Even into your mirror pieces.
-
 Step 5
Now remember my plans changed so I dont have as many jump rings around my CD only about 19 or so. Which is maybe a little more than half way around the CD
-
Step 6
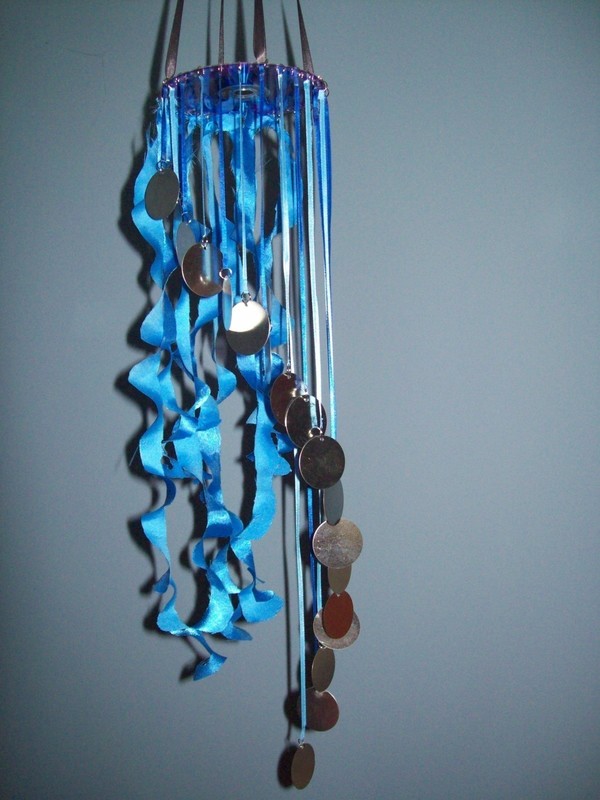
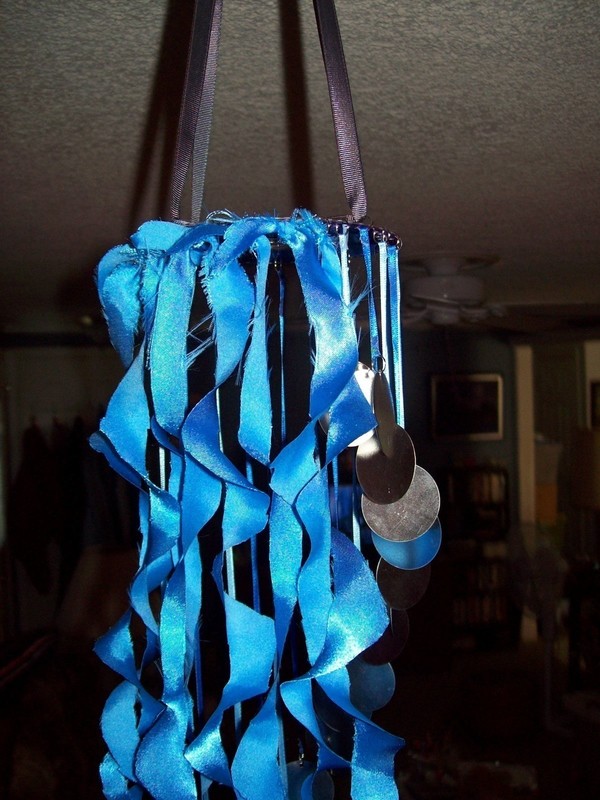
You are then going to want to cut pieces of ribbon that get steadily longer and longer to have the "layered" look. I did it by 1 and a half inches. My first was 2 and a half..my next 3 and a half, 4 and a half, and so on until I got to about 15 and a half inches I believe.
-
Step 7
Im sorry for not having steps of this.
I then just folded a little piece on both end of the ribbon around the jump rings and glued it together. You can use elmers glue, hot gun, tacky glue, or whatever. I used Krazy Glue
-
Step 8
For the swirling ribbons:
I have 4 short ones and 4 long ones. Take 4 circle pieces of fabric for the long swirls and place them on top of each other and cut into it going around and around until you cant cut anymore.
The same for the short swirled ribbons of fabric but only smaller cut circle pieces of fabricI recommend got to this link if my instruction was confussing:
http://www.youtube.com/user/SecretLifeOfaBioNerd?blend=2&ob=1#p/c/70C48F30F2B8B703/3/YLbivdOl-ekIt is Secretlifeofabionerd's video from Youtube The part you want is at time 2:07min but I def. recommend watching the whole video and all her videos. She is very talented
-
 Step 9
I then just simply tied those swirled pieces of fabric to their own jump rings alternating short from long
-
 Step 10
To hang your piece of art I ran two pieces of ribbon through the jump rings at equal points on the CD
-
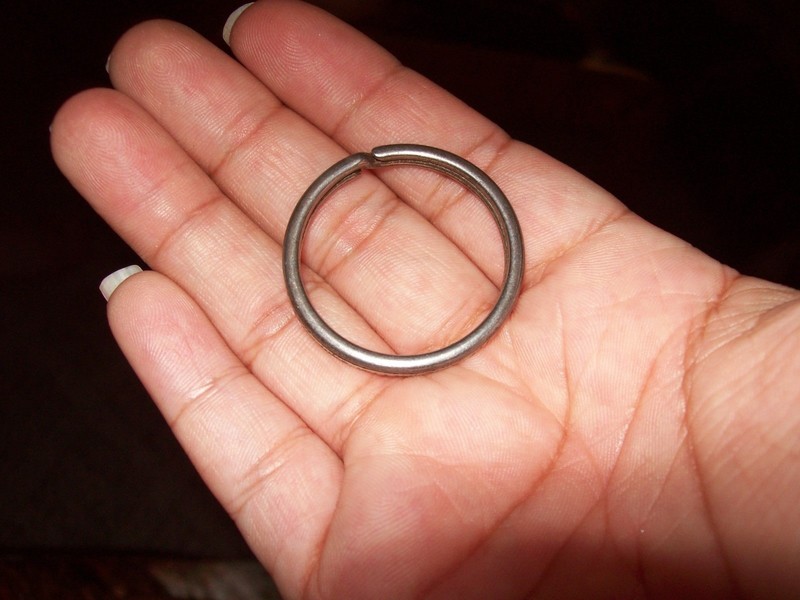
 Step 11
I just tied simple knots through a key ring holder and voila!!
-
 Step 12
You're Done