


About
Make a happy hubcap wall garden for yourself, and save the earth with repurposed hubcaps. Guaranteed to make you smile!
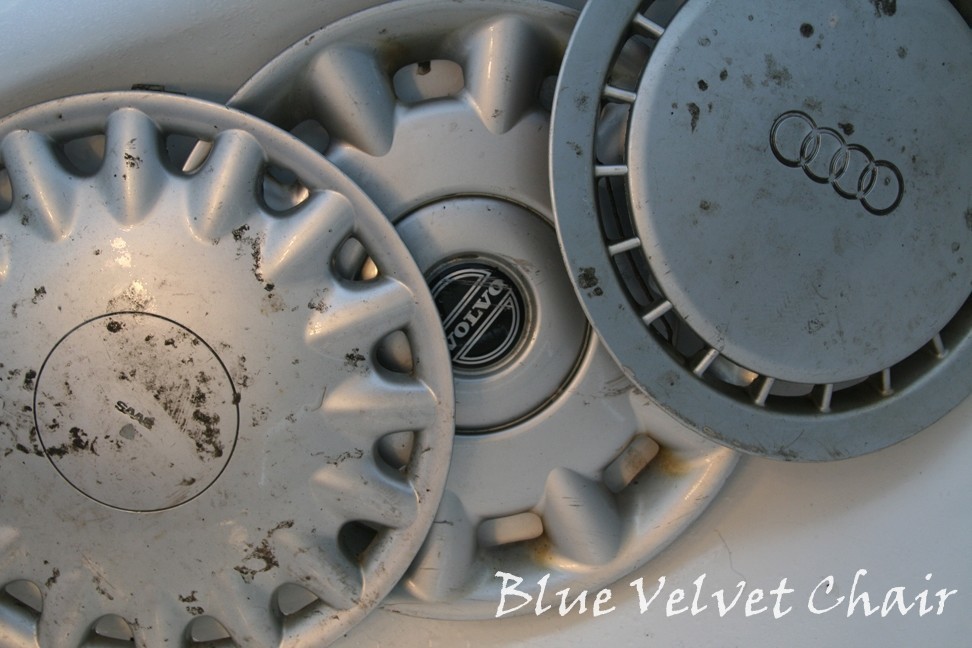
How many of you have driven past lost and abandoned hubcaps on the side of the road and thought to yourself, "I could do something with those!" Well...I thought that exact thing for years and finally did something about it! It all started with a quick roadside hubcap hunt (mentioned in DIY Sneak Peek post on my blog at bluevelvetchair.blogspot.com a little over a week ago), which made me the proud owner of a Saab, a Volvo, and an Audi all at once...the only time I'll ever say that in my lifetime!
So, home to the bathtub they went for a good scrub - which also provided me with the necessary motivation to give my bathtub a good cleaning afterwards. Bonus!
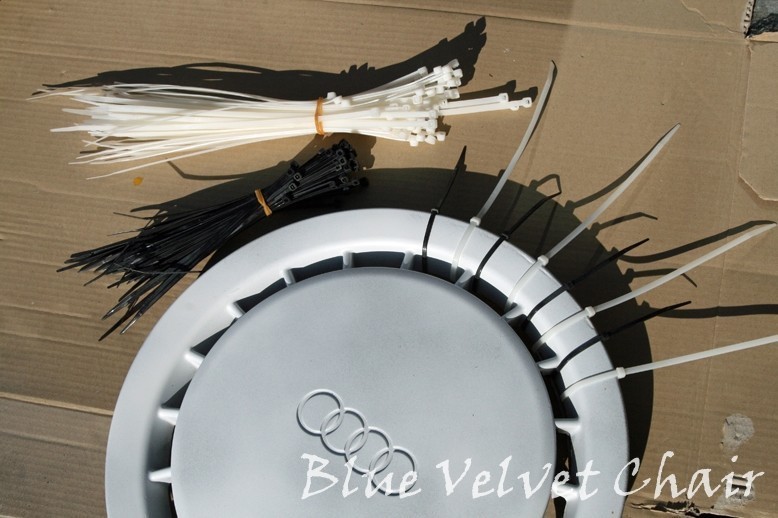
I applied a quick coat of spray primer - didn't worry about full coverage...just enough to give the plastic hubcaps a bit of support to hold the paint. Remember when hubcaps were actually metal? Nowadays they are so lightweight, so I already knew I wanted to create a 'wall garden'. I left one of the hubcaps turned over in the photo so that you could see that I didn't worry about getting all the grease and grime off the back sides...it won't show in the end, so no problem to skip that step and save yourself some time.
I found zip ties (cable ties) in the garage and attached them around the openings at the outer edge of the hubcap (we had two different lengths as luck would have it). These would be my petals.
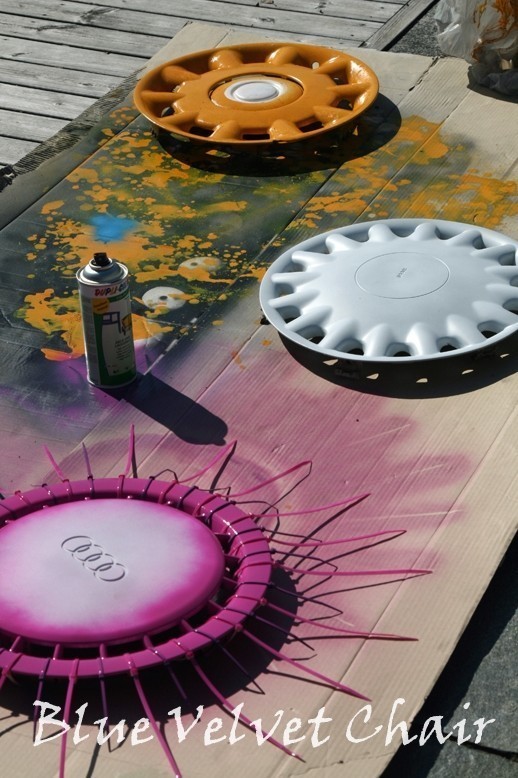
And now for my favorite part...spray painting!
In the photo above, you get a sneak peek at the other two flowers that will be added to my wall garden when I get them finished later this week. I painted a bright blue center to contrast with the pink/purple color chosen for the flower. It's okay if the edges bleed together a bit...makes it feel a little more airbrushed.
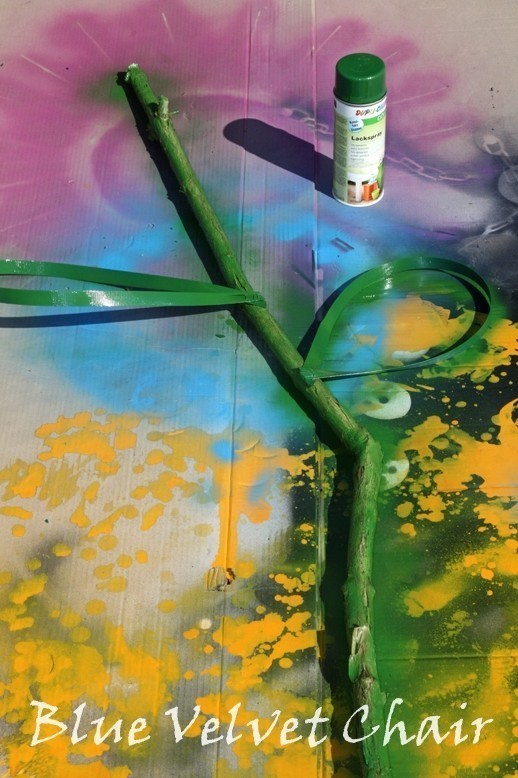
Making this flower not only forced me to give my bathtub a good scrub, it also provided one of my overgrown bushes outside with a nice springtime trim when I needed some branches to use for my flower stems. The leaves are made from plastic strapping - the kind that comes around boxes to hold them together during shipping. A quick trip to the back side of a local home improvement store gave me what I needed...and I even scored a couple of green straps that were perfect for this project.
I simply cut a length of the plastic strapping and used a staple gun to hold it in place.
More fun with spray painting! This time with green.
After my first failed attempt at giving the flower center a final flourish (it looked more like a boob than a flourish), I opted for some flat glass beads that I've had stuffed in a drawer for forever...they gave just enough flourish. I used an all-purpose clear bonding glue (kinda like super glue) that worked a charm.
Ah, there she is. Flora, the first bloom on my wall garden. I put a wire hook on her back side - easy to do because there are so many hook openings or wires already on the back of the hubcap - and hung her on an existing screw that was coming out of our brick home. The stem is simply supported by the ground and the flower, but it will soon get its own little support to keep it attached to the wall properly.
The wall - soon to be wall garden - is just begging for more of these colorful little bits of eye candy. I can't wait to get the others finished.
I hope you'll stop by Blue Velvet Chair later this week to see if the wall garden has bloomed! And I can't wait to see some happy hubcap flowers bloom in your garden soon.
Until next time...
Michael
Downloads
- hubcapflower.jpg 516 KB [ Download ]
-
 Key West Witch favorited Hubcap Flower Garden
29 Jun 09:36
Key West Witch favorited Hubcap Flower Garden
29 Jun 09:36
-
 Adrienne S. added Hubcap Flower Garden to YARD ART
29 Apr 21:00
Adrienne S. added Hubcap Flower Garden to YARD ART
29 Apr 21:00
-
 Harmonee.seal added Hubcap Flower Garden to Gardening Fun
19 Jul 02:46
Harmonee.seal added Hubcap Flower Garden to Gardening Fun
19 Jul 02:46
-
 Katharine C. favorited Hubcap Flower Garden
23 Aug 18:02
Katharine C. favorited Hubcap Flower Garden
23 Aug 18:02
Mike posted this project as a creation without steps
Here are some similar tutorials to help you make this one!


