


About
Save your sewing machine from extra wear and tear by servicing it yourself!
This step-by-step tutorial shows you how to thoroughly clean and re-oil your sewing machine from top to bottom. No need to pay someone to service your machine when you can do it yourself.
-
 Susana F. favorited How To Service Your Sewing Machine Yourself
20 Jan 16:12
Susana F. favorited How To Service Your Sewing Machine Yourself
20 Jan 16:12
-
Susana F. added How To Service Your Sewing Machine Yourself to techniques
18 Jan 18:47
-
 Key West Witch added How To Service Your Sewing Machine Yourself to Sewing
20 Mar 21:43
Key West Witch added How To Service Your Sewing Machine Yourself to Sewing
20 Mar 21:43
-
 Linda of Nice dress! Thanks, I made it!! favorited How To Service Your Sewing Machine Yourself
03 Jul 13:57
Linda of Nice dress! Thanks, I made it!! favorited How To Service Your Sewing Machine Yourself
03 Jul 13:57
-
 Shelly S. added How To Service Your Sewing Machine Yourself to DIY
23 Aug 03:37
Shelly S. added How To Service Your Sewing Machine Yourself to DIY
23 Aug 03:37
-
Shelly S. favorited How To Service Your Sewing Machine Yourself
23 Aug 03:37
-
 Linda D. added How To Service Your Sewing Machine Yourself to Sewing
31 Mar 09:39
Linda D. added How To Service Your Sewing Machine Yourself to Sewing
31 Mar 09:39
-
Linda D. favorited How To Service Your Sewing Machine Yourself
31 Mar 09:39
-
 Chloe commented on How To Service Your Sewing Machine Yourself
07 Mar 22:47
Chloe commented on How To Service Your Sewing Machine Yourself
07 Mar 22:47
-
 cathy s. favorited How To Service Your Sewing Machine Yourself
07 Mar 11:36
cathy s. favorited How To Service Your Sewing Machine Yourself
07 Mar 11:36
-
 Step 1
Your manual can be a crucial resource to assist you in this process. Look for the sections labeled "maintenance" or "troubleshooting". The manual will also have helpful diagrams of your machine that you can reference throughout this tutorial. If you don't have a manual, most can be found online to download, or on sites such as Ebay or Etsy to purchase.
I would like to say that these instructions are best for older machines. By older I mean most machines from the late 90's and older. Most brand new machines don't leave you the option to service them this thoroughly, and therefore you'd have to take them to a sewing machine repair shop. This is a good example of why I prefer vintage sewing machines to new ones, but that's info for another post in the future.
-
 Step 2
Remove all thread spools, the bobbin, the bobbin case and the needle. Set them aside, somewhere safe.
-
 Step 3
Remove the screws from the top of your sewing machine. Mine in particular has 3, yours may have more or less. Some machines don't have any screws at top, but instead have a hinged lid that opens.
-
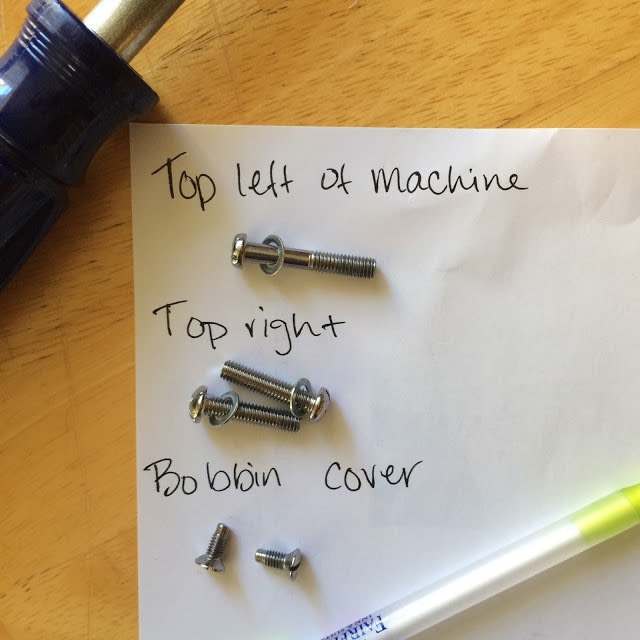
 Step 4
Note if there are washers with the screws and that they may be different sizes. Be sure to make a note of which screw fits in which opening. I recommend making a sheet that looks like this:
-
 Step 5
Next, remove the top cover. Some machines have a metal bracket underneath that keeps the lid on tight, you may have to push the lid back (away from you), or forward (toward yourself) to get the bracket to unhook.
-
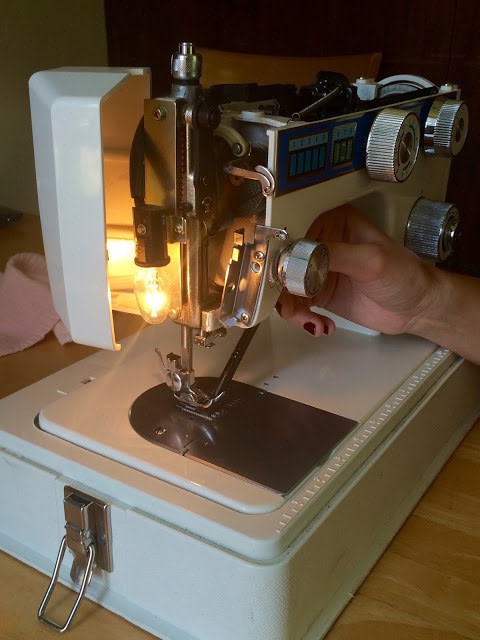
 Step 6
And then you'll see this! The inner workings of your machine. Take a moment to appreciate all the work it does for you :) Turn your hand wheel towards you and take a look at everything that moves in there.
-
 Step 7
Cleaning the Top of the Machine:
You're now going to take a rag and clean out all the old, nasty, dirty grease. A knitting needle tucked inside a rag becomes a handy tool for reaching those smaller spaces. A toothbrush may come in handy during this step as well. I wouldn't advise using your soft brushes for removing grease, they're better for lint removal later on.
-
 Step 8
Be gentle: Use kid gloves when cleaning your machine. It doesn't require a lot of force or pressure to get your machine nice and clean. No sharp jabbing! Being too rough will greatly increase your chances of bumping springs, and dislodging crucial pieces.
-
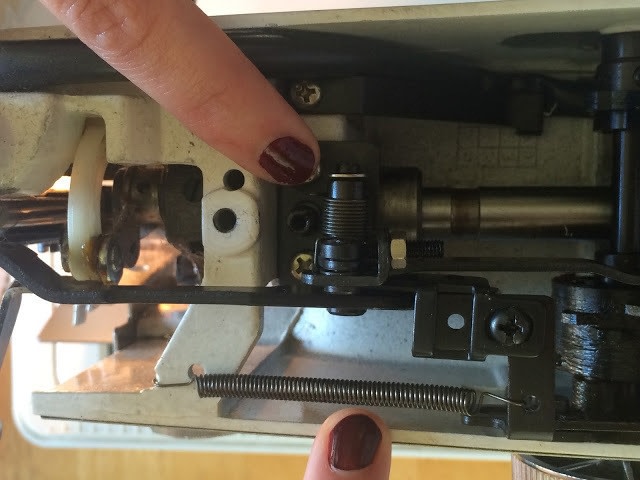
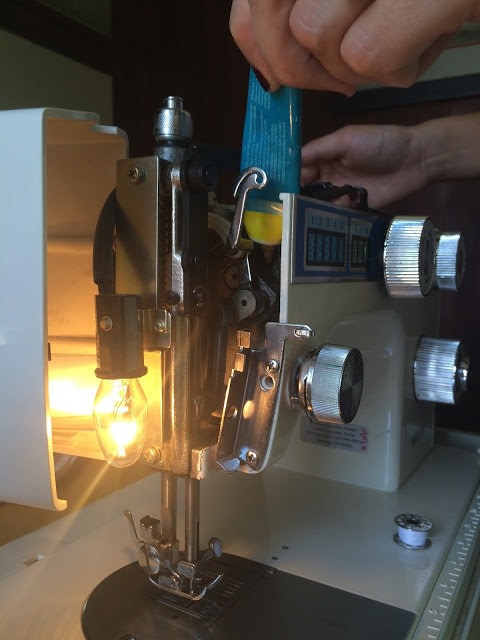
 Step 9
Watch out for springs! These little babies are sensitive, fragile and will screw up the entire function of your machine if they're dislodged or broken. See the photo below for examples of placement. If they are covered in lint, use a soft brush (like a makeup brush, or the sewing machine-specific cleaning brush) to brush it off. If they are coated in dirty grease, use the rag to gently wipe it off.
-
 Step 10
Here are pictures of the gross stuff you may encounter in your machine. Hunks of dried grease, dirty grease, lint, threads, etc. all needs to come out! Be sure to clean each place, then turn the hand wheel 1/4 turn so that you can see and clean all sides of the wheels, cogs, etc.
-
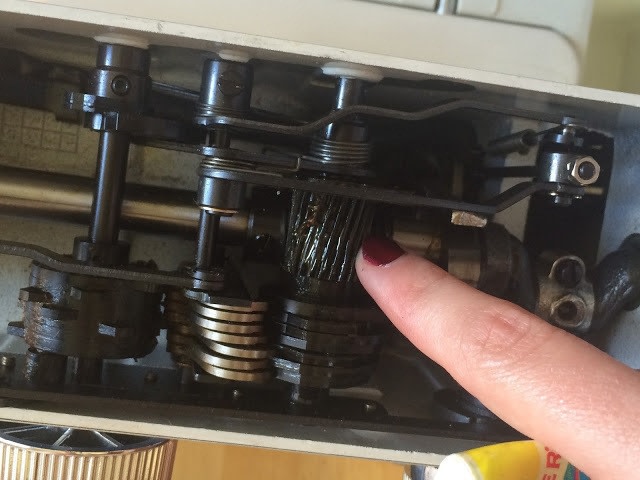
 Step 11
You'll also want to turn your stitch selector, stitch width, and stitch length knobs (depending on where they're placed on your machine) to make sure that you clean all sides of their mechanisms. The photo below shows the built up grease on my stitch selector knob. To get it all clean, I turned the knob through each stitch to clean entirely around the cog.
-
 Step 12
Oiling the Top of the Machine:
Once you've thoroughly cleaned the top part of your machine, we need to replace all the grease we just removed. Oil helps to keep all the parts and pieces moving smoothly, and prevents excess wear, friction, heat and noise.
-
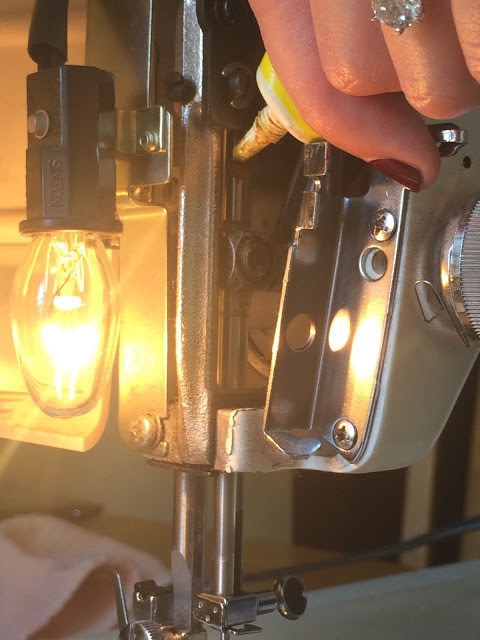
 Step 13
We are going to grease any two parts that move against one another.
-
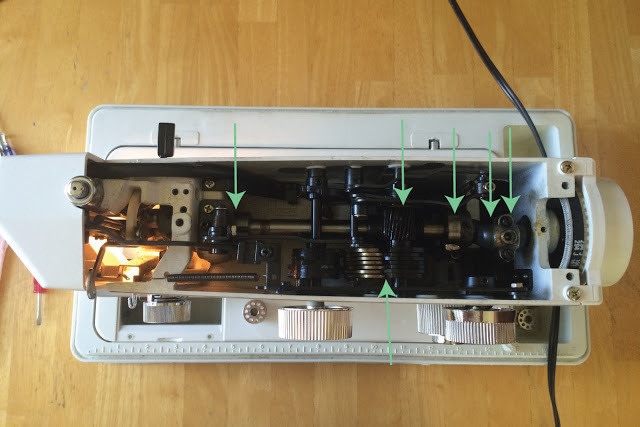
 Step 14
Here, I have pointed to the places I put oil. Your machine may have more or less moving parts.
-
 Step 15
...
-
 Step 16
What not to do:
• Don't grease the belts. I am pointing to the drive belt in my sewing machine in this picture. If any of the belts looks frayed, or cracked, take your sewing machine to a professional to have it replaced.• Don't over oil. Too much oil can cause the pieces to slip and malfunction. If you're using the liquid oil, it only takes a drop or two per part. If you're using the thick stuff, a half-pea sized will be more than enough.
-
 Step 17
Cleaning the Left Side and the Bobbin Housing:
Now, open the left side panel on your machine. Mine has a hinged door that opens, yours may have screws. If it has screws, be sure to add them to your paper sheet and label them so that you don't forget where they go! It's also a good time to brush any lint off of the tension knob (if that's where yours is placed), and the thread guides along the front of the machine.
-
 Step 18
Next remove the foot, and the needle if you haven't already.
-
 Step 19
Take a soft brush and clean the dogfeed (those are the little teeth that stick up from the bottom of your machine).
-
 Step 20
Now remove the needle plate (also known as the throat plate). Mine has screws, (see above) some have a bracket underneath so that you can slide the plate off by pulling it towards you.
-
 Step 21
...
-
 Step 22
Remove the lint that builds up underneath the needle plate. Below, you can see that mine was so dirty, I used a small screwdriver to gently push out large pieces of lint. Here's a good time to use your soft brushes & grease-free toothbrush as well.
-
 Step 23
Removing the Bobbin Housing:
Taking apart the bobbin mechanism can be a little intimidating, but follow along and you shouldn't have a problem. If you have a top loading bobbin, you do not need to follow these steps. Because I don't currently have a top loading machine in my possession, you may want to see what you can find on YouTube, and I will add pictures of that process as soon as I can!
For a front loading bobbin: you should see two small arms on either side of the bottom of the bobbin mechanism. Gently push those arms away from the case.
-
 Step 24
You can then remove the first metal piece (known as the 'race').
-
 Step 25
You will then be able to remove the second metal piece (known as the 'hook').
-
 Step 26
Gently brush out the entire bobbin mechanism. Brush over the hook and race and collect all the lint you find. Mine is below. Gross.
-
 Step 27
Now, to oil the left side and the bobbin housing:
Again, turn your hand wheel and watch what moves inside the left side panel. Place a drop of oil anyplace where two mechanical pieces move against one another.
-
 Step 28
...
-
 Step 29
Be sure to place a small amount on the needle bar (the cylindrical piece of metal that moves the needle up and down).
-
 Step 30
For the bobbin mechanism, be sure to place a small amount behind the part that swings back and forth (move the hand wheel in full rotations to find this part). See the photo below.
-
 Step 31
Cleaning the Underside of the Machine:
My machine has a small plastic arm at the side that holds the machine into it's bottom case.Whether your machine is in a case like mine, in a table, or not in any kind of housing, you'll need to tip it back so that you can look underneath it. I rested mine on a stack of books, but you could also lay a towel down on your workspace and set it in on it's back.
-
 Step 32
Take your soft cloth and gently wipe down the underside as well as the bottom of the case, if the machine is in one.
-
 Step 33
...
-
 Step 34
Oiling the Underside of the Machine:
Once more, turn your hand wheel and watch what moves underneath the machine. Place a drop of oil anyplace where two mechanical pieces move against one another. Look for very small movements at the underside of your machine, not all parts here make drastic movements.
-
 Step 35
...
-
 Step 36
...
-
 Step 37
Reassembling the Bobbin Housing:
Firstly, turn your hand wheel until the inner crescent moon shaped piece in the housing is on the right.
-
 Step 38
Secondly, pop the 'hook' into the housing, it will only fit in all the way if the crescent-moon shaped piece is in the right place. You may have to adjust it's position using the handwheel.
-
 Step 39
Third, place the 'race' over the top of the hook and the crescent-moon shaped piece. See that itty-bitty notch at the bottom of the housing between the two black arms? That notch helps align the 'race' to the rest of the hous
-
 Step 40
Lastly, pop the little black arms over the little metal buttons on the housing. Be sure that the dogfeed lever to the right of the housing (it usually has little red arrows on it), is in it's upright position.
-
 Step 41
To Finish Up:
Lastly, replace all the screws in your machine (top, side and bobbin), and give the machine one last good wipe down. My machine gets especially dusty on the back side and in the grooves of the case.
-
 Step 42
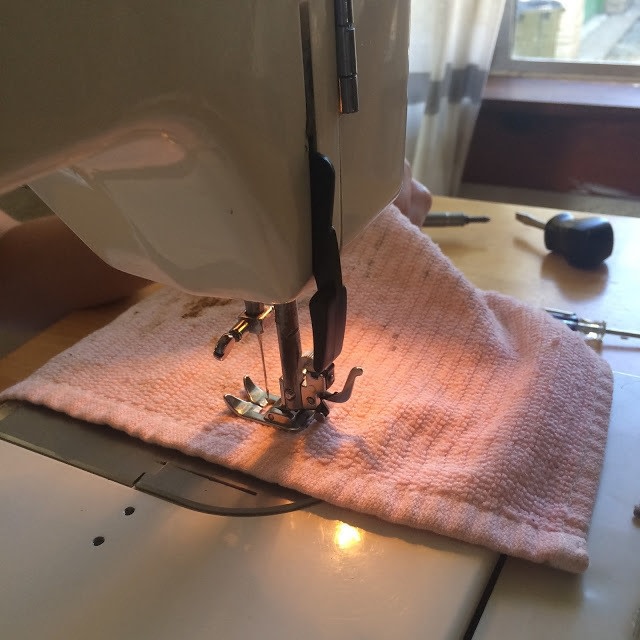
Then, replace the needle, and using a piece of fabric that you don't care about (you could even use the rag you've used through this whole process), run the machine at full speed, without any thread in it. This moves the oil throughout the machine and allows any excess oil to work it's way out. You may see oil on the fabric, and that's OK. Continue using the machine without any thread until you don't see oil on the fabric anymore. Then, using thread you don't care about, thread the bobbin and the top of the machine and sew some more. You may see that the thread is greasy (either on the top or the bottom), and this is OK too.


I just wanted to point out one thing; for personal safety, it would be a good idea to unplug the machine before servicing it yourself.