


About
Create incredible designs using magnets on your fridge.
Magnetic nail polish has been around for a while now, but now you can create your own magnets with designs you can't buy in the shops.
-
 Coreen M. favorited How To Make Your Own Magnet Designs For Magnetic Nail Polish
29 Sep 13:17
Coreen M. favorited How To Make Your Own Magnet Designs For Magnetic Nail Polish
29 Sep 13:17
-
 Phoenix M. favorited How To Make Your Own Magnet Designs For Magnetic Nail Polish
17 Jul 04:41
Phoenix M. favorited How To Make Your Own Magnet Designs For Magnetic Nail Polish
17 Jul 04:41
-
Heather H. favorited How To Make Your Own Magnet Designs For Magnetic Nail Polish
08 Jun 17:30
-
Beth B. favorited How To Make Your Own Magnet Designs For Magnetic Nail Polish
12 May 23:13
-
Brenda M. favorited How To Make Your Own Magnet Designs For Magnetic Nail Polish
21 Mar 04:30
-
Megan M. added How To Make Your Own Magnet Designs For Magnetic Nail Polish to *NaiL ArT*
04 Dec 01:15
- Castiel favorited How To Make Your Own Magnet Designs For Magnetic Nail Polish 25 Nov 19:01
-
 craftgirl14 favorited How To Make Your Own Magnet Designs For Magnetic Nail Polish
20 Nov 02:57
craftgirl14 favorited How To Make Your Own Magnet Designs For Magnetic Nail Polish
20 Nov 02:57
-
Louisa R. favorited How To Make Your Own Magnet Designs For Magnetic Nail Polish
16 Nov 22:36
-
 fetisha favorited How To Make Your Own Magnet Designs For Magnetic Nail Polish
13 Nov 18:47
fetisha favorited How To Make Your Own Magnet Designs For Magnetic Nail Polish
13 Nov 18:47
-
 Step 1
Firstly, did you know that pretty much every single flat fridge magnet will create a beautiful line design on magnetic nail polish. You know the ones that you usually get from trades people or with handy calendars on them.
You will need to experiment with the magnets you have to see which ones create the size lines you want.
As you can see, if you just want to do a regular line design, you can curl your magnet around your finger a bit to get the design all the way around. Especially if you have really curved nails sideways.
-
 Step 2
Here is the example of how a regular fridge magnet works to create a striped design.
-
 Step 3
Make sure you're happy to destroy the magnet you choose, because you will be cutting it up.
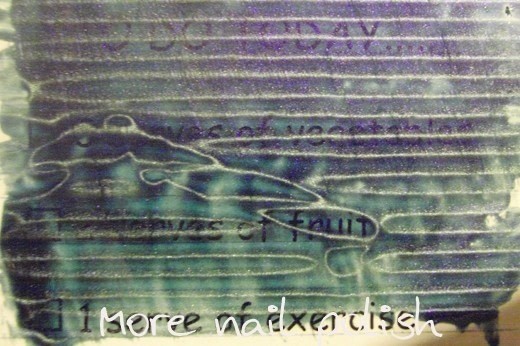
You can check the polarization lines on a magnet by painting magnetic nail polish on the printed side. You may find some areas of the magnet are not suitable to use such as parts of this one.
-
 Step 4
Here I've photographed a piece of paper with lines on it, to represent the magnet with the lines on it.
I will show you how to cut the magnets using this example lined piece of paper.
-
 Step 5
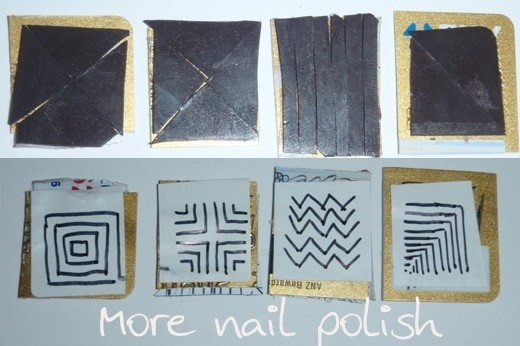
Pretend this piece of paper is your magnet and grab your scissors. Then cut up the magnet to form various designs.
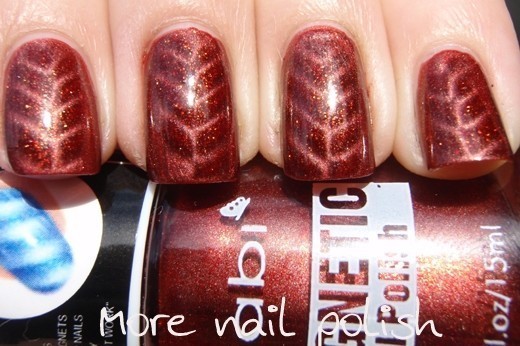
This first design is a simple chevron. Just cut the magnet at 45 degree angles and then line up the magnet pieces so the lines are on a right angle to each other.
-
 Step 6
Here is the Chevron design on the nail.
-
 Step 7
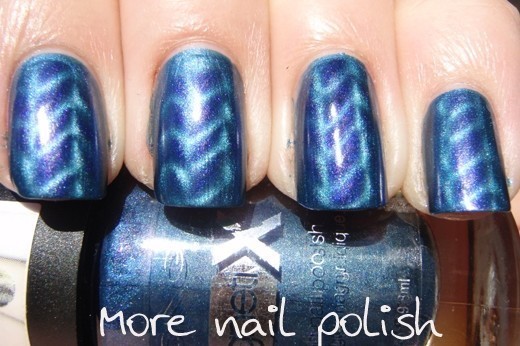
Another design can be made with zigzag lines by cutting the magnet in thin strips on a 45 degree angle, about 1-2mm thick. You then aligned the strips so the lines formed a zigzag.
-
 Step 8
Here is the zigzag design on the nail.
-
 Step 9
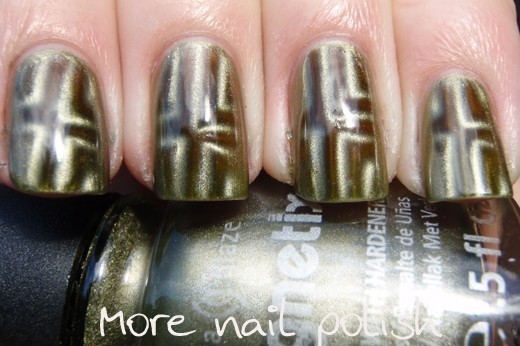
This design is created using four small triangles with the magnetic lines going outwards which creates a multiple cross effect.
-
 Step 10
Here is the cross design on the nail.
-
 Step 11
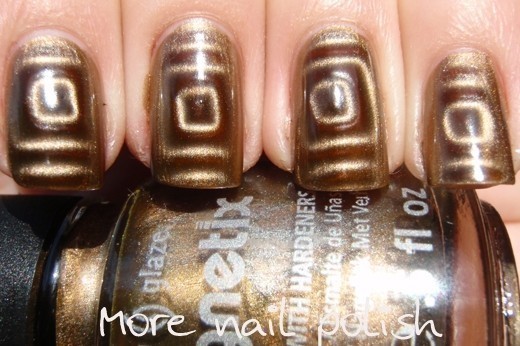
This last design uses small triangles again, but this time with polarization lines going around sideways. This creates a small square in the middle with concentric squares circling it.
-
 Step 12
Here is the concentric squares design on the nail.
-
 Step 13
When you are happy with your designs and have them all lined up, grab some double sided sticky tape and apply some to a small piece of plastic. I used the back of an old credit card that I cut up.
I then transferred my magnets onto the sticky tape, with the printed side down. I then did some tests on a nail to see if the magnets were lines up ok. If you need to adjust a magnet you can just lift if off the sticky tape and move it.
Finally I stuck a little label on the other side to indicate what each of my magnets were.


Comments


