


About
Super easy icing techniques to make them match everytime
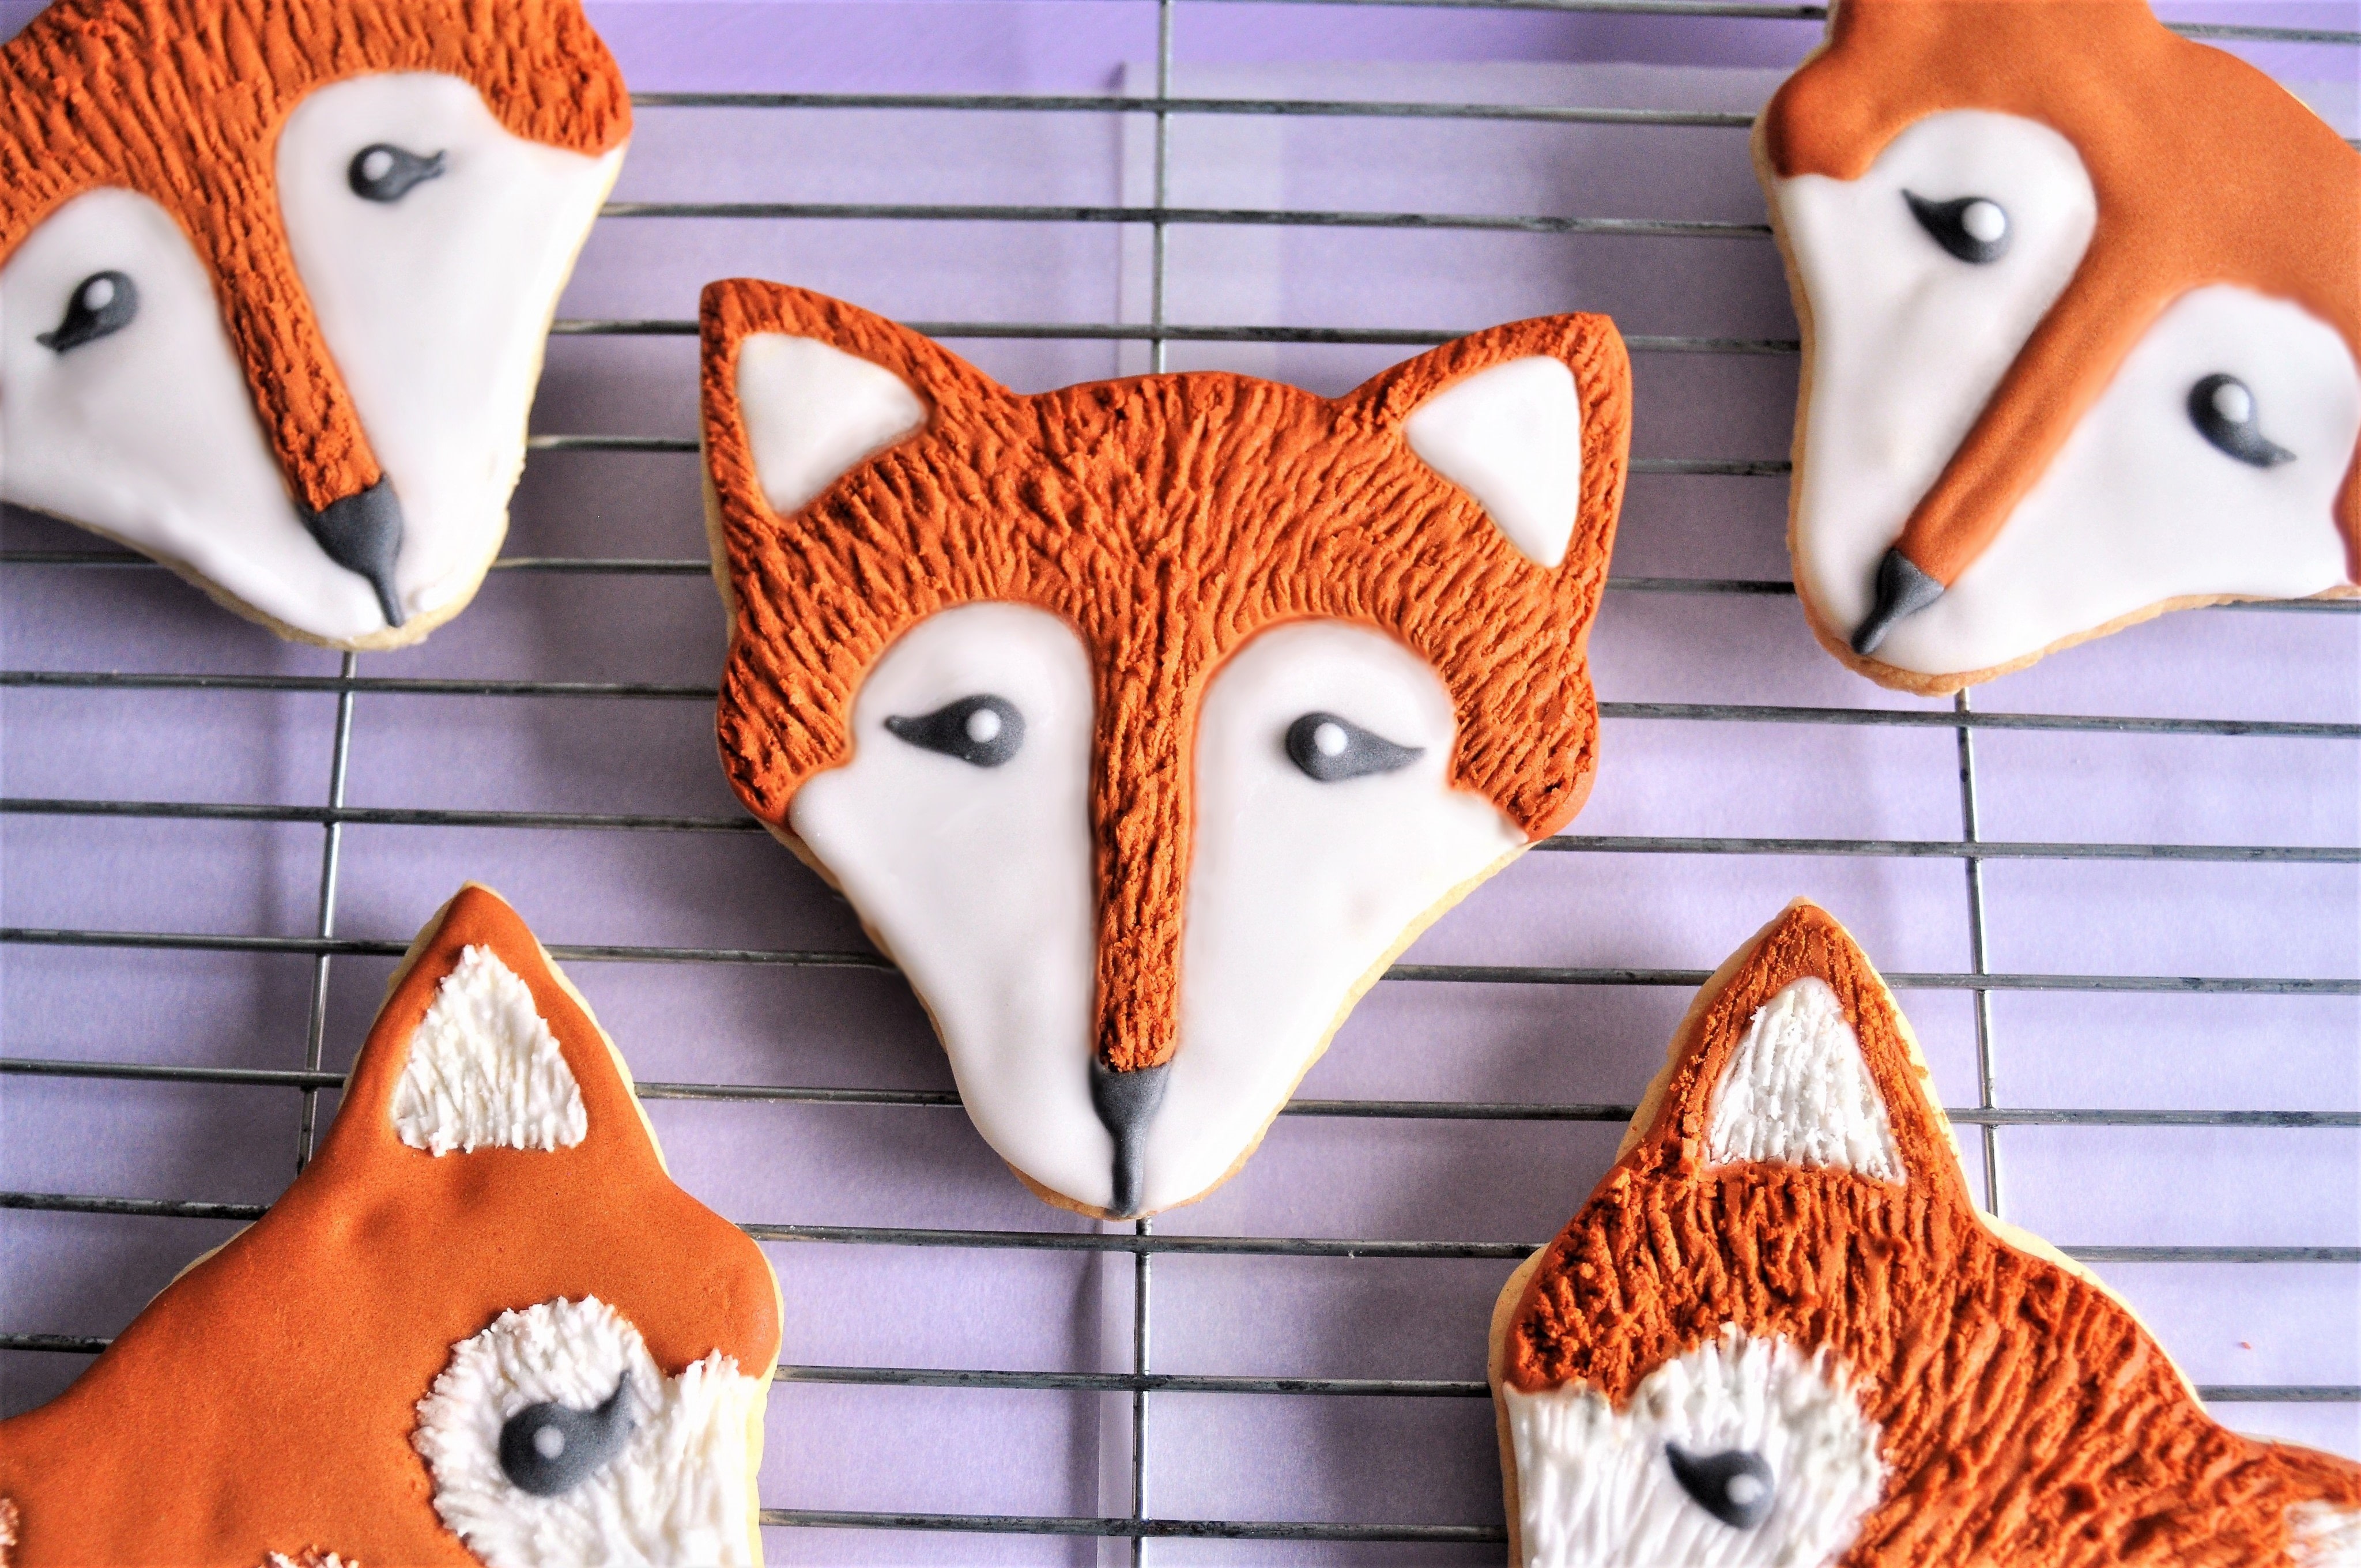
Fox Faced Cookies to continue my learning curve of cookie icing. I really struggle with cookie icing but I am relentlessly trying to change that. I decided to try out a technique I usually keep for salt dough decorations. It involves using a needle to pierce through a stencil into the cookie to create guide lines. I’m not a natural artist so, drawing things freehand and expecting them to match each other is totally beyond my scope. Add a piping bag to the mix and I’m a floundering mess. Next, I kept the design super simple so that I could use a needle to neaten up the edges and take the pressure off my piping skills. Finally, I added a little texture to give these furry cuties real fur, well almost.
Tags
-
 Cherise.R added How To Make Foxy Cookies to Labyrinth Party
09 Apr 11:58
Cherise.R added How To Make Foxy Cookies to Labyrinth Party
09 Apr 11:58
-
 VillainousNinja favorited How To Make Foxy Cookies
10 Jul 23:05
VillainousNinja favorited How To Make Foxy Cookies
10 Jul 23:05
-
 mmotse03 favorited How To Make Foxy Cookies
07 Mar 19:37
mmotse03 favorited How To Make Foxy Cookies
07 Mar 19:37
-
 JadeSucksAtLife favorited How To Make Foxy Cookies
25 Feb 08:36
JadeSucksAtLife favorited How To Make Foxy Cookies
25 Feb 08:36
-
 Wrap Champion published her project How To Make Foxy Cookies
24 Nov 09:00
Wrap Champion published her project How To Make Foxy Cookies
24 Nov 09:00
-
Step 1
Cream together the butter and sugar with an electric whisk. Gradually add the beaten eggs, whisking all the time.
Gently fold in the flour, be careful not to overwork the dough.
Cover with film and place in the fridge for 30 minutes.
-
 Step 2
While that’s chilling, draw a fox face outline on a piece of card. Cut this out and then use it to create a fully drawn fox face on parchment paper, in pencil
Remove the dough from the fridge and roll to ½ cm thickness on a floured worktop.
Place the fox faced card on top and cut around with a sharp knife to make fox shaped cookies. Continue until you have used all the dough.
-
Step 3
Pre-heat the oven to 190C/170 fan. Place the cookies on a lined baking tray and bake for 10-12 minutes.
Remove from the oven and leave on the tray to firm up for 5 minutes before transferring to a wire rack to cool completely.
-
Step 4
Whisk the egg white until it’s fluffy but not stiff. Gradually whisk in the icing sugar until smooth.
Split the mix equally into 2 bowls and put one to the side, this will stay white.
-
Step 5
From the other, take out 2 tbsp of icing and place in a cup. Colour the remainder in the bowl orange and the icing in the cup black.
For all three colours, the icing should be a 10 second consistency, meaning if you draw a line through the centre it will take 10 seconds to disappear. If it doesn’t, add water slowly until it does
Cover the icing with cling film and move to the side (leaving it to rest allows the air bubbles to escape). -
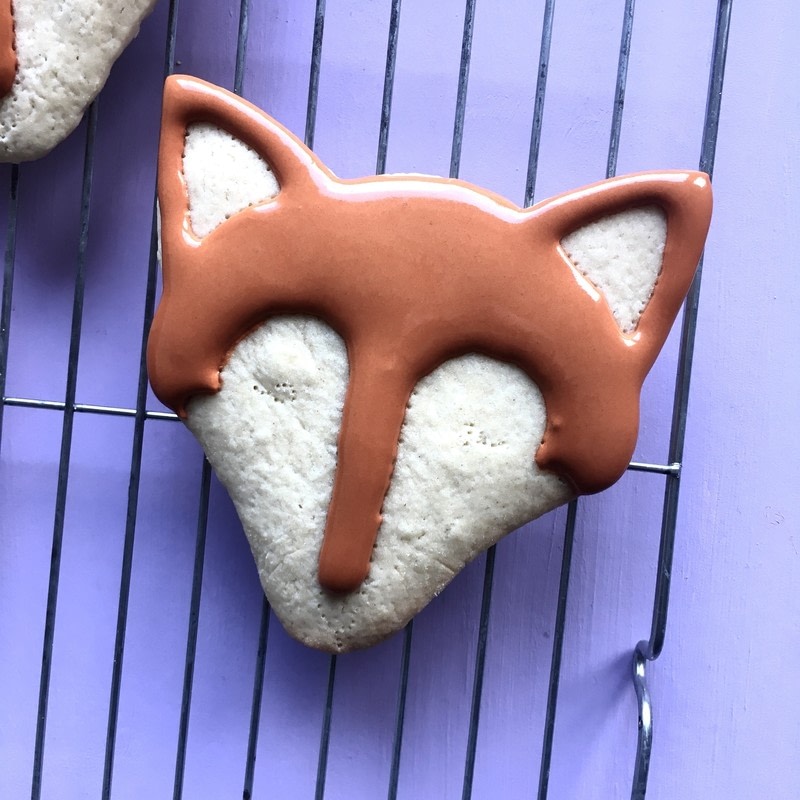
Step 6
Back to the cookies and the fox faced parchment paper. Place the paper on top of a cookie, lining up the edges. The pencil side should be face up
Using a needle, pierce little holes all around the stencil lines, this will transfer the image onto the cookie, providing you with guide lines and making it easier to decorate later
-
 Step 7
Once all your cookies have a pin guide, transfer the icing to 3 piping bags. If you have small round nozzles, great, if not just cut small holes in the end of the bags
Pipe the orange colour first, don’t worry too much about staying in the lines. When you’re happy there is enough orange, take the needle and use it to smooth out the icing and straighten the edges. Leave to dry for 30 minutes
-
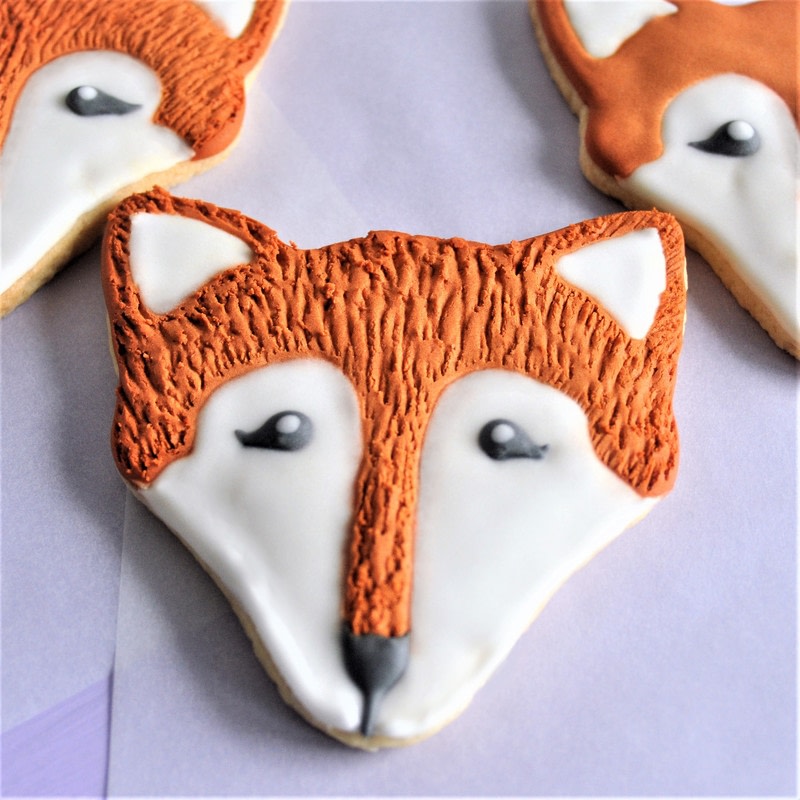
 Step 8
After 30 minutes pipe on the white icing. Again, use the needle to even out the edges. Leave to dry for 30 minutes.
Take the needle and make little scores all over the orange icing to create a furry texture.
-
Step 9
Finally, add in a little back nose and eyes, I added a little flick at the edges because apparently my fox loves Amy Winehouse.
Leave to dry completely over night.
Enjoy! And try not to feel too bad that you’re eating something so freaking adorable