

About
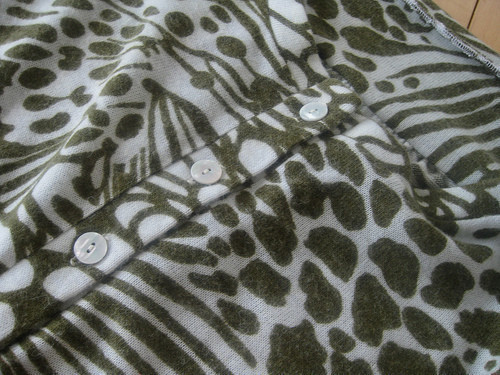
Turn your favorite T-shirt pattern into a cardigan
What do you get when you have a semi-large stash of sweater knits and every cardigan pattern disappoints? You get out your trusty Renfrew pattern and hack it up!
You can purchase the renfew pattern here. http://www.sewaholicpatterns.com/renfrew-top/
These instructions can also be used on any scoop neck T-shirt pattern.
Sample is sewn in a wool/acrylic blend sweater knit.
-
 Heather B published her project How To Convert Renfrew Into A Cardigan
02 Oct 19:22
Heather B published her project How To Convert Renfrew Into A Cardigan
02 Oct 19:22
You Will Need
-
Step 1
For this modification you'll need to trace the following Renfrew pieces,
1. Scoop front and Scoop front neckband
2. Back
3. Long sleeves and long sleeve hem bands
4. Hem Band
(Note Renfrew comes with 5/8th seam allowances but I've reduced mine to 1/4.) -
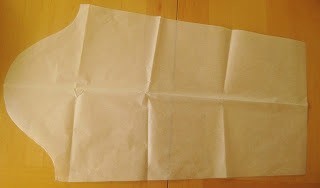
Step 2
Starting with the front - Take the scoop front and shorten the length by 2". Then add 1/4" extra width to the entire side seam. Add another 1/4" to the CF since you'll be sewing a button band to it.
-
 Step 3
Next put your ruler on the shoulder seam of the front. Measure 1 3/4" down from stitching line (not edge of pattern) and draw a line parallel to the should seam. This is your front yoke line.
If you're going to do gathered yokes add some placement notches on this line before cutting it. Later you'll need them to know where to put your gathering stitches. On my sweater I put a notch 5/8"away from the stitch line on each side. Cut the pattern apart on the yoke line and then add seam allowance to the yoke edge. Label the top part Front Yoke and then set it aside. We will be using only the bottom half of the pattern next.
-
 Step 4
To add ease to make gathers you'll need to slash and spread the lower part of the front. Draw a line between the placement notches and parallel to the grain line though the entire length of the pattern. Now cut the line from the top almost all the way through to the bottom. You want to leave a little "hinge" for the pattern to swing open from. Take a scrap piece of paper and place it behind the cut. Spread the pattern open til there is an 1" gap, then tape the pattern piece to the scrap paper. Make sure you add some seam allowance to the now yoke seam line now. Trim off any extra paper and label this piece front. It should look something like this.
-
Step 5
Moving onto the back - Take the back and shorten the length by 2". Then add 1/4" extra width to the entire side seam.
-
 Step 6
From the CB line measure down 4" from seam line. Draw a straight line perpendicular to the grain line across the pattern piece. You'll only need to mark on placement notch since the pattern is on the half. Mine is 2.5" from the armhole stitch line.
Cut the pattern apart on the yoke line and then add seam allowance to both cut edges. Label the top part Back Yoke make sure it says Fold on the CB edge and then set it aside. Again we will be using only the bottom half of the pattern next. -
 Step 7
Once again we will be adding more lines to slash and spread on. Since I wanted to add 2" of ease to the half the back I drew in two lines parallel to the grain line. Both lines are cut almost all the way through and each is spread open 1". Fill in the gapes with scrap paper and tape down the cut edges. You'll want to true the yoke seam line a little bit. Just make sure it is smooth and it will probably have a tiny curve to it.
Add seam allowance to the yoke seam line edge, trim any excess paper off and label the pattern Back. It should look something like this. -
 Step 8
You can keep the shoulder seam or you can remove it and have a continuous yoke. I decided to remove the seam since the front yoke piece is so small. Simply tape the two pieces along the should seam line and you're done.
-
 Step 9
Now we will do some tiny changes to the sleeve. Add 1/4" to both side seams. I also shortened the length of my sleeve by 1/2" which is optional.
-
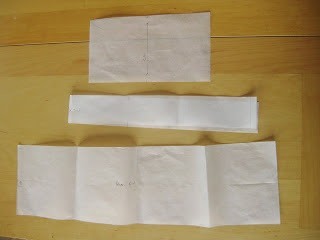
 Step 10
No changes are needed for the Hem and Sleeve bands. The Neck band gets 1/2" additional length added to each end. (If your fabric has plenty of stretch you may not need the extra length)
-
 Step 11
Finally you will need to draft a button band. The button band needs to be the length of the CF + half of the hem band + seam allowance doubled (Ahhh Maths!) and 2 1/4" wide plus your chosen seam allowance. You'll fold it in half and serge it on just like the other bands.