About
Hoop Art
A detachable collar is a super-fun way to update any outfit. I love to wear these collars with a sweater for a layered look without the bulk, or over a T-shirt for an unexpected touch. Brightly coloured hearts lend a punch of graphic charm and texture to any ensemble, but a floral motif would also be lovely. If you’d rather not sew your own collar, remove one from an existing shirt and stitch directly on that instead.
Stitches Used
• Back stitch
• Split stitch
Thread Colours Used
• Cornflower blue, 6 strands
• Dark sea green, 6 strands
• Light sea green, 6 strands
• Mauve, 6 strands
• Peach, 6 strands
• Red, 6 strands
• Straw, 6 strands
• Pearl cotton, black
-
 Rebecca favorited Heart Collar
15 May 06:05
Rebecca favorited Heart Collar
15 May 06:05
-
 Cindy H. favorited Heart Collar
26 Jun 12:20
Cindy H. favorited Heart Collar
26 Jun 12:20
-
 Luna D. favorited Heart Collar
25 Apr 05:53
Luna D. favorited Heart Collar
25 Apr 05:53
-
 Ungrateful bat favorited Heart Collar
20 Mar 19:50
Ungrateful bat favorited Heart Collar
20 Mar 19:50
-
 Crafterella featured Heart Collar
13 Mar 23:00
Crafterella featured Heart Collar
13 Mar 23:00
-
 Ms Dorito favorited Heart Collar
13 Mar 03:54
Ms Dorito favorited Heart Collar
13 Mar 03:54
-
 Sarah W. favorited Heart Collar
12 Mar 09:44
Sarah W. favorited Heart Collar
12 Mar 09:44
-
ForestFolk added Heart Collar to Inspiration for makes
05 Mar 12:20
-
 Search Press published her project Heart Collar
05 Mar 09:00
Search Press published her project Heart Collar
05 Mar 09:00
You Will Need
-
 Step 1
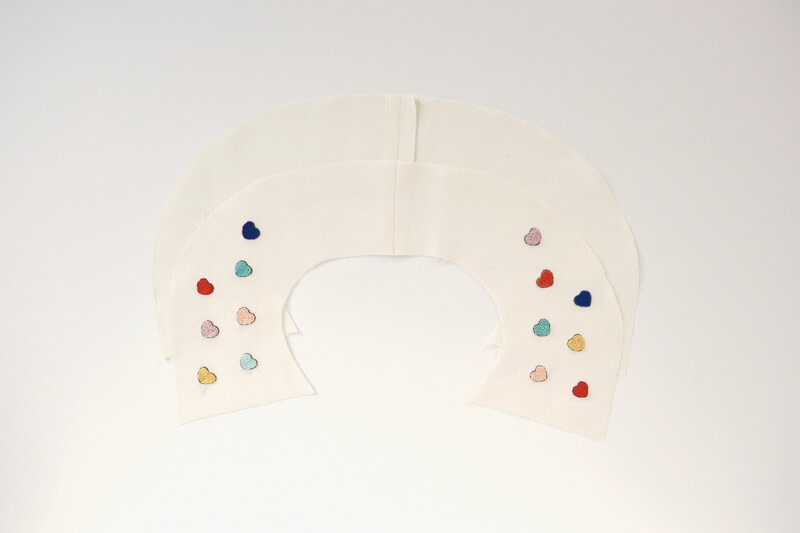
Mark two sides of the collar with the transferred heart motifs on the top fabric piece. Reverse the pattern for one side so you have mirror images. Leave excess fabric around the top pieces for stitching. Use the same method to mark the bottom fabric and interfacing pieces, and cut out.
-
 Step 2
Assemble the large piece of top fabric in the hoop. Fill in each heart with a continuous line of split stitch, beginning on the outside of the heart and working your way towards the centre. I used a variety of colours for the hearts.
-
Step 3
Use back stitch to outline each heart in black pearl cotton.
-
 Step 4
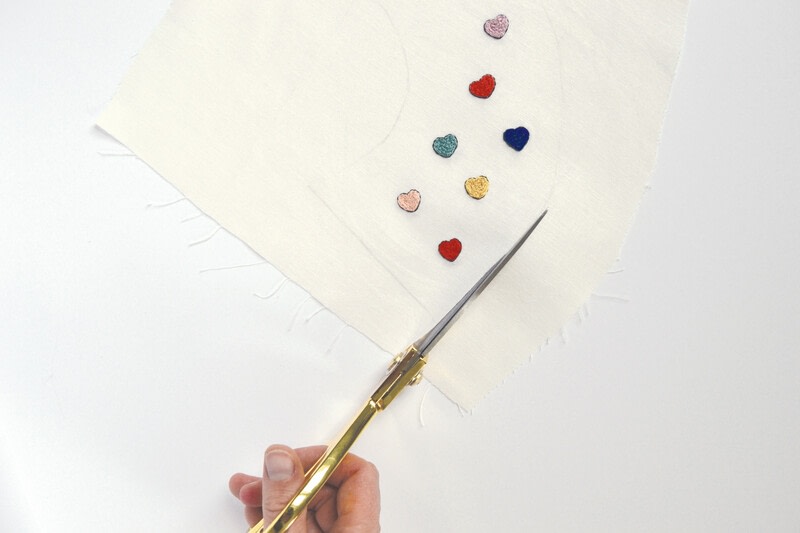
Use a hot iron to press out any wrinkles left by the embroidery hoop. Cut out the embroidered pieces along the marked lines.
-
 Step 5
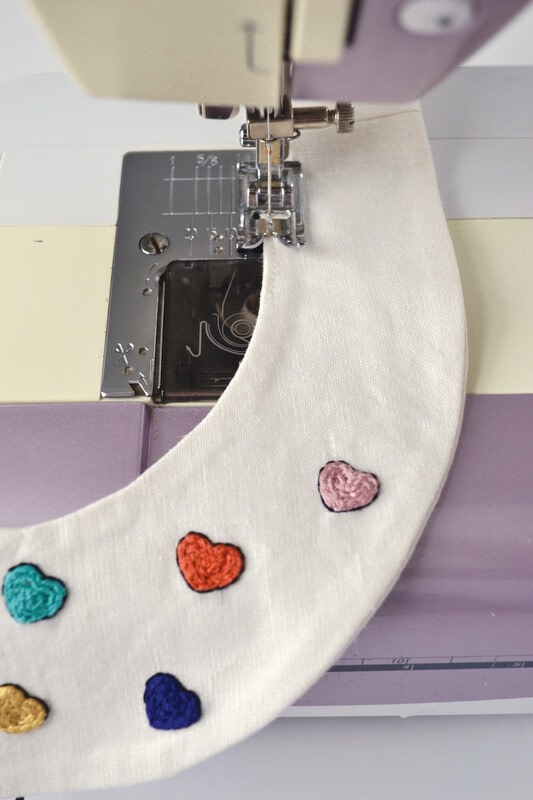
Join the top pieces together with right sides facing and machine stitch along the straight side with a 12mm (1/2 inch) seam allowance.
-
 Step 6
Press the seams open. Join the two bottom pieces of the collar in the same way.
-
 Step 7
Lay the pieces of interfacing on the back of the embroidered pieces of collar, with the rough side facing down, and press lightly with the iron to fuse.
-
 Step 8
Put the top and bottom pieces of the collar together, with the right sides facing in. Position one tie in each corner, as shown, with the longer ends running in between the fabric layers. Pin around the edges and where the tie is positioned to hold everything in place.
-
 Step 9
Machine stitch around the edge of the collar with a 12-mm (1⁄2-in.) seam allowance, using the edge of the interfacing as a guide. Leave a 7.5-cm (3-in.) opening in the centre of the smaller curve for turning the collar right side out.
-
 Step 10
Trim the seam allowance to 6mm (1/4 in.), clip the corners, making sure not to cut into any of your stitches, and carefully snip a few short notches into the curved edges.
-
 Step 11
Turn the collar right side out through the opening, using a point turner or other pointed object to push out the seams and corners. Tuck the edges of the opening inside. Press the edges with a hot iron.
-
 Step 12
Hand-or machine-stitch the opening of the collar closed, then trim the ties to the desired length and knot the ends.