
About
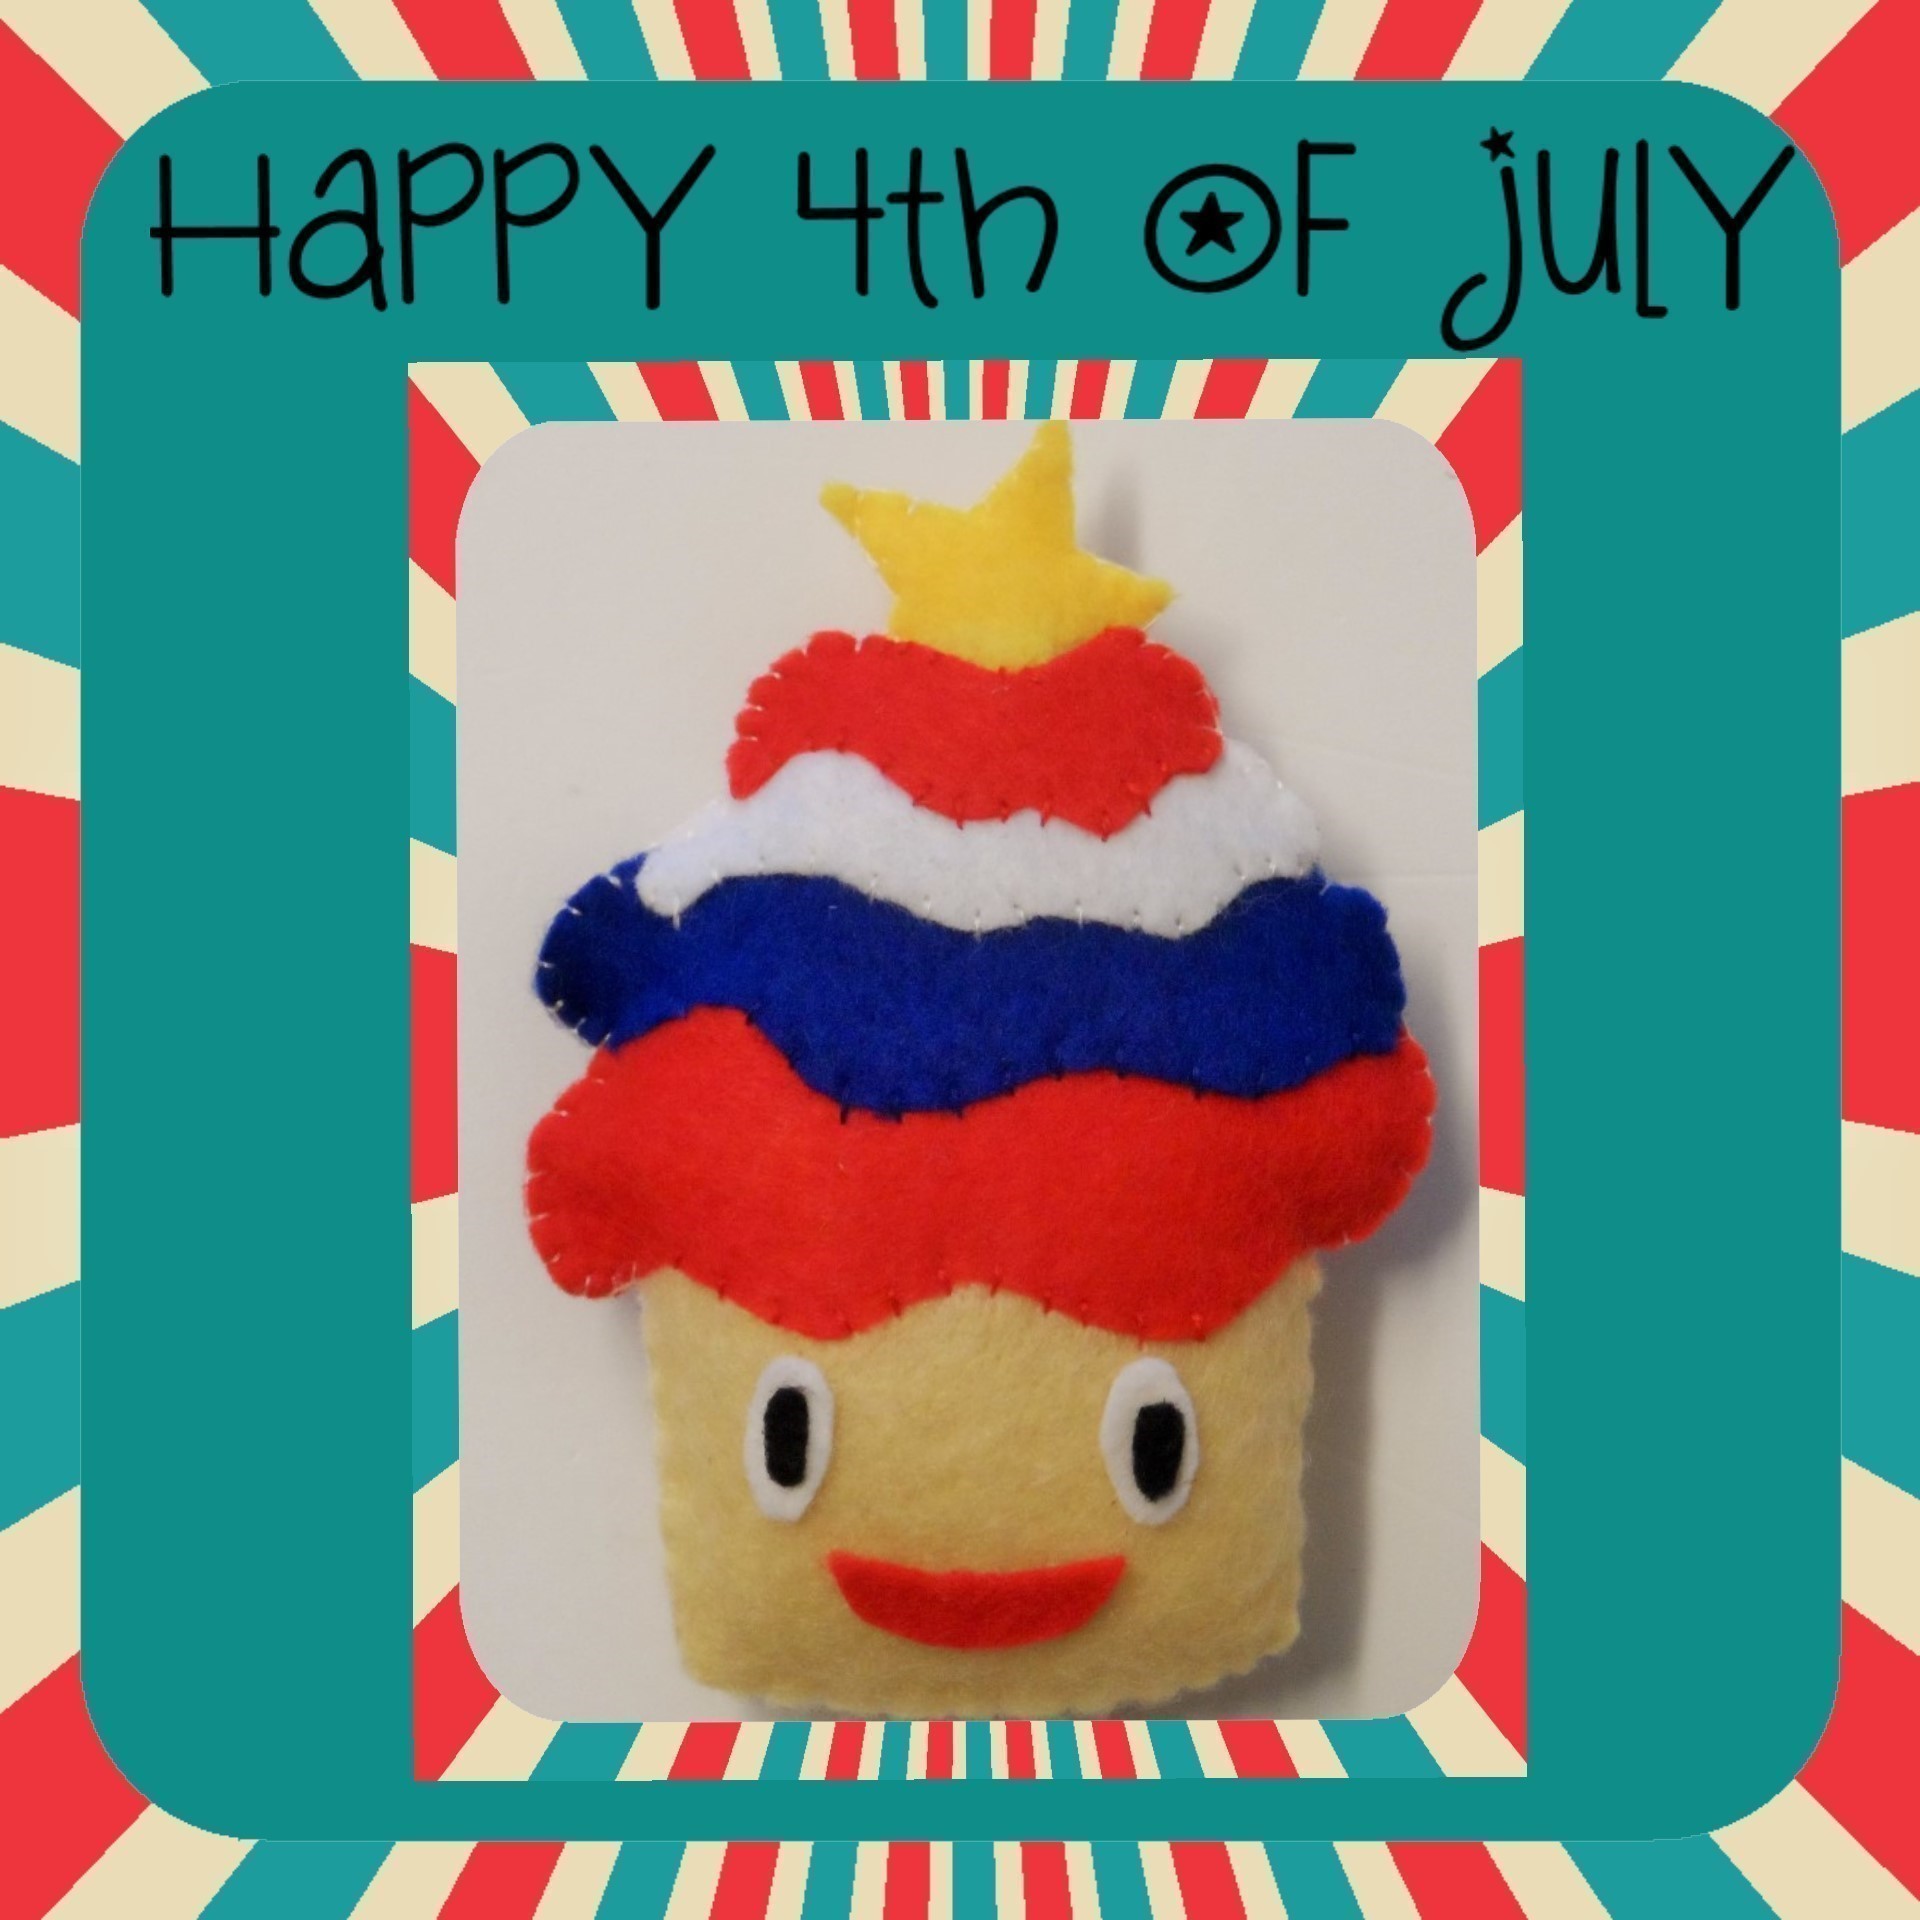
100% Celebration 0% Calories
Even though we don't celebrate Independence Day here in the UK I couldn't resist using taking the opportunity to design a little project for my American crafty friends.
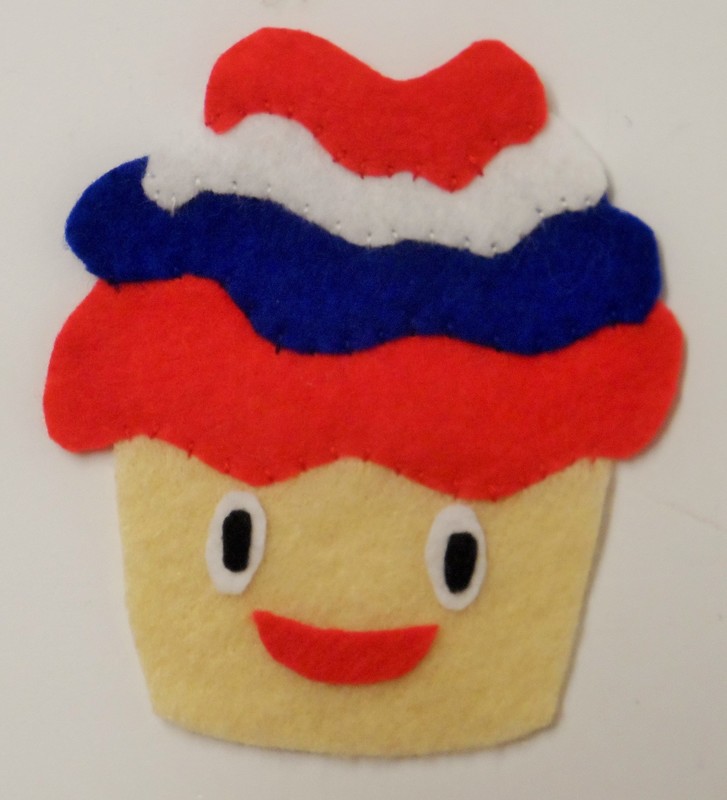
This little fella is patriotic with his red, white & blue fondant and a star on top to finish.
This fun little cupcake is 9.5cm and designed to be made from felt.
Tags
Downloads
- 109654_2F2015-06-30-184723-Happy+4th+July+Cupcake+PDF+Pattern.pdf 976 KB [ Download ]
-
 Summer O. favorited Happy 4th July Cupcake
19 May 02:45
Summer O. favorited Happy 4th July Cupcake
19 May 02:45
-
 mmotse03 favorited Happy 4th July Cupcake
18 Jul 18:22
mmotse03 favorited Happy 4th July Cupcake
18 Jul 18:22
-
 Caz published her project Happy 4th July Cupcake
30 Jun 20:50
Caz published her project Happy 4th July Cupcake
30 Jun 20:50
You Will Need
-
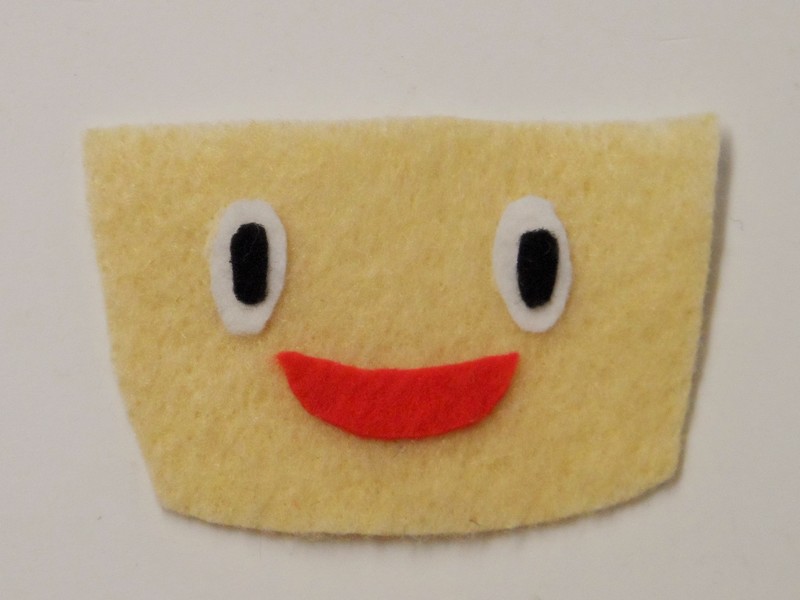
Step 1
To make the front of the cupcake, sew or glue black inner eye piece in centre of white outer eye piece.
-
 Step 2
Sew or glue eyes and mouth piece in place on cake case piece.
-
 Step 3
Overlap the 1st layer piece over the top edge of the cake case and sew in place.
-
 Step 4
Overlap the 2nd layer piece over the top edge of the 1st layer piece and sew in place.
-
 Step 5
Overlap the 3rd layer piece over the top edge of the 2nd layer piece and sew in place.
-
 Step 6
Overlap the 4th layer piece over the top edge of the 3rd layer piece and sew in place.
-
 Step 7
Pin star piece in place behind the 4th layer piece using the picture as a guide. Sew the joining edges together to keep the star in place.
-
 Step 8
To make the back of the cupcake repeat steps 3 to 7 using the back pieces
-
 Step 9
Pin the two completed pieces wrong sides together. Sew around the outside, leaving a small gap for stuffing with toy filling. Lightly stuff the cupcake then sew gap closed.