
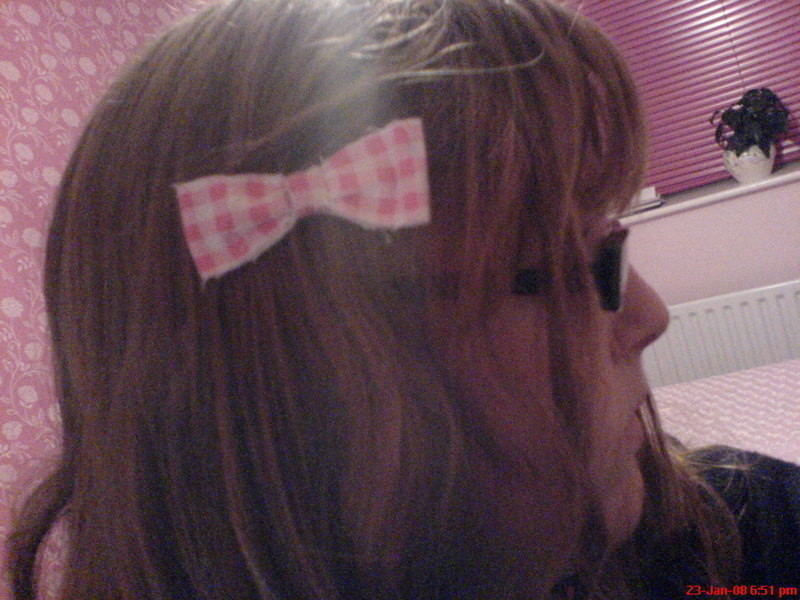

About
hairbows awsome stitch
With practice you can make these really cool bows
Tags
-
 Sveta favorited Hairbows <3
20 Oct 00:24
Sveta favorited Hairbows <3
20 Oct 00:24
-
 Jasmine L. favorited Hairbows <3
05 Oct 10:33
Jasmine L. favorited Hairbows <3
05 Oct 10:33
-
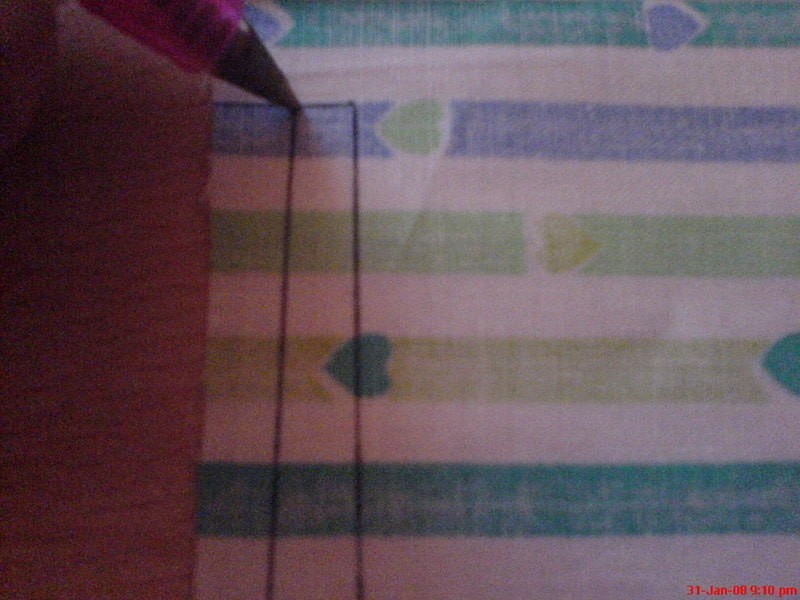
 Step 1
Take your material, ruler and pen. open out your material, place your ruler ON THE EDGE of the material and draw around the entire ruler - This way you get a nice strip.
-
 Step 2
Now, cut out the strip. Cut off any frays that may worry you
-
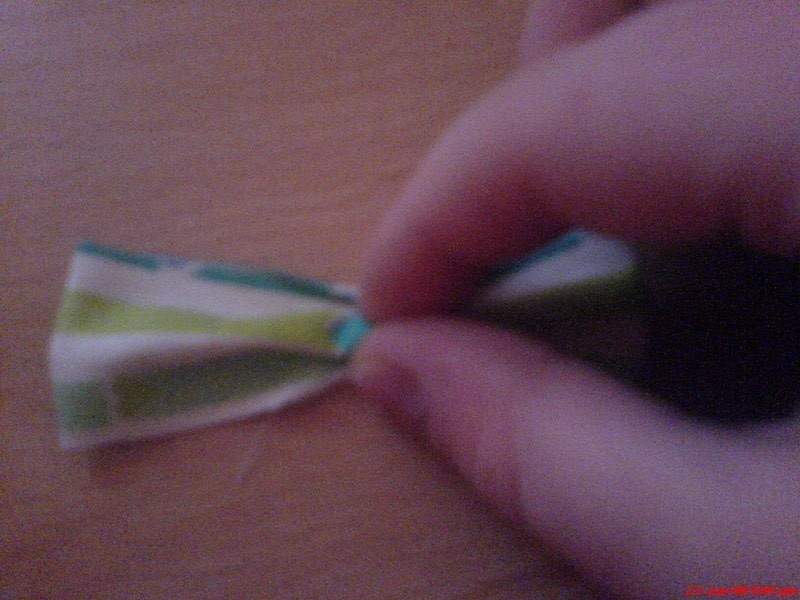
 Step 3
Now, with the colour side up (if you turn it over the colour/pattern doesn't stand out as much) make the ends meet and sew them together
-
 Step 4
Now somewhat pinch the middle, this makes the somewhat shape
-
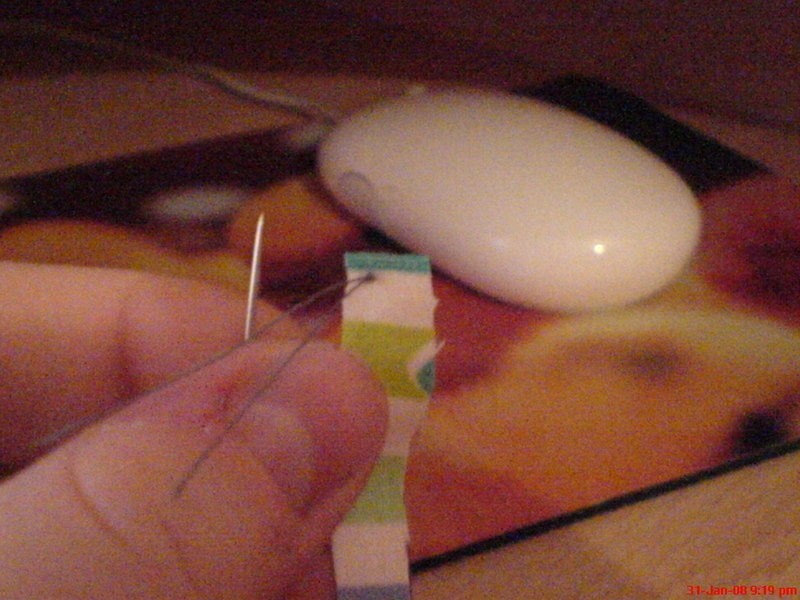
 Step 5
(if you need to) re-thread your needle and while holding the pinch, thread the needle through the pinch
-
 Step 6
Wrap your thread around the center (where your pinch is), sew through the middle to keep the wrap in place and make a mini knot in the thread
-
 Step 7
now take out your fabric again and draw a small strip, width 1cm and length 6cm (that's ample) cut that strip this is the middle
-
 Step 8
THE FOLLOWING STEPS COULD GET A LITTLE TRICKY, SO WORK THROUGH IT SLOWLY
Thread the needle in the corner of the strip -
Step 9
sew this through your bow (not in the center though)
-
Step 10
The stitch it over the top and through, do this until you get to the end of the strip
-
Step 11
Wrap the strip around those stichings with the fabric strip 2 times and sew that together by stiching through the wrapped round strips a basic up through and down through stitch
-
Step 12
OK THIS MAY BE THE HARDEST STEP IN THIS WHOLE HOW-TO PLEASE BE PATIENT [:
Open out your clip and wrap the rest of the strip around the clip and sew that tight -
Step 13
OK NOW YOU CAN RELAX A LITTLE! [:
now, if you don't do this step everytime you put your hairbow in it will slip of the clip! :/
open the left loop of the bow and make the stiches shown in the picture or you can do different stiches to mine, as long as the bow stays with the clip with the stitches you're gonna be alright -
Step 14
now mkae knots in the thread to secure the clip and NOW SLIDE IN YOUR HAIR!!!
Well Done! [:
I am hoping to start a business making these


It should be folded so it does not fray.
and i love it!