


About
Deocrative and filled with happy thoughts!
Transform an ordinary glass jar into a gratitude jar!
When something beautiful happens in my life, large or small, I can jot it down on a slip of paper and stick it in the jar. Next New Year's Eve, I'm going to sit down with my beloved and go through the jar to see what we have to be grateful for in 2013. In the meantime, I think it is a quite decorative item to have on my desk.
The total time to make it doesn't include drying time.
Gratitude can be one of the most transforming attitudes we can have. It's almost a new way of seeing. I hope that this jar will help me to look out for (and create!) beautiful, inspiring moments.
-
 julietierney14 added Gratitude Jar to DIY Crafts
26 Nov 17:54
julietierney14 added Gratitude Jar to DIY Crafts
26 Nov 17:54
-
 C K. added Gratitude Jar to Hive/Dwelling Possibilities
23 Jul 03:33
C K. added Gratitude Jar to Hive/Dwelling Possibilities
23 Jul 03:33
-
 J. Pario replied to a comment on her project Gratitude Jar
11 May 23:30
J. Pario replied to a comment on her project Gratitude Jar
11 May 23:30
-
 NaEl__ commented on Gratitude Jar
05 May 05:14
NaEl__ commented on Gratitude Jar
05 May 05:14
-
NaEl__ favorited Gratitude Jar
05 May 05:11
-
kay2003 favorited Gratitude Jar
28 Dec 18:35
-
Denise L. favorited Gratitude Jar
17 Dec 05:25
-
J. Pario entered her project Gratitude Jar to Wander & Hunt
10 Nov 22:33
-
 M S. added Gratitude Jar to home deco
10 Oct 07:19
M S. added Gratitude Jar to home deco
10 Oct 07:19
-
 ktull329 favorited Gratitude Jar
10 Sep 03:36
ktull329 favorited Gratitude Jar
10 Sep 03:36
You Will Need
-
 Step 1
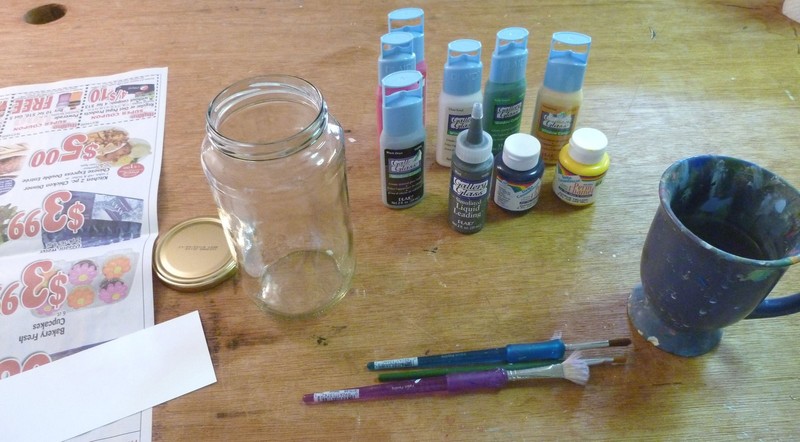
Here's what you'll need.
I used glass paint (which let the light through) and enamel paint (which didn't). I didn't buy any of these paints--they came with a bunch of art stuff I got at an auction.
I actually mixed them at one point to get different colors, which resulted in a strange texture, as one type dried faster than the other.
-
 Step 2
On some scrap cardstock I tested the textures and how well the different paints came out of the tubes. I "unstuck" stuck tips, etc.
-
 Step 3
I added the paint to the jar.
Some paints I used a paintbrush with, some I squeezed right from the tube on to the jar.
-
 Step 4
I painted mostly triangles with a few funky four-sided pieces. I discovered that the "frosted" color was basically clear, so I had to add layers to get it to look sort of white.
Here I'm almost done adding the color.
After this step, I let the piece dry overnight.
-
 Step 5
I needed to have lots of control over the leading--I didn't want to have it splurt out everywhere and mess up what I'd already done--so I practiced with it first to get the hang of it.
-
 Step 6
After the color had all dried over night, it was time to add the fake leading.
I put the piece on a rag so it wouldn't roll around.
-
 Step 7
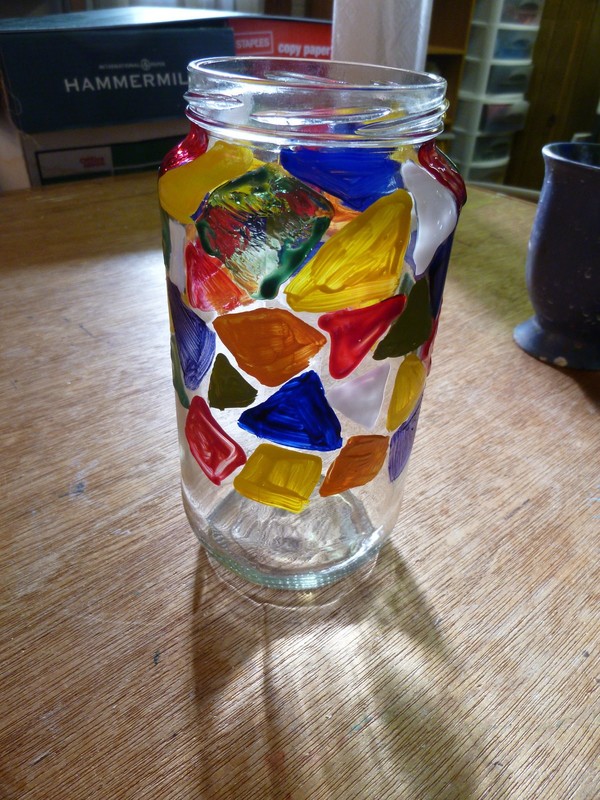
I added black between the color patches to make the piece look more like stained glass.
This had to be done in three separate stages, as the paint needed to dry before I could rotate the jar to do the next section.
-
 Step 8
Here it is with some sunlight coming through it.
-
 Step 9
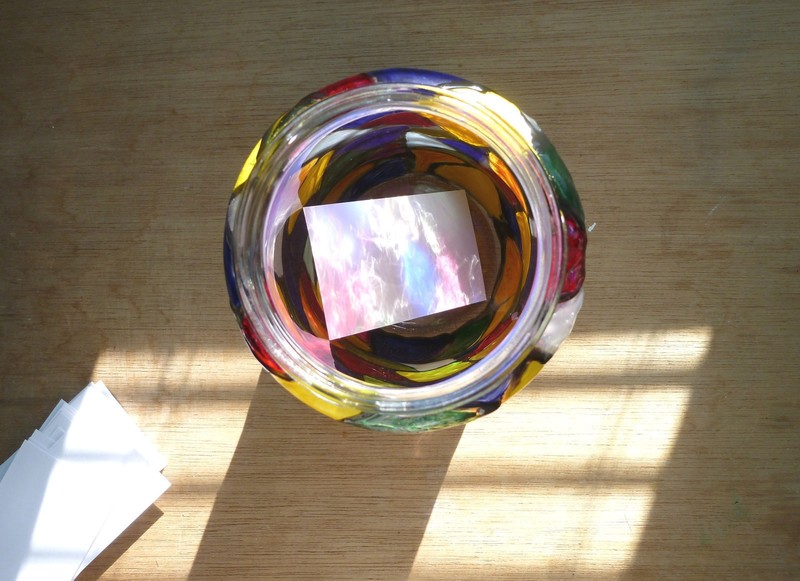
Here it is with a card in it. The colors make patterns on the card, which I didn't expect.
Here's to lots of things to be grateful for in the New Year!
Thanks for reading!


Comments


