
About
Get set to dazzle with this pristine white headband which is super-frugal but looks luxe!
//Fun Disclaimer: When I first spied projects which required adhering beads I was completely bowled over by how pretty they turn out but the thought of gluing down so many beads one by one was too much sweat for me. However, I can guarantee you that once I set my heart on making this, it was one of the most soothing projects I made; you can't figure how fun it is! Needless to say, I'll be doing many more! :)
-
 Lorinda S. added Gorgeous Diy Beaded Headband! to To-make list
27 Jan 10:21
Lorinda S. added Gorgeous Diy Beaded Headband! to To-make list
27 Jan 10:21
-
Katt C. favorited Gorgeous Diy Beaded Headband!
23 Aug 20:09
-
 Rachel B. added Gorgeous Diy Beaded Headband! to DIY or Crochet Hair Accessories
30 May 04:01
Rachel B. added Gorgeous Diy Beaded Headband! to DIY or Crochet Hair Accessories
30 May 04:01
-
Rachel B. favorited Gorgeous Diy Beaded Headband!
30 May 04:01
-
 Danielle M. favorited Gorgeous Diy Beaded Headband!
29 Apr 09:42
Danielle M. favorited Gorgeous Diy Beaded Headband!
29 Apr 09:42
-
 NanaBlue favorited Gorgeous Diy Beaded Headband!
04 Feb 22:58
NanaBlue favorited Gorgeous Diy Beaded Headband!
04 Feb 22:58
-
 Cindy H. favorited Gorgeous Diy Beaded Headband!
01 Nov 12:48
Cindy H. favorited Gorgeous Diy Beaded Headband!
01 Nov 12:48
-
 Melia P. favorited Gorgeous Diy Beaded Headband!
18 Aug 17:03
Melia P. favorited Gorgeous Diy Beaded Headband!
18 Aug 17:03
-
Emma K. favorited Gorgeous Diy Beaded Headband!
13 Aug 06:27
-
C K. favorited Gorgeous Diy Beaded Headband!
21 Jul 22:11
-
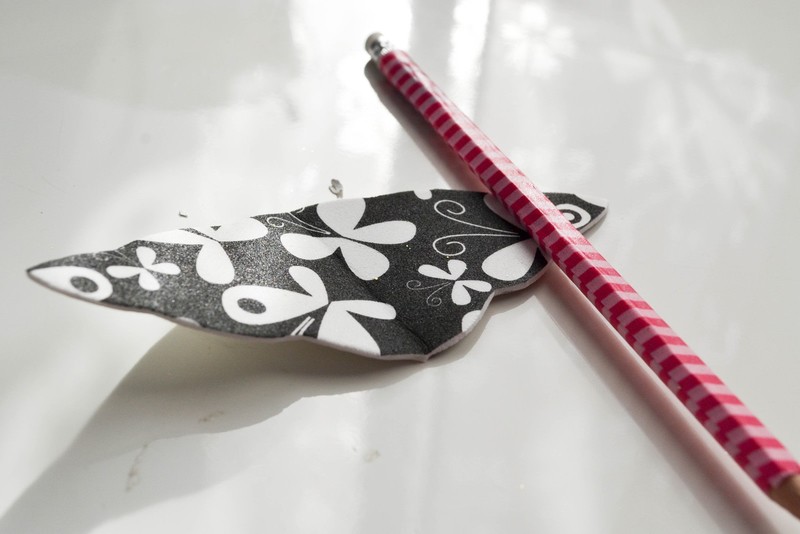
 Step 1
First step is to fold the foam in half and draw out half of the pattern that you want the foam's shape to be.
(Since my foam was patterned I primed it lightly with white acrylic paint later.) -
 Step 2
Cut the pattern out and unfold. If you have any awkward edges, smoothen them out with a scissors!
-
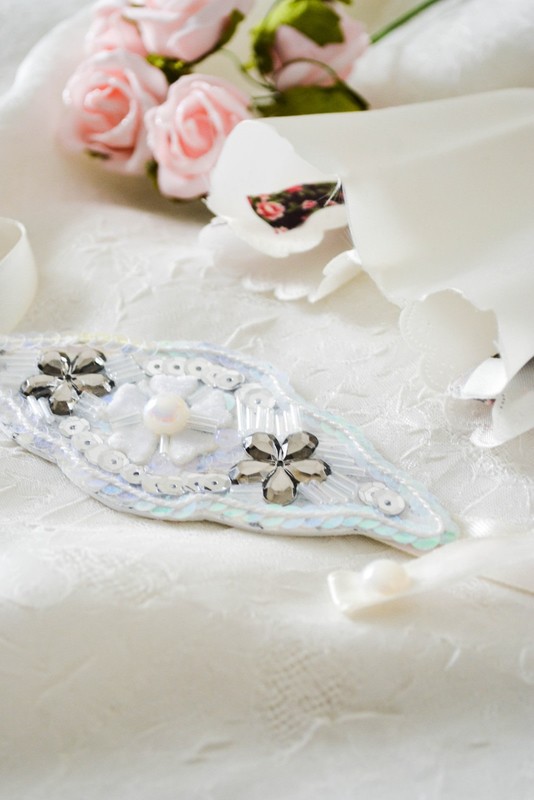
 Step 3
To give more definition to the shape of the foam, I added a sequin trim all round the border.
Then I eyeballed the center and glued down the biggest flower that would act as the focal point. (When you glue down the flower don't apply it onto the whole base but only in the center. You'll see why in a minute!)
You can also use a gem/bigger bead instead of the flower but make sure it stands out among the rest! -
 Step 4
To avoid making the design too flat I stuck on a faux pearl in the center of the flower.
-
 Step 5
Then I added two secondary flowers in silver on the left and right to add some contrast to all the white going on in there!
-
 Step 6
Time to go crazy with all the mini beads! Make sure you make the design as balanced as possible by doing a bit of the left and right half alternately. I added both the silver and white sequins as well as long white beads to fill in the small gaps. You can add on the sequins underneath the flower petals so they don't look like separate entities and then finally glue the petals down (from step 3)
-
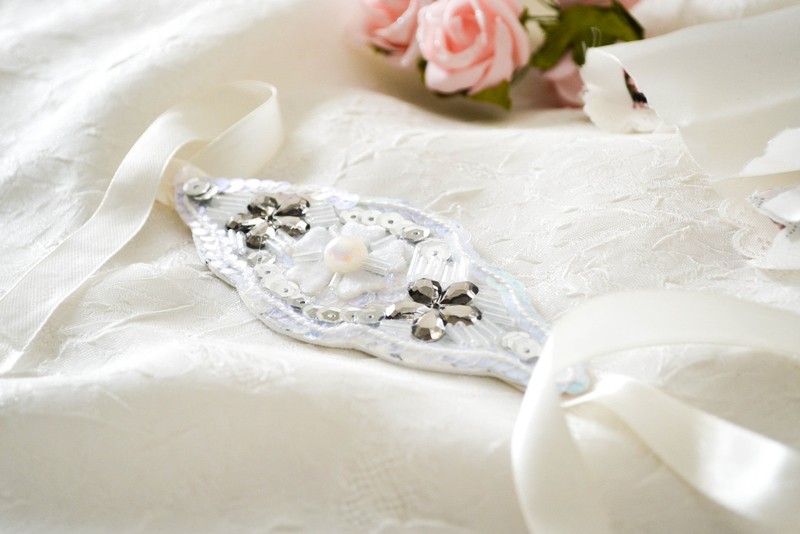
 Step 7
Measure the length of the ribbon round your head to get an idea of how long you should cut it. To deal with the frayed ends I simply turned over the end and glued it down!
-
 Step 8
Add on velcro at both the ends with E-6000. If you don't have velcro you can still tie a knot/bow but I feel like that slides around too much and velcro gives a snug fit. I cut a long piece so that it is flexible as well since I was making this as a gift for a friend :D
-
 Step 9
On the end that goes topmost I added a faux pearl for some more elegance. This step is completely optional. If you've been using broken jewelry bits to for the foam, you may not want to glue down the same onto the ribbon end because that's gonna cause some major hair tangling!
-
 Step 10
Glue down the foam onto a side of the ribbon (so that it's either on the moderate left/right when it sits on your head.) You may want to pull over the ribbon on your head to get an idea of the beaded foam's placement!
-
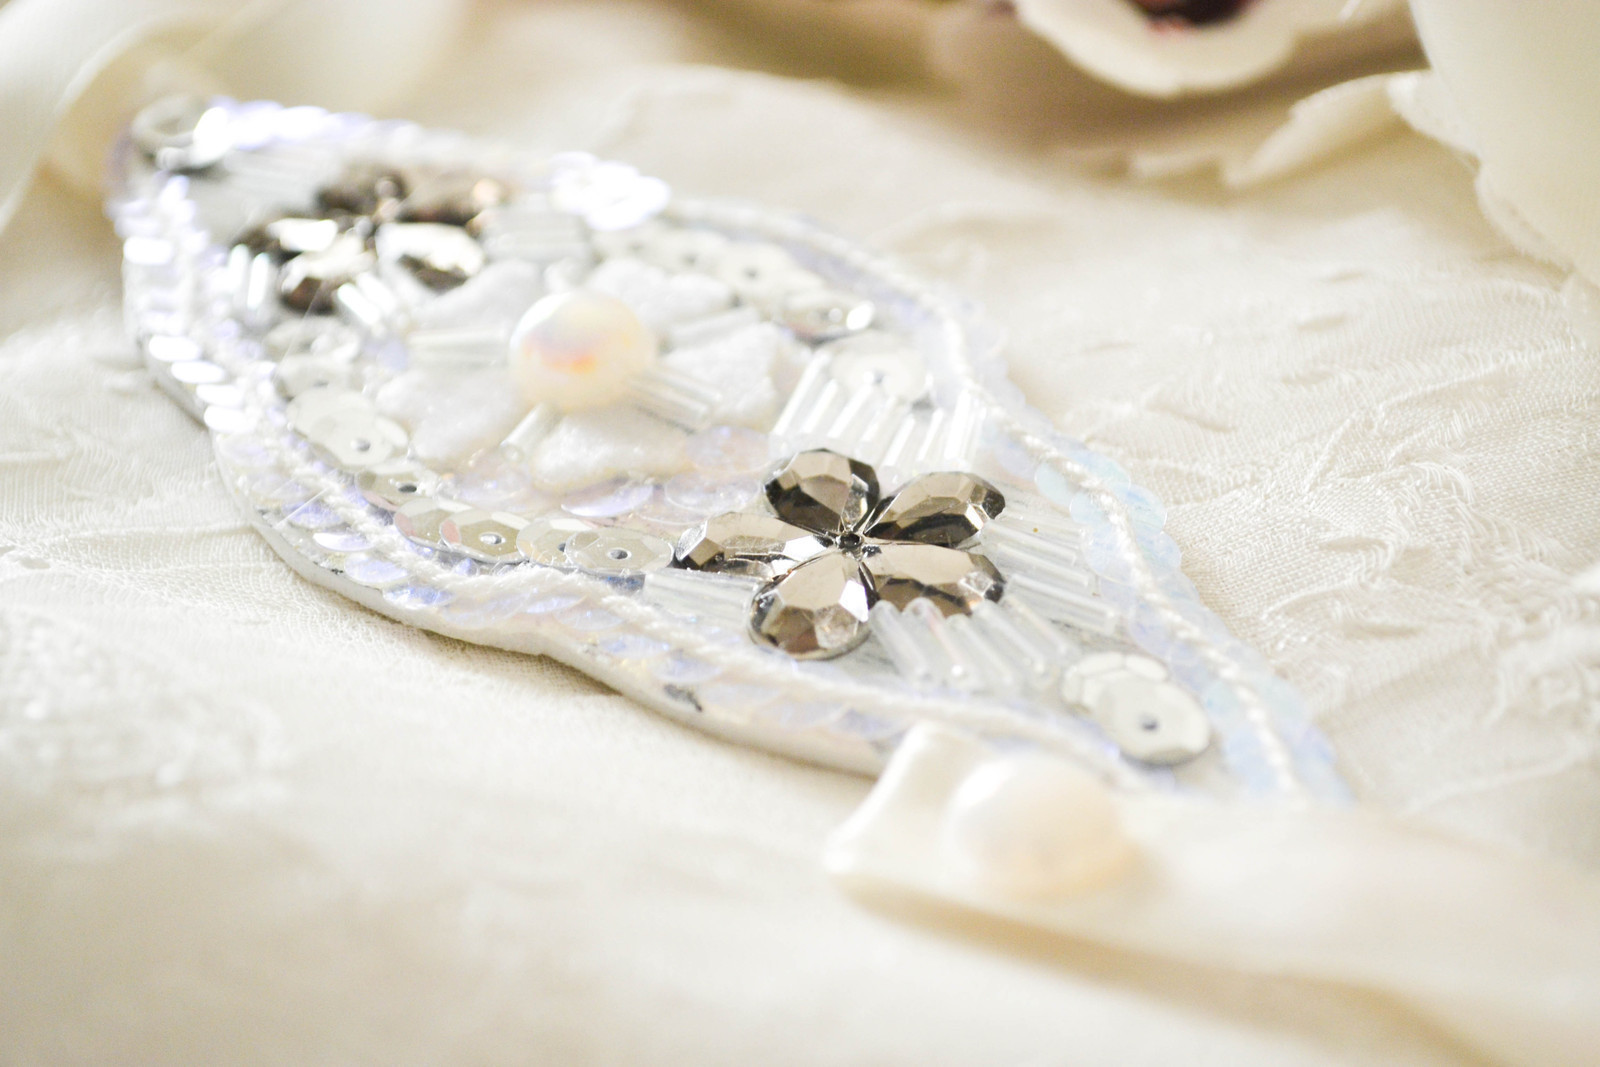
 Step 11
There you have it! Easy-Peasy! For packaging I sewed a satin napkin to the size of a giftbag (as well as something to protect it over time)for the headband since it's quite delicate just laying around....and oh yes, do let the glue dry down hard overnight for best results! :)
-
 Step 12
I also added a gifttag made with some floral washi tape to complete the whole feminine look! :)
My friend was completely overjoyed! -
 Step 13
If you're having problems fitting it smug on your head, add another piece of velcro deeper than the original one onto the ribbon so that it fits tighter.
Inspired yet?
Give this tough-lookin' craft a chance and you'll be surprised by how easy it really is and how glamorous it looks!
PS: Another friend of mine saw this and asked me to make one for her too! That just goes on to say how much of a head-turner it'll look on a pretty head like yours! :)