


About
Girls Spring Mini Tote - tutorial
As a kid, one of my favorite things about going to church on Easter Sunday was carrying a special little purse. Mine was round, white wicker with a hinged lid. I wore white gloves with itty-bitty flowers on them just to have something to put in the purse when I got to church. I was always such a tomboy, I can hardly believe it was me. I guess everyone likes to dress up and be girlie once in a while.
I love the idea of a spring pocketbook in felted wool. Easter, especially an early one, can be a little chilly. This mini-tote is cozy to hold yet springy to look at. As usual, I had an idea in mind for this project but kind of made it up as I went. I wanted to do something small, just big enough for gloves (c'mon, it could happen...), a small doll or stuffed animal and maybe some contraband jelly beans. (I won't tell.)
Tags
-
 Kay T. favorited Girls Spring Mini Tote
20 Nov 21:45
Kay T. favorited Girls Spring Mini Tote
20 Nov 21:45
-
 amanda m. favorited Girls Spring Mini Tote
14 Jun 08:34
amanda m. favorited Girls Spring Mini Tote
14 Jun 08:34
-
hajira k. commented on Girls Spring Mini Tote
13 Apr 18:56
-
 Karen B. favorited Girls Spring Mini Tote
01 Oct 02:54
Karen B. favorited Girls Spring Mini Tote
01 Oct 02:54
-
 RustyFish favorited Girls Spring Mini Tote
23 Jul 20:57
RustyFish favorited Girls Spring Mini Tote
23 Jul 20:57
-
Dawn H. favorited Girls Spring Mini Tote
09 Jul 22:41
-
 Step 1
Make Pattern and Cut
Using a piece of 8.5 x 11" office paper, measure a trapezoid following the measurements above. The top width of the bag will be 10", the bottom width will be 7", the height 8.5". The oval for the base should be 1" shorter in length than the width of the bottom of the bag, about 6". I made my base 3.5" wide. Using your paper pattern, cut out 2 trapezoid sides and one oval base. I lucked out and found this sweet pink sweater with a basket weave look. Any sort of texture or pattern would be adorable for this. Cables, fair isle, etc. Note that a fair isle will tend to felt more firmly due to the stranding on the back. A ribbed texture may not appear to felt at all. (more on this topic to come in a future felting tutorial) -
 Step 2
Sew Sides and Base
Right sides together, pin then sew side seams. Pin then sew oval base to bottom opening, aligning mid-points of oval to side seams. Resist the urge to zigzag your seam allowances. There is no need (the felted sweater will not ravel) and a zigzag will cause your seams to get all woopy. Trust me, I know woopy. -
 Step 3
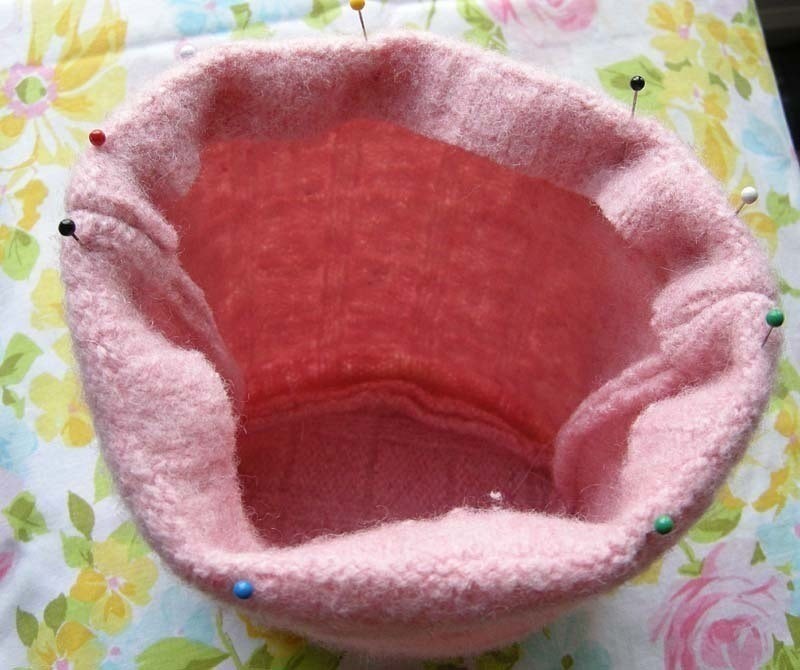
Hem Top Edge
Fold down 1" around the top opening. Pin, evenly distributing the fabric. Straight stitch 7/8" from the folded edge. The bulk and the flare of the trapezoid will cause the opening to curve out slightly giving it a cute basket-y shape. At this point, you could line the bag, if you are a liner. I'm not so much a liner. I'm a "hurry and get it done-r". -
 Step 4
Cut Straps
For double handles, Cut 2 strips measuring approx. 2.5" x 11". Fold raw edges in toward each other. Butt edges together firmly and stitch down the center of the strap using a wide zigzag. Stitch the full length of the strap. -
 Step 5
(for a single handle, cut a strip measuring 3" x 14". Stitch as described above. This gives the tote more of a basket look)
-
 Step 6
Attach Handles
Pin handles to the inside hem of the opening, making sure they are spaced equally from the side seams. Stitch along the previous stitch line to secure. Gather some bright sweater scraps together for embellishment. -
 Step 7
Add Leaves
I was going to make flowers all around the edge, but decided to start with leaves instead. (Why do I love pink and green?) The tote is pretty small and softly constructed. I didn't think it would hold up to a whole bouquet of flowers around the edge. Cut some simple leaves from scraps and glue into place. Pin until dry. (There will be plenty of hand sewing to come. Go ahead, glue the leaves.) -
 Step 8
Make Flower Pieces
For my flower, I pretty much made my standard brooch. Cut scraps into strips. To make loopy petals, cut 2" x 6" strips, fold lengthwise and sew edge (yellow and dark pink above). For straight petals, cut a strip 1" x 4" (orange). Next you'll snip the strips every 1/4" to make petals. -
 Step 9
Roll Petal Strips
Roll the strips up and hand stitch the base together catching all layers. Wrap with a second color strip and stitch. For the flower on this tote I cut a daisy shaped base and glued the rolled petals onto it. -
 Step 10
Finishing Touches
After making several flowers, I chose the one I liked best for this project. I sewed my flower in place then added a few vintage buttons for an extra dash of color. I like the different textures of the fuzzy felt with the smooth buttons. Besides, it's nice to have something pretty to look at when you're sitting in church all hopped up on Easter candy.


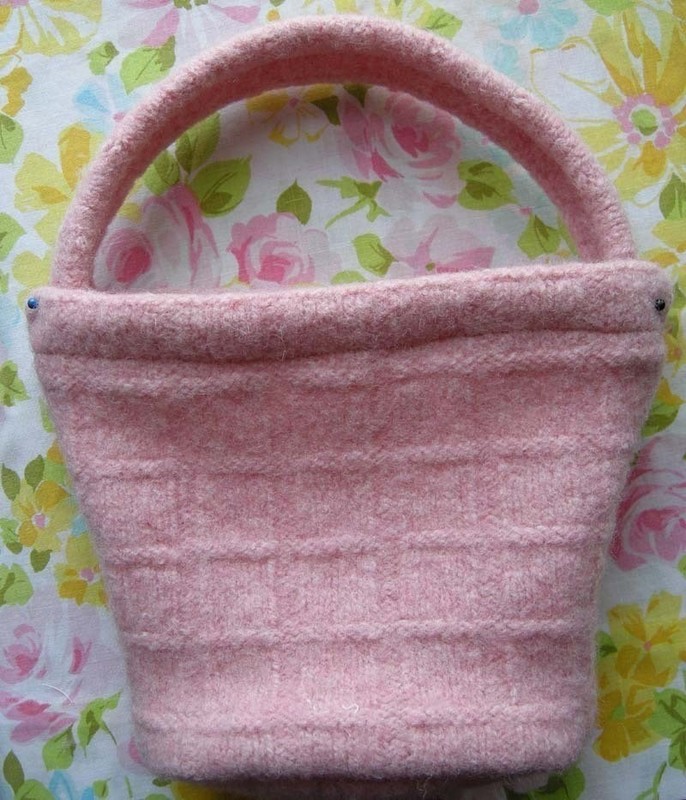


... and the final project is ADORABLE!
Thanks for How-to.
CO + K User