About
Do you ever get an itching to paint something? I do. A lot.
Prepping a project like this is 100% CRUCIAL to having a fantastic outcome.
First things first, I lightly sanded down the dresser, removing the shiny finish, scuff marks and pen marks. Then, I gave the whole thing (except the drawers) a few coats of glossy, white paint. I didn't sand down the drawers (more on this later).
Then, I got down to business. The business of making perfectly square, squares.
Tags
-
 Cassandra L. added Geometric Dresser to Louise Bechers Room
05 Feb 03:12
Cassandra L. added Geometric Dresser to Louise Bechers Room
05 Feb 03:12
-
 judithchen added Geometric Dresser to Kourtney
08 Dec 14:02
judithchen added Geometric Dresser to Kourtney
08 Dec 14:02
-
 Rachel F. favorited Geometric Dresser
28 Sep 22:14
Rachel F. favorited Geometric Dresser
28 Sep 22:14
-
tam b. favorited Geometric Dresser
22 Feb 17:39
-
 Logan M. favorited Geometric Dresser
17 Dec 15:37
Logan M. favorited Geometric Dresser
17 Dec 15:37
-
 Sarah W. favorited Geometric Dresser
08 Dec 20:43
Sarah W. favorited Geometric Dresser
08 Dec 20:43
-
 Witchy favorited Geometric Dresser
08 Dec 18:11
Witchy favorited Geometric Dresser
08 Dec 18:11
-
 Michelle v. favorited Geometric Dresser
06 Dec 20:36
Michelle v. favorited Geometric Dresser
06 Dec 20:36
-
 Mikoto added Geometric Dresser to Inspiration
06 Dec 01:19
Mikoto added Geometric Dresser to Inspiration
06 Dec 01:19
-
 thehowtogal published her project Geometric Dresser
07 Aug 19:51
thehowtogal published her project Geometric Dresser
07 Aug 19:51
You Will Need
-
 Step 1
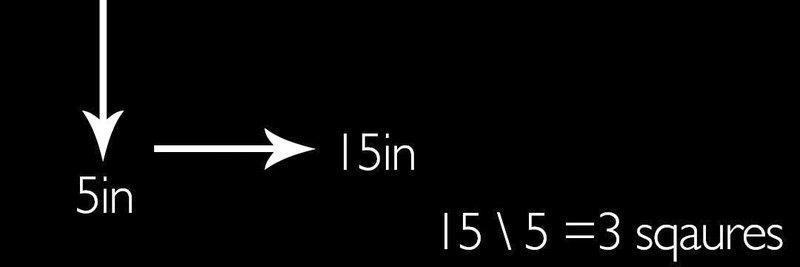
Measure your dresser drawer from top to bottom and across. Let's pretend this giant black rectangle is my drawer. Because it is 5 inches down and 15 inches across, you can make 3 perfect squares out of it. My actual drawer didn't have perfect measurements like this, so I had to add a little extra on each end to split it into 4 even squares. But you get the idea.
-
 Step 2
Make pencil marks every 5 inches (or whatever your drawer's height measurement is). Remember, you may have to add a little on each square to evenly divide your drawer.
-
 Step 3
Then, pick a triangle you want to start with and start taping off your drawer.
-
 Step 4
This example shows us starting with the bottom triangle. Notice how the tape moves to fully outline a specific triangle while covering up some of another.
-
Step 5
I did one triangle at a time on each drawer. It was faster this way since I didn't have to switch back and forth between paint colors. After each triangle was dry, I carefully peeled off the tape and started outlining the next triangle. Also, because I didn't sand down the dresser drawers beforehand (wanted to keep the original white, glossy finish on the one white triangle), I lightly sanded each triangle after it was taped off so the paint would stick better.
-
Step 6
When I had finished painting all of the triangles, I let them dry an additional day before applying two coats of polyurethane. I then installed new, shiny handles for a finishing touch.