https://www.cutoutandkeep.net/projects/framed-name • Posted by GMC Group
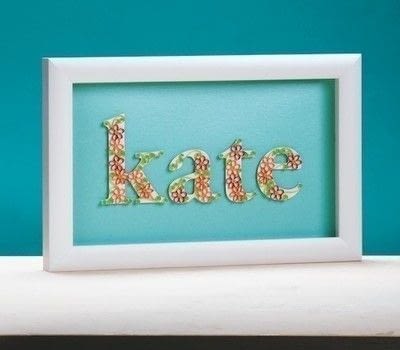
Personalized gifts have always been my favorite projects. No matter how many hours they take or how badly my neck aches, the thought is always on my mind that this person will feel special for receiving the gift, because they will see how much they mean to me. Just like love, this kind of gift is not something you can buy. This project is not like the previous ones. The font and size shown here are just examples. The font you choose should fit the flowers from the Cupcake Toppers project and some greenery. Allow your creative side to flourish, and make your own statement in quilling!
Personalized gifts have always been my favorite projects. No matter how many hours they take or how badly my neck aches, the thought is always on my mind that this person will feel special for receiving the gift, because they will see how much they mean to me. Just like love, this kind of gift is not something you can buy. This project is not like the previous ones. The font and size shown here are just examples. The font you choose should fit the flowers from the Cupcake Toppers project and some greenery. Allow your creative side to flourish, and make your own statement in quilling!
Letters The font I used in this example is 452-point Adobe Garamond. This font has soft serifs, lending it well to quilled coils. Any font can be used, but a width of 3⁄4 inch (1.9 cm) is ideal. It will allow the flowers to nestle comfortably. Use a computer to print your letters in solid black onto regular printer paper. Tape or staple the sheet with your printed letters on top of your chosen cardstock. Use a craft knife or scissors to cut around the outside of your printed letters, cutting through both layers at once.

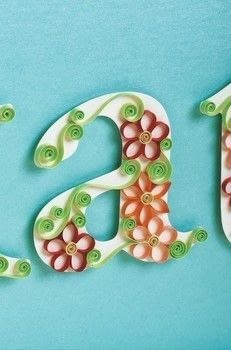
Flowers Make as many flowers as needed to fill each letter. Place the finished flowers in the largest spaces first, gluing them in place once the layout is finalized (shown at right at 50%). Varying the spacing gives a random, unplanned appearance.

Small, medium, large Stems Use strips C , D ,and E to make stems ( C = Question-mark scroll, D = V-scrolls or same-sided scrolls, E = S-scrolls). Fill the smaller spaces in between the flowers and amongst the serifs with the stems, varying their lengths as needed.

Plinths Roll the F strips into tight coils and glue them closed. Glue the dots to the back of the letters to give your monogram a raised platform and added dimension. As you can see in the illustration on the bottom of the facing page, I’ve used about 4–6 coils per letter.