


About
What to do with green flowers!
I’m one of those crafter’s that’s quite literal. I can’t use something unless it makes sense. Green flowers, in nature, are more of an anomaly. Sure, I have some Green Wizards in garden, but they kinda freak me out. So when I buy a bottle of flowers for crafting and some of them are green, I scratch my head in wonder. I just haven’t been able to EVER use them. As a result, I have a lot of them in my stash. This project helped me put a dent in the stash. So, break out the green flowers and play along with me.
-
 Debbie V. added Flower Embellishments to Flowers
16 Feb 04:10
Debbie V. added Flower Embellishments to Flowers
16 Feb 04:10
-
Debbie V. favorited Flower Embellishments
16 Feb 04:10
-
 Rachael H. added Flower Embellishments to Flowers!
16 Dec 17:55
Rachael H. added Flower Embellishments to Flowers!
16 Dec 17:55
-
 ubercute favorited Flower Embellishments
01 Jan 17:13
ubercute favorited Flower Embellishments
01 Jan 17:13
-
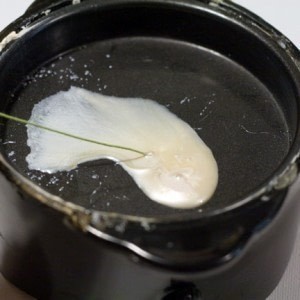
 Step 1
Melt a small amount of UTEE in a melting pot, or use a heat gun. Dip the tip of a pice of floral wire or regular wire into the melted stuff. You just want a dab on the tip. This is your flower center.
-
 Step 2
Let this dry. In fact, make a bunch of them and then get your flowers ready.
-
 Step 3
Experiment with chalk, ink, and colors. Once you pick some out, thread them on to the wire.
-
 Step 4
Pinch the first flower around the dab of UTEE. This is the center of the flower.
-
 Step 5
Pull the second flower up and pinch it around the first. These are the outside petals and what you will see the most.
-
 Step 6
Using your small hole punch, punch a hole in the center of your snot dot. Mine come in a little zip bag on sheets. They have a clear top so I can easily see. If you have the snot dots on a strip, just fold over the wax paper on top and then punch. Easy enough.
-
 Step 7
Take the top off of the snot dot and slide it on to the stem with the bottom still on. This helps get it all lined up. Then stick the snot dot on to the back of the flower and peel off the back. Tada.
-
 Step 8
Thread your neglected green flower on to the bottom and secure with snot dot. I played with cutting notches in the petals first, for a more natural look. Do what you want.
-
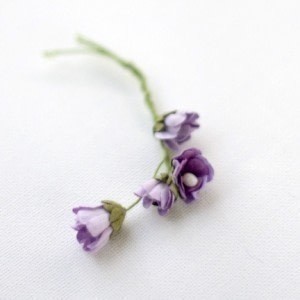
 Step 9
Make a bunch and cluster them together. Once I got the process down, I was able to make a couple dozen in an hour.
-
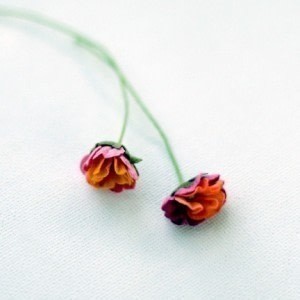
 Step 10
Here’s a little sprig. Perfect for a card or something fun. Experiment with colors and shapes to get a different effect.
-
 Step 11
And here is a layout with some photos of me when I was a wee lass. these flowers worked well with the vintage feel to the page. Anyway, have fun.
Enjoy!


They're NEVER gonna be known as anythingelse in my house now ;D
Cute idea