About
Flocking
Ever felt that a tool is a little expensive don't feel you know whether should buy it or not. All you need is a little try.
Here is a simple and cheap alternative to making a flocking applicator, it may be all you need if you only make small items!
See link to pages that can be printed out and used. https://www.facebook.com/145534025467989/photos/?tab=album&album_id=805102002844518
-
 Jayne R. favorited Flocking Applicator
14 Nov 19:12
Jayne R. favorited Flocking Applicator
14 Nov 19:12
-
Alissa B. favorited Flocking Applicator
03 Apr 16:20
-
 Rebecca Skeels. published her project Flocking Applicator
17 Mar 09:00
Rebecca Skeels. published her project Flocking Applicator
17 Mar 09:00
-
 Step 1
You will need an electric fly swat like this.
-
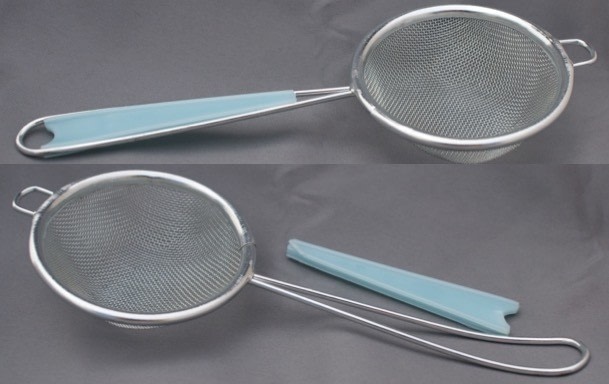
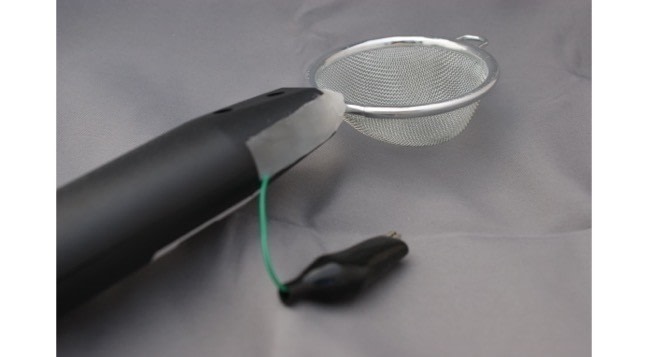
 Step 2
And wire, a sieve, crocodile clips, polymorph or thick tape.
-
 Step 3
And some pliers, screwdrivers, batteries, tweezers, scissors and tape.
-
 Step 4
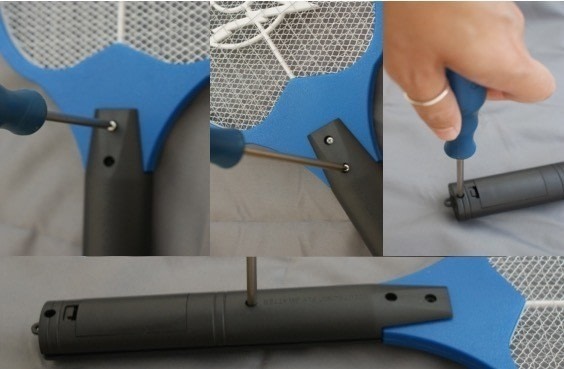
Take the fly swat apart by removing the screws in the handle.
-
 Step 5
Keep hold of the screws as you will need them.
-
 Step 6
The button will be loose, so put that in a safe place too.
-
 Step 7
Undo the screw that had been revealed by the open handle.
-
 Step 8
Split open the racket part of the fly swat.
-
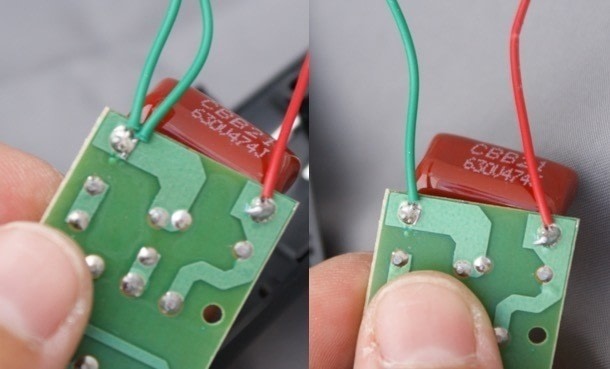
 Step 9
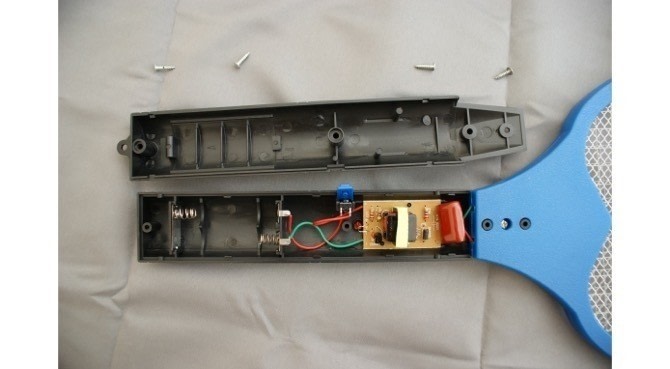
The live (red +) goes to the inside mesh and the other (green -) goes to the outside bars.
-
 Step 10
You only need to do this if your wires are not coloured
-
 Step 11
You can dispose of the frame now.
-
 Step 12
Break the handle off the sieve.
-
 Step 13
Then cut the length of the sieve to the desired length.
-
 Step 14
Short enough to not interfere with the circuit board.
-
 Step 15
Long enough to hold in place.
-
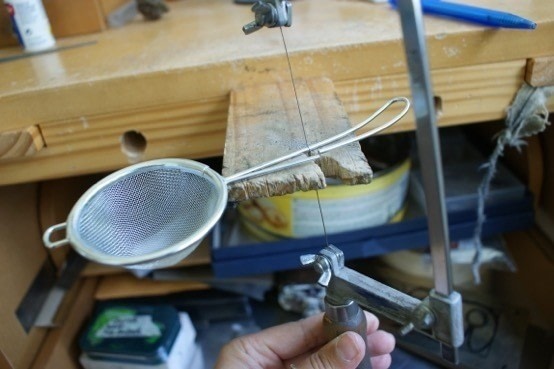
 Step 16
I bend mine a little to clip in place.
-
 Step 17
You will now need to attach the crocodile clip.
-
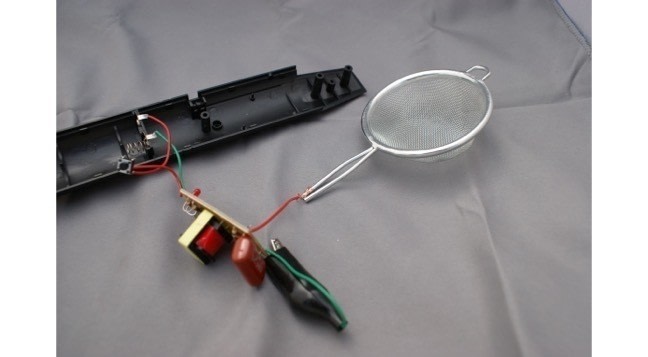
 Step 18
Negative (green -) to crocodile clip, remove one.
-
 Step 19
When attaching the clip remember to feed the wire through the cover first.
-
 Step 20
Ensure the wire has good contact with the clip.
-
 Step 21
Positive (red +) goes to the sieve.
-
 Step 22
Tape this in place.
-
 Step 23
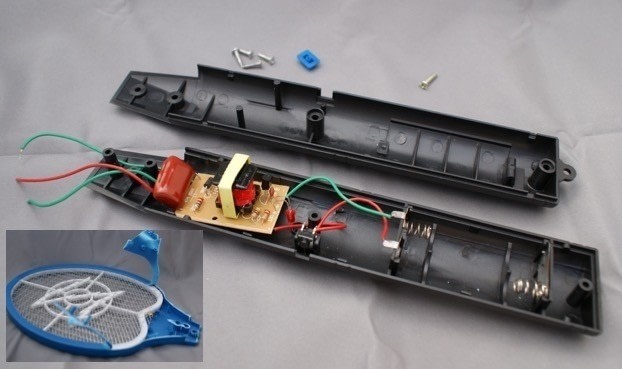
Then make sure all the pieces fit into the handle.
-
 Step 24
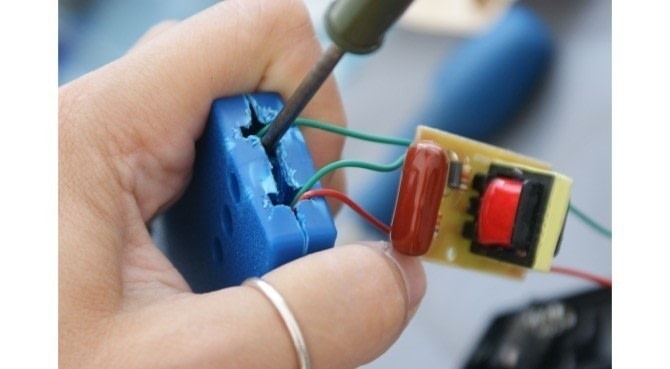
It is thinner than the fly swat so will need some padding to keep it in place.
-
 Step 25
I use polymorph but you could use card, duct tape, etc
-
 Step 26
Make sure you put the screws in place while it sets.
-
 Step 27
Wait for the polymorph to set.
-
 Step 28
When the polymorph has set all you need to do now is put in the batteries.
-
Step 29
Flock
-
 Step 30
pva or wood glue, a brush and items to be flocked
-
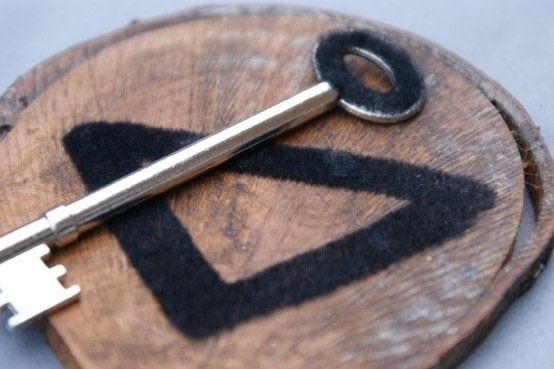
 Step 31
When flocking paint on some glue in a nice thin layer. You can also use nail varnish, if it is the same colour as the flock it will make a deeper richer colour, be careful your nail varnish doesn't dry before you get to flock the work.
-
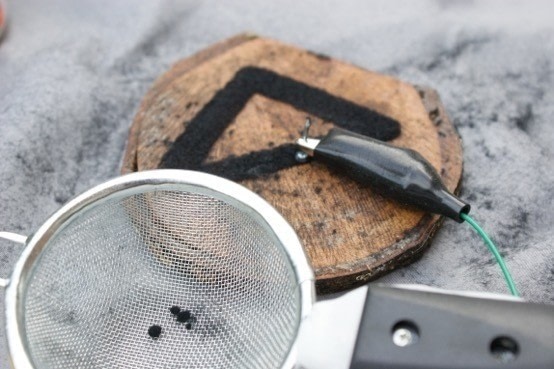
 Step 32
Attach the crocodile clip to the piece.
-
 Step 33
Fill the sieve with enough flock for the area you wish to cover.
-
 Step 34
Press the button on the side of the applicator.
-
 Step 35
Sieve the flock onto the work, place the seive very close to the surface you are flocking, but not touching.
-
 Step 36
To flock a material that is not metal you will need a pin or piece of wire.
-
 Step 37
Put the pin or wire in the glue and attach the crocodile clip to it.
-
 Step 38
When you have finished wait for the glue to dry.
-
 Step 39
Note: Flocking material does not mix too well.