


About
Felty the Snowman was a jolly, happy decoration
I made this snowman using felt, buttons and embroidery floss. Sewn up using the blanket stitch, I made this little guy for my mother-in-law's birthday (Dec. 4th). She *loves* snowmen for the holidays.
Tags
-
 Deb E. favorited Felt Christmas Snowman
03 Dec 00:10
Deb E. favorited Felt Christmas Snowman
03 Dec 00:10
-
 Neko-San K. favorited Felt Christmas Snowman
31 May 21:52
Neko-San K. favorited Felt Christmas Snowman
31 May 21:52
-
 Kristy B. favorited Felt Christmas Snowman
27 Mar 07:54
Kristy B. favorited Felt Christmas Snowman
27 Mar 07:54
-
 mmotse03 favorited Felt Christmas Snowman
14 Apr 10:54
mmotse03 favorited Felt Christmas Snowman
14 Apr 10:54
-
 Rachael H. added Felt Christmas Snowman to Plushies
16 Dec 21:45
Rachael H. added Felt Christmas Snowman to Plushies
16 Dec 21:45
-
 selly.f.hing added Felt Christmas Snowman to felt christmas gift
19 Aug 16:21
selly.f.hing added Felt Christmas Snowman to felt christmas gift
19 Aug 16:21
-
 Leigh-Anne D. entered their project Felt Christmas Snowman to Brini Maxwell
28 Dec 15:54
Leigh-Anne D. entered their project Felt Christmas Snowman to Brini Maxwell
28 Dec 15:54
-
Step 1
Create a pattern in paper using either a large cookie cutter or tracing other round objects (overlapping at the "neck"). If desired, create arms and legs/feet by folding paper together and free-handing the shape you want; then cut them out. Folding the paper gives you two matching limbs.
-
Step 2
Lay all the pattern pieces on the two pieces of white felt, overlapping the body and the limbs as needed to create the final shape you'll want for your snowman. Pin and cut out.
-
Step 3
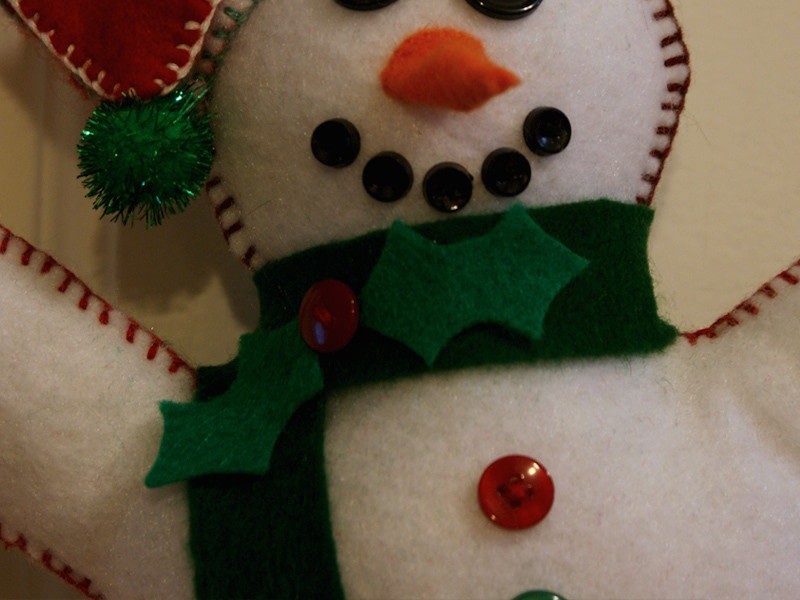
Use a scrap of orange felt, cut in a triangle to create the carrot nose. You can go 2D and just sew it flat on the snowman face or cut a larger triangle and sew two of the edges together to form a cone that can be sewn on (as pictured) to make it 3D.
-
 Step 4
Lay out the buttons (beads, wiggle eyes or felt pieces) around the nose to create the face. Using a delicate whip stitch, attach the nose to the face. Then, sew the buttons in place using a little matching embroidery floss/thread.
-
Step 5
Sew the two pieces of your snowman together using matching or contrasting embroidery floss in a whip or blanket stitch.
I start at the foot and work my way around. When I get one side and both arms completed, I stuffed the head and arms before finishing up the side. It's easier to get into those smaller areas when you have a larger opening. Finish the second side, leaving the bottom open so you can stuff the belly and feet before closing it up.
-
 Step 6
Use the snowman head template to determine the size of your hat, if you're adding one. Finish the hat as you did the body. Use a store-bought pom pom on the end if you're doing a Santa hat or ski cap design (versus stovepipe Frosty hat).
Cut a scarf and either snip the ends to create fringe or use loops of embroidery floss for a finer effect.
-
 Step 7
Decorate with little holly leaves from felt (they were so small that I used Fabric Fusion Glue to adhere them), overlapping their points and using another small red button as a berry and to help adhere them to the scarf. Just wrap the scarf around the neck. The texture of felt on felt keeps it in place.
You can go further with dressing your snowman by creating gloves, boots or a vest -- whatever you like!
-
Step 8
Use another loop of embroidery floss or thin ribbon to create the hanger. Knot it at the base (top of the head) and then again at the top.


Comments

