


About
FAUX ECLIPSE CARD Tutorial
-
 Linda K. published her project Faux Eclipse Card
17 Nov 09:00
Linda K. published her project Faux Eclipse Card
17 Nov 09:00
-
Step 1
Fold a 5 1/2" x 8 1/2" piece of Whisper White cardstock in half, creasing it well with a bone folder.
-
Step 2
YOU WILL BE DOING MOST OF YOUR WORK ON A 3 3/4" X 5" PIECE OF WHISPER WHITE CARDSTOCK:
-
Step 3
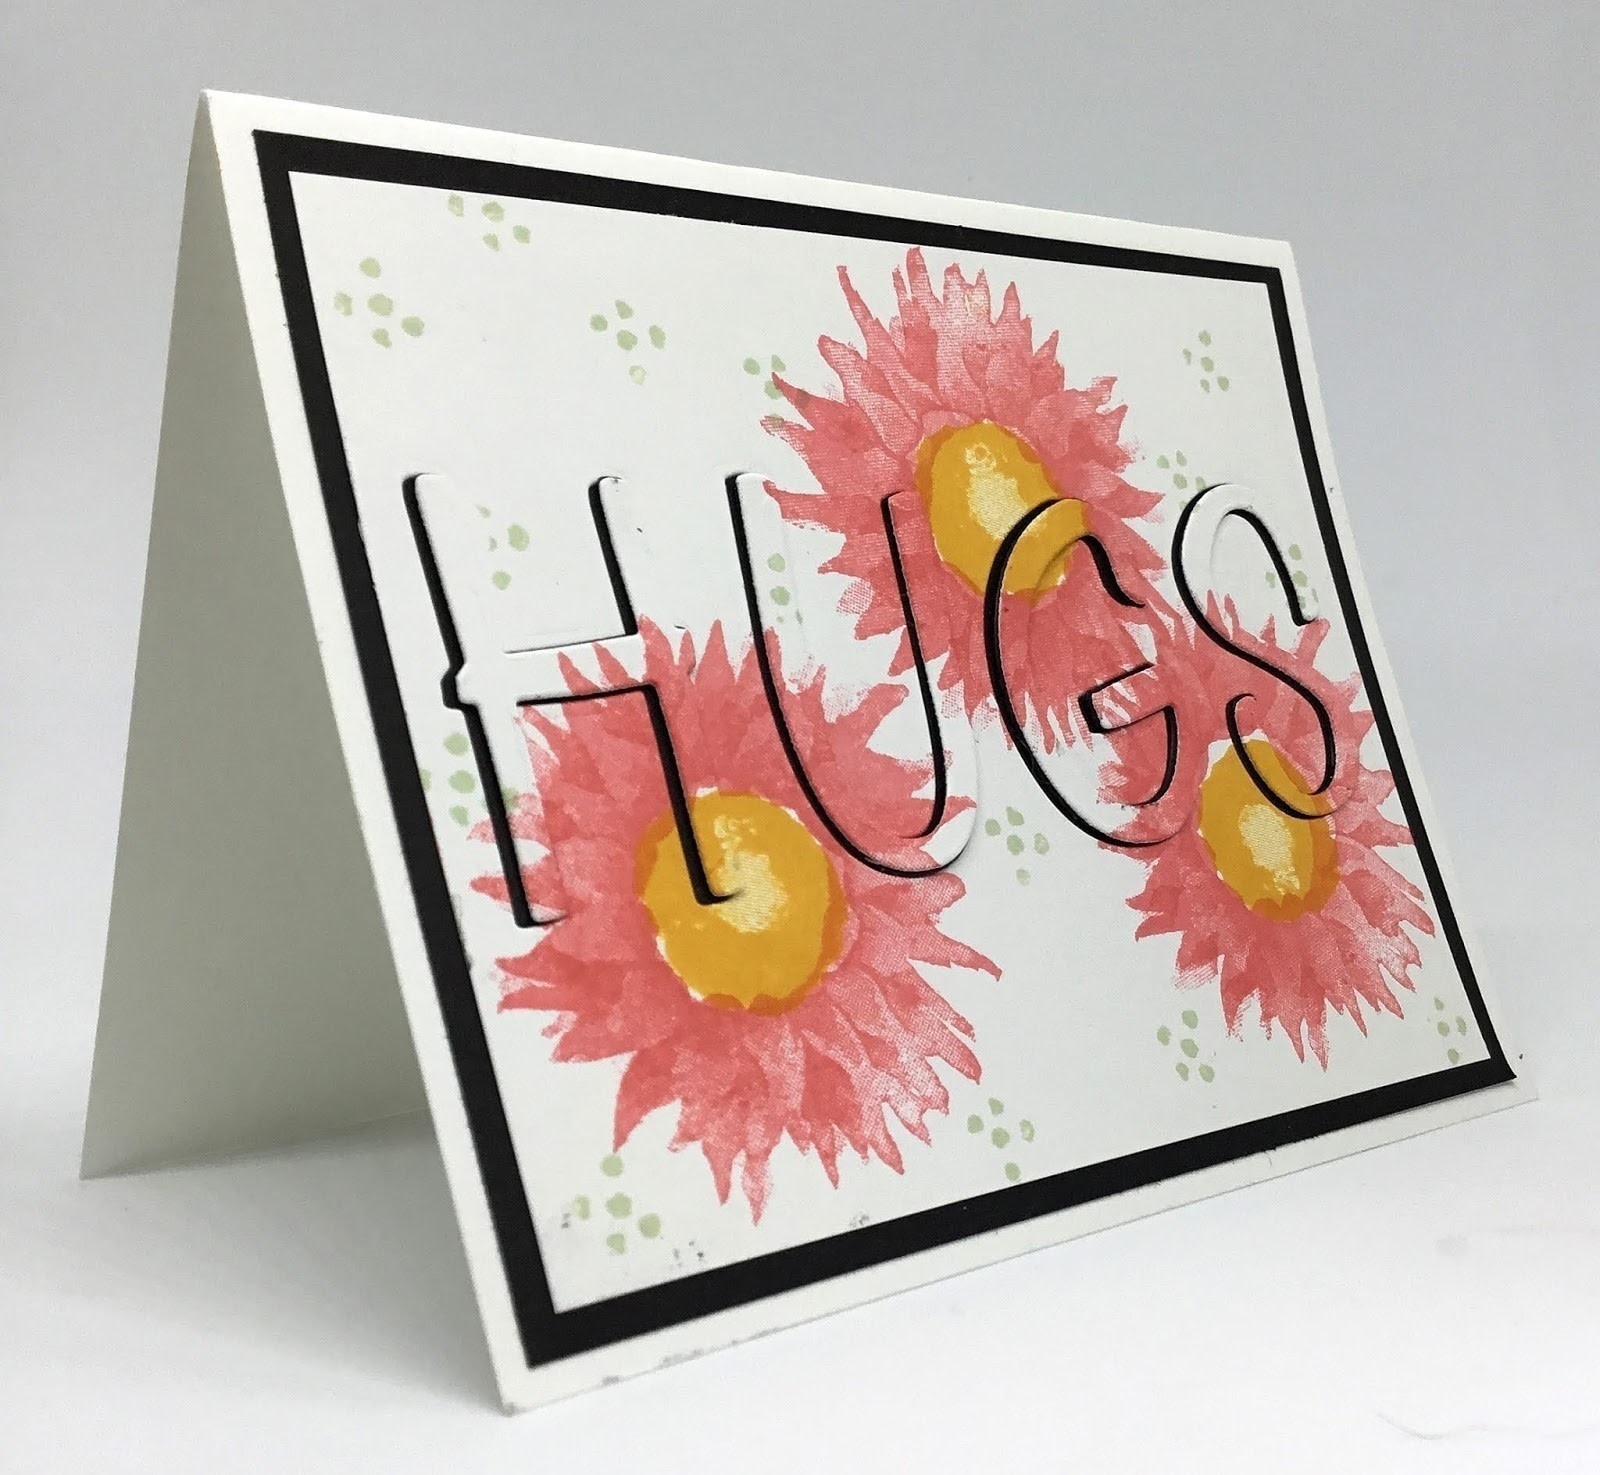
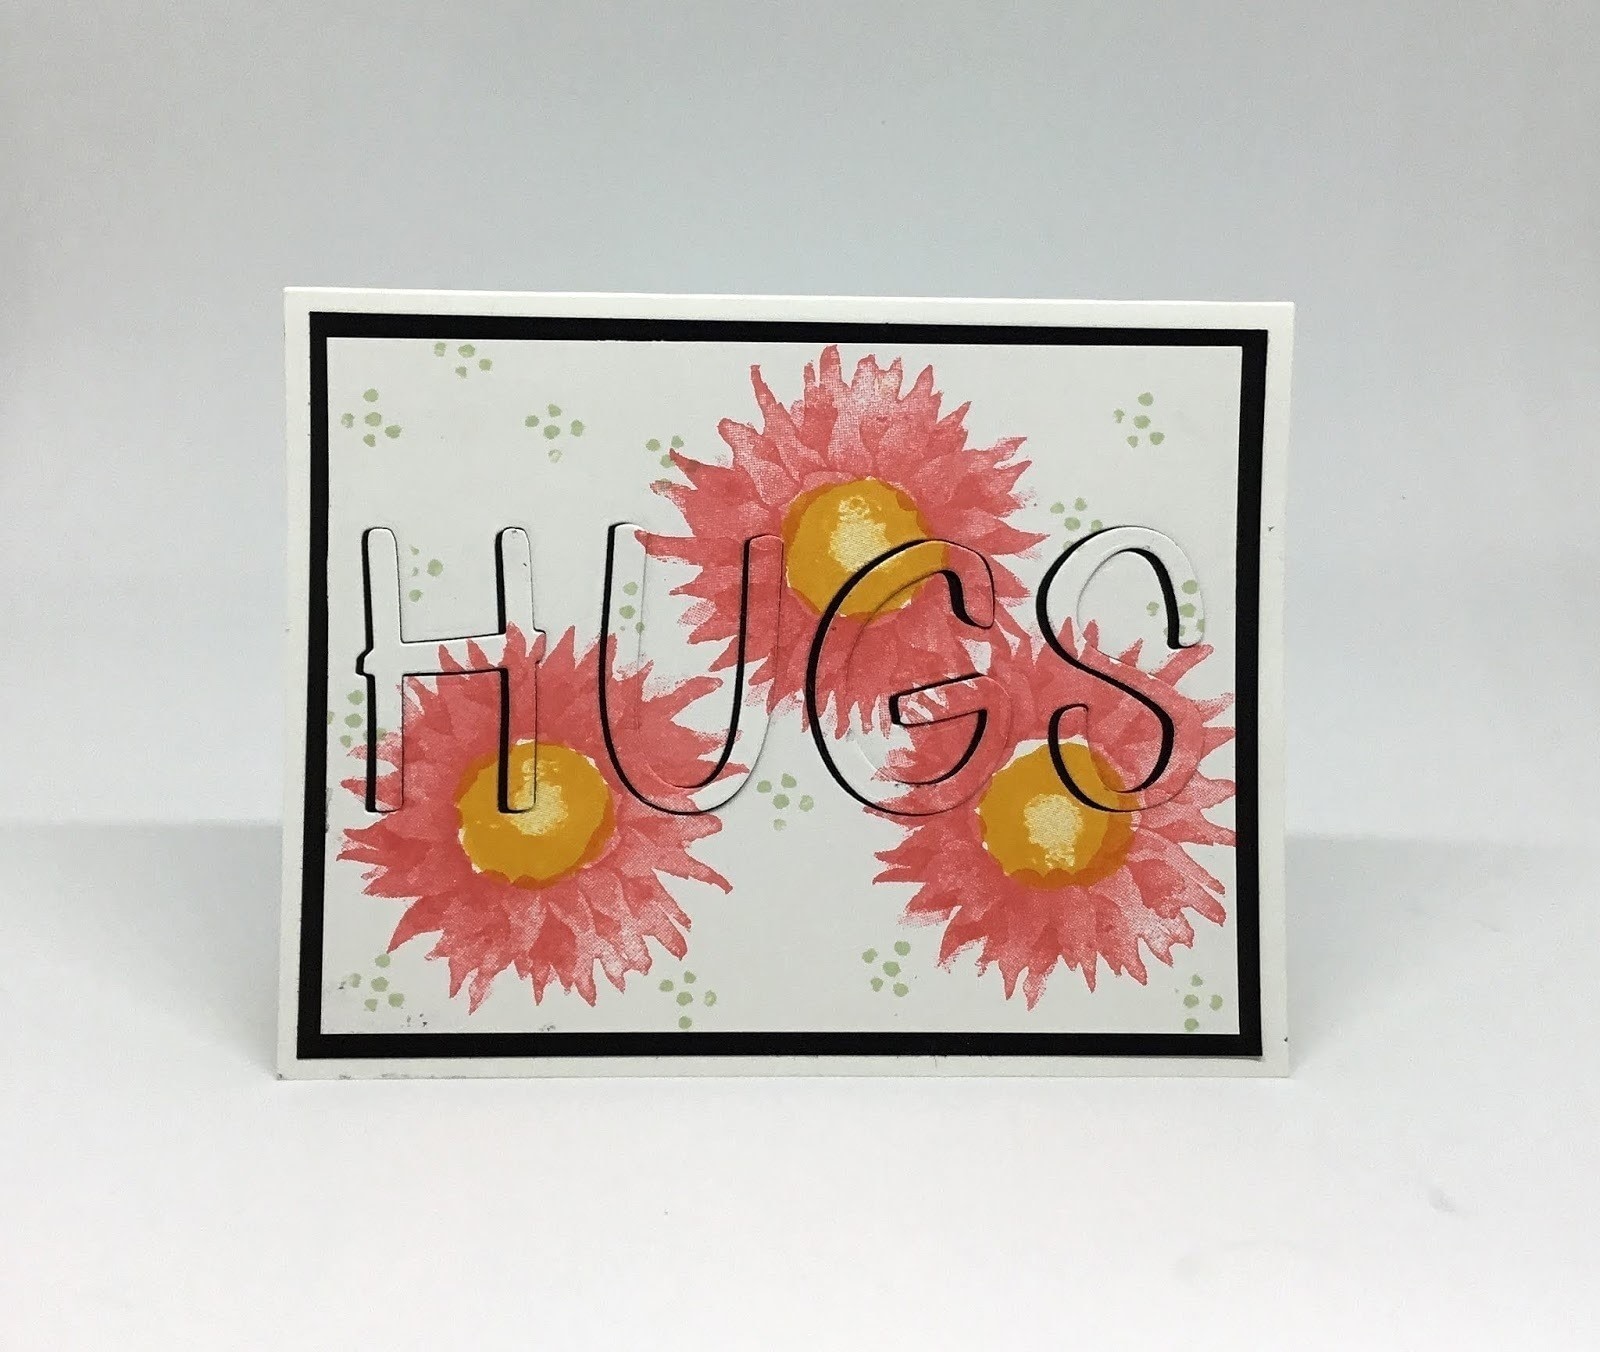
Stamp three of the flowers on the cardstock. (Try to do a better job of spacing them than I did in my sample. Several of the girls at my Stamp-In stamped the flowers randomly all over the cardstock and filled in with the little green dots. Looked great!) Stamp the larger, more solid flower first, followed by the smaller flower atop in Flirty Flamingo ink. Add centers in Mango Melody.
-
Step 4
Add a few of the dot clusters in Soft Seafoam ink to the rest of the background.
-
Step 5
Once you are satisfied with your stamping, line up the dies to spell "hugs" pretty much centered. (Another change a couple of the Stamp-In girls made was to add the letters in a less than straight line -- much happier and less formal looking!) Once you have the letters spaced the way you want them, you can hold them in place with some sticky tape.
-
Step 6
At the Big Shot, run the piece through.
-
Step 7
Mount this piece with the letters missing onto a 4" x 5 1/4" piece of black cardstock. Using miniscule dots of glue, add the letters back in, but shifted just slightly to the right.
-
Step 8
Adhere the finished piece to the card base.
