


About
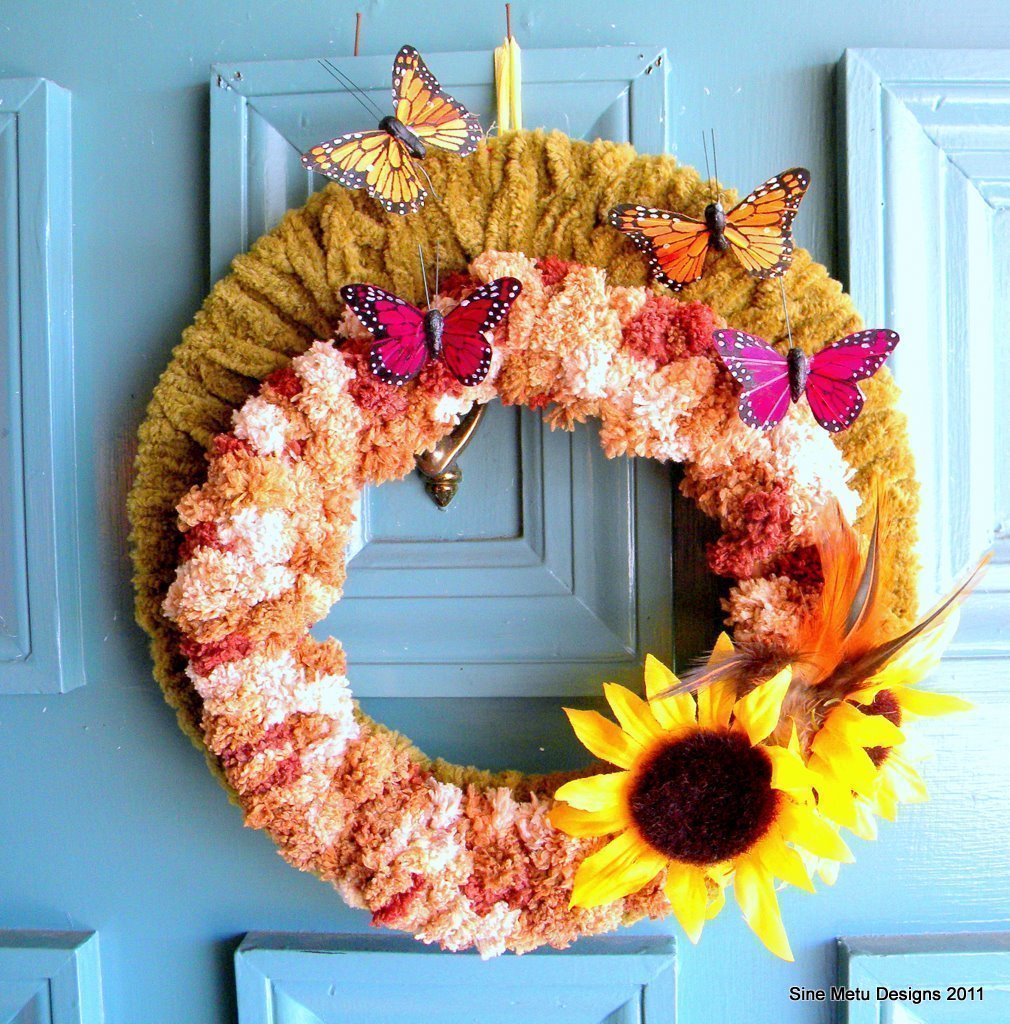
DIY home decor perfect for end-of-summer & early fall
This is a great project to show off some of your chunky, mismatched yarn for a pretty fall wreath! I frequently buy random skeins of yarn that piques my interest when they hit clearance, even if I can't get enough to do an actual textile project. They always come in handy! The two yarn types I used were a fluffy woodsy green chenille and "pom-a-doodle" in mixed shades of brown, tan, cream, and olive. Both had been less than 50-cents at Michaels!
You could use whatever yarn type, texture, and colors you desire--I was looking for a textured look. The bulkier your yarn choice, however, the less time you will spend wrapping it.
I constructed this wreath in such a way that none of the embellishments are permanently attached directly to the yarn. Not only does that mean it could be stored flat by removing the dimensional pieces, but that I could update the embellishments as I wish (e.g. Thanksgiving, Halloween-themed, etc.) If this is not a concern, you could save time by hot-gluing the embellishments directly to the wreath.
Instead of an outdoor wreath, you could also turn these pieces into wall-art, such as a constellation of yarn-wrapped rings with various embellishments around photos or scrapbook paper. They could even be table centerpieces around the base of a tiered serving platter, hurricane glass candle holders, and more. The possibilities are endless!
Tags
Downloads
- DSCN1480-1.JPG 174 KB [ Download ]
- DSCN1481-1.JPG 123 KB [ Download ]
- DSCN1482-1.JPG 186 KB [ Download ]
- DSCN1483-1.JPG 233 KB [ Download ]
- DSCN1487-1.JPG 187 KB [ Download ]
- Missing file
- DSCN1492-1.JPG 270 KB [ Download ]
-
 Jamie S. favorited Fall Wrapped Yarn Wreath
16 Oct 14:40
Jamie S. favorited Fall Wrapped Yarn Wreath
16 Oct 14:40
-
 Stephanie favorited Fall Wrapped Yarn Wreath
12 Nov 17:59
Stephanie favorited Fall Wrapped Yarn Wreath
12 Nov 17:59
-
 Maladignia commented on Fall Wrapped Yarn Wreath
26 Sep 14:24
Maladignia commented on Fall Wrapped Yarn Wreath
26 Sep 14:24
-
 Step 1
Using a piece of fairly rigid cardboard, draw a circle with a compass, or trace a circle, such as a plate. I used a corrugated moving box, which while difficult to cut, was very sturdy in handling.
-
 Step 2
Again either using a compass or a smaller-sized plate, draw or trace a smaller, concentric circle. The space in between the smaller and larger circle will be the thickness of your wreath.
Cut the inside circle out so you are left with a doughnut shape. This is the wreath base.
For my project I used two wreath bases of different sizes--one larger (shown) and a slightly smaller set.
-
 Step 3
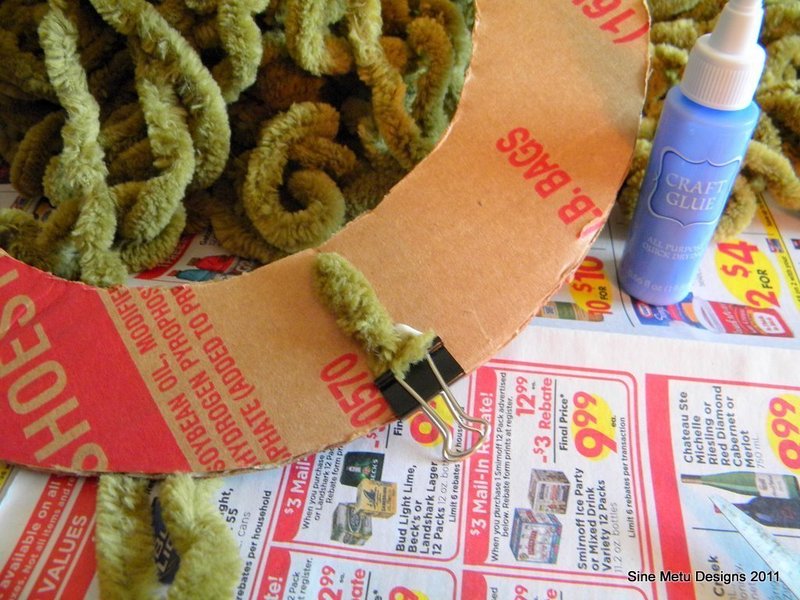
Cut a one-inch slit on the inside ring, and pull the start of your yarn into the slit. Add a drop of craft glue and secure the yarn to the base with a binder clip.
Begin wrapping your yarn around the ring. This runs most smoothly when your yarn is in a nice ball you can pass to yourself through the center, but if your yarn is in pieces or becomes tangled, you can always cut & start any piece in this same way. You'll be able to cover up any tails in the wrapping process.
-
 Step 4
I recommend wrapping the base layer of yarn all the way around before adding any more wrappings of yarn for textural interest. This way you know you have at least enough to cover the cardboard.
To make the textural interest, I wrapped parallel diagonals in alternating directions to make "X" shapes.
I made two of these units, in different yarn types, in slightly different sizes.
-
 Step 5
I connected the wreath units using some leftover ribbon tied tightly.
I hot-glued the sunflowers (dollar-store fake flower heads popped off the stem) onto the ribbon rather than directly on the yarn. This way if I want to change them out, I only need to cut off the ribbon.
Attach the rings anywhere else needed for security invisibly with small gauge craft or jewelry wire. You can tuck it between wraps of yarn and twist it together in the back.
-
 Step 6
Use whatever embellishments you desire or look through your collection o'random things and play around until you have an interesting arrangement
I used monarch butterflies on wire which I had on hand (from the floral department at Hobby Lobby, $2 for 6). You could hot-glue any embellishment to wire to achieve the same result.
Poke the wire into the yarn wrap and secure. I left an inch or so protruding from the wreath so it added dimension and gave the appearance of butterflies lighting on the wreath, especially when the wind brushes past.
-
 Step 7
For the spray of feathers, I wrapped clear tape around the bottom, and inserted them into the yarn wrap behind the sunflowers.
Again, my goal was to make all attachments impermanent so I can change the arrangement for the fall season. You could just as easily hot-glue everything into place.
I used a piece of leftover ribbon wrapped through a few wraps of yarn in the back and tied in a loop for the hanger.


Comments

