
About
Sew a Fabric Pizza Or Pie Box
After making several items out of old siver car windscreen shades recently, I was asked if I knew of a tutorial on how to make a ' pie carrier' - something to take a pie to a picnic in. I didn't but liked the idea of this, and so decided to have a go at something myself! And here is what I came up with - a fabric pie or pizza box!
It is padded and lined with ... what else?....a silver car windscreen shade, which provides insulation to keep your pie or pizza warm, and can also be wiped or hand-washed clean!
So, here's how I did it:
-
 Deb E. favorited Fabric Pizza Or Pie Box
06 Feb 04:44
Deb E. favorited Fabric Pizza Or Pie Box
06 Feb 04:44
-
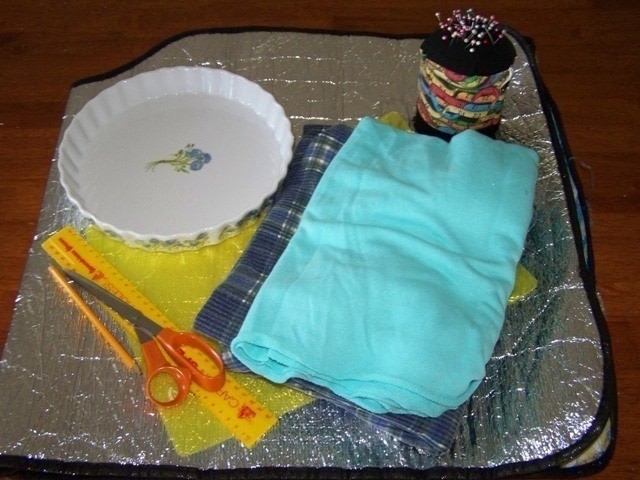
 Step 1
First I gathered my materials:
-
 Step 2
First I cut the plastic chopping boards into 2 squares that the pie would fit on (mine were 28cm square)
-
 Step 3
Next I cut 2 squares of siver car shade 5cm bigger on each side than the plasic board.
I cut 2 pieces of fleece the same side as this and machine stitched one to the back of each silver square. (I used my new overlocker, but you could just plain stitch as the edges will be covered in.
Then cut 2 outer squares 2cm wider again than the silver shade.
So now you have 3 squares for each box like this: -
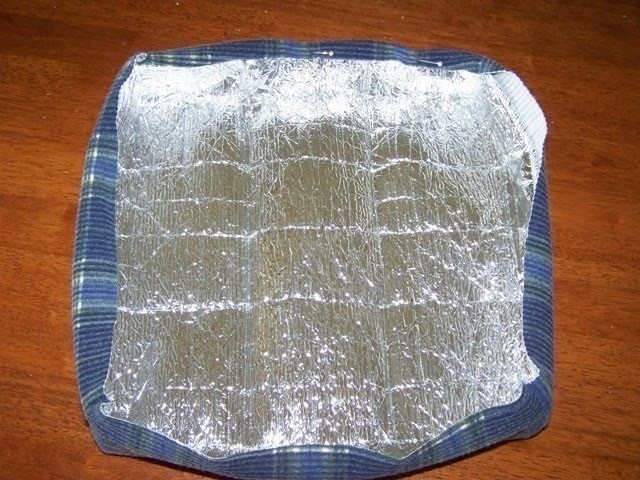
 Step 4
Now you make the silver inner box.
Pinch up the corners around the plastic square, and pin -
 Step 5
Do this for all four corners so it's starting to look like a pizza box!
-
 Step 6
Then stitch each corner where you have pinned it. I stitched over the line 3 times for strength, then cut off the pointy end.
-
 Step 7
Lay this box on top of the outer fabric (right side up), and pin the corners of the outer fabric into a box too.
(keeping the plastic square inside helps you know where to pinch the corners and keep the shape even- but you need to take it out to stitch!!!) -
 Step 8
Pin all four corners, and stitch as you did for the silver square.
-
 Step 9
Then stitch 3 times along the pinned corners and snip the pointy ends off, just as you did for the silver part.
Turn right sides out.
Now you have the inner and outer boxes ready to join together. -
 Step 10
Place the plastic square under the silver box, inside the outer fabric.
Turn the top edge of the outer fabric double over the edge of the silver box and pin down. -
 Step 11
Top stitch around the edges to join all the layers together.
-
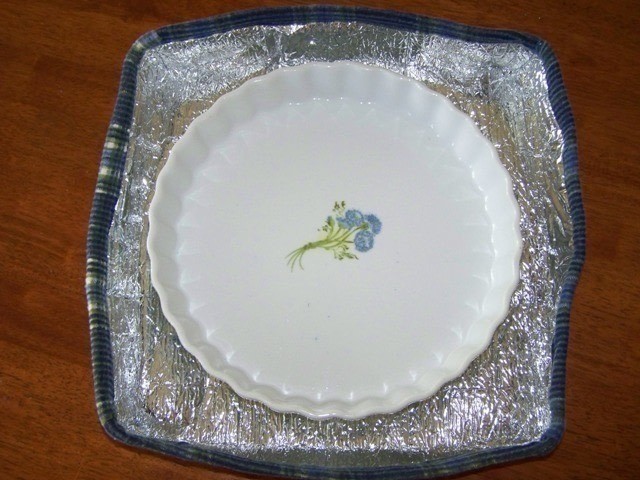
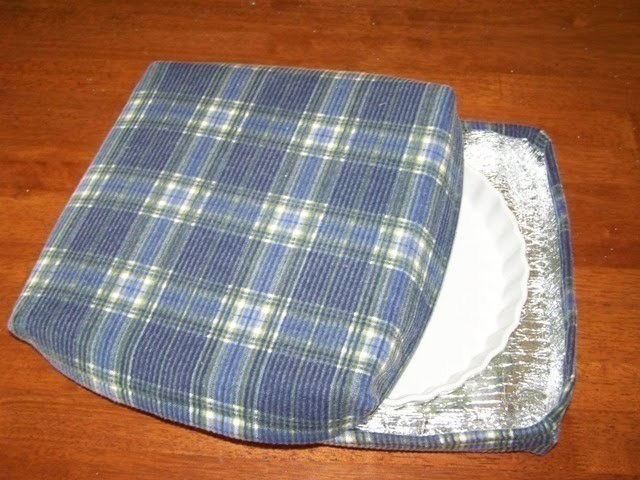
 Step 12
You're done!! One box is completed, and you can place your pie dish inside it!
-
 Step 13
Now repeat with your second set of squares.
I found with my second box, that I cut strips off the remaining pieces of plastic chopping board and inserted them along each side of the box to give those sides strength.
The box with strengthened edges then became the bottom box, and the floppier one worked well as the lid as it stretched over the edges well. (Love it when things just work out like that!!)You can see what I mean here the floppy one is on the left, the strengthened one on the right.
-
 Step 14
Of course you could strengthen both boxes, and just make one very slightly larger than the other so they fit together!
-
 Step 15
So now the only problem left to solve is how best to carry this to your picnic!!
The answer?
A furoshiki!!
What is a furoshiki? I hear you ask!!
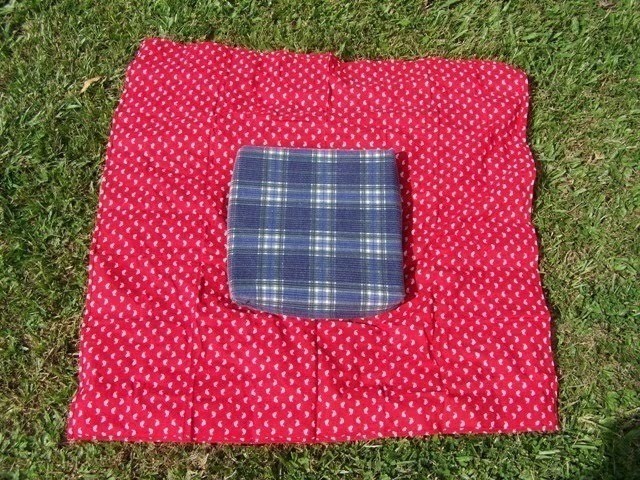
It's a Japanese wrapping cloth. Basically a square of fabric with finished edges, that you can tie in various mindboggling ways to carry things, wrap presents, make bags....... (Go on, google it and see!!)
So, take a nice large furoshiki and place your fabric pizza / pie dish in the centre:
-
 Step 16
Then tie opposite corners together over the top of the box:
-
 Step 17
Then fold the remaining corners over and tie them. Just use a double granny knot, and tie the second corners on either side of the first knot for extra stability!
-
 Step 18
Then just pick it up, and off you go to your picnic!!!
Enjoy!!
I hope you liked this tutorial!
Happy picnicing!!
Jill