

About
Use gorgeous holiday fabrics to make your gifts look amazing & keep wrapping easy
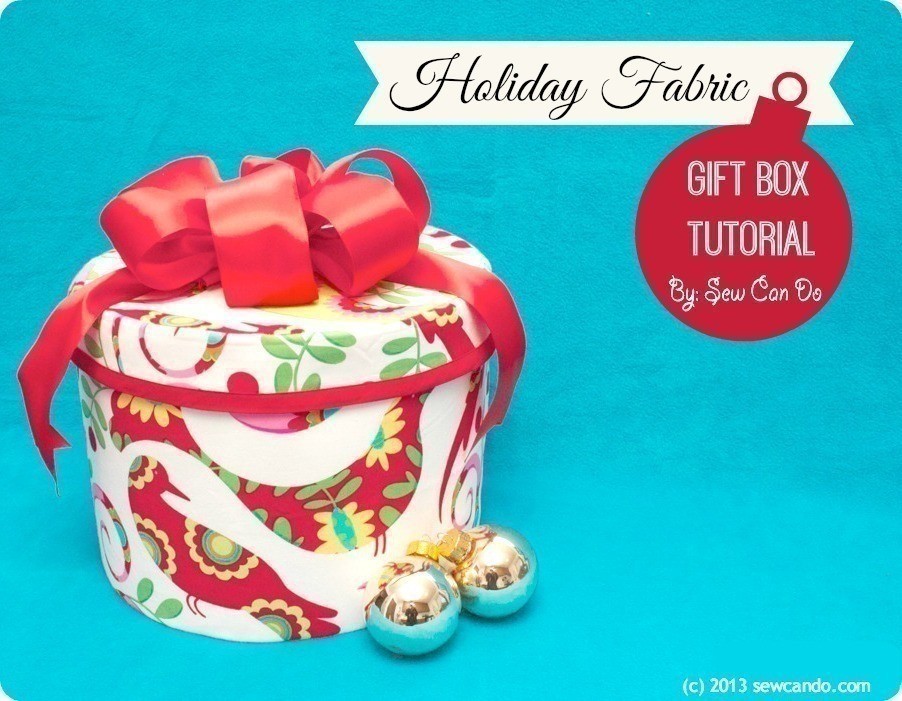
Gift shopping & wrapping for the holidays getting challenging? Want some packaging that will wow and also won't get tossed in the trash in a hot second? Make my Holiday Fabric Gift Box! Today's tutorial shows how to use gorgeous holiday fabrics to make your gifts look amazing and keep wrapping easy. Added bonus, they can be used year after year, so one box will last a long time!
-
 Cheryl@Sew Can Do entered her project Fabric Gift Box to Secret Santa
18 Jan 00:19
Cheryl@Sew Can Do entered her project Fabric Gift Box to Secret Santa
18 Jan 00:19
-
 Pimke added Fabric Gift Box to Nähmuster
27 Jan 08:10
Pimke added Fabric Gift Box to Nähmuster
27 Jan 08:10
-
 pandanomz added Fabric Gift Box to my list
07 Sep 03:04
pandanomz added Fabric Gift Box to my list
07 Sep 03:04
-
 Alissa B. favorited Fabric Gift Box
20 Jan 12:11
Alissa B. favorited Fabric Gift Box
20 Jan 12:11
-
 yuliatko added Fabric Gift Box to Crafts
15 Jan 07:54
yuliatko added Fabric Gift Box to Crafts
15 Jan 07:54
-
yuliatko favorited Fabric Gift Box
15 Jan 07:53
-
Suzi T. favorited Fabric Gift Box
13 Jan 13:32
-
 It's only Me. added Fabric Gift Box to Boxes and Storage
09 Jan 07:03
It's only Me. added Fabric Gift Box to Boxes and Storage
09 Jan 07:03
-
It's only Me. favorited Fabric Gift Box
09 Jan 07:02
-
It's only Me. commented on Fabric Gift Box
09 Jan 07:02
-
 Step 1
Cut the following pieces:
- 8 inch high by 33 inch wide rectangle from outer + lining + fusible stabilizer
- 2 inch high by 33 inch wide strip from outer + lining + fusible stabilizer
- 10 1/2 inch diameter circle from outer + lining + fusible stabilizer -
 Step 2
Also cut a 7 1/4 high by 32 inch wide rectangle and a 10 inch diameter circle from the Extra Firm sew-in stabilizer
-
 Step 3
Start by fusing the medium-weight stabilizer to the wrong side of the lining pieces (base, side, lid top, lid edge strip). Fold the side pieces of the outer fabric width-wise, with right sides facing, and stitch along the short side with a 1/2 inch seam allowance and repeat with lining piece. Do the same with the lid strips, but use a 3/8 inch seam allowance (this will make the lid fit better later).
-
 Step 4
With right sides facing, pin the circular bottom to the box side piece and stitch together. Repeat this with the lid outer and lining pieces, again using a 3/8 inch seam allowance. Trim all raw edges with pinking shears or clip around curves.
-
 Step 5
Personally, I hate trying to sew Extra Firm/Ultra Firm stabilizer into place on a curved item. It's hard to get on the machine, adds a lot of thickness to seams and tends to shift around when sewing. Even a careful job, with an expert hand, can end up looking wobbly and lead to some profanity, mutterings about throwing the project out the window, etc. So here's what I do to save my sanity on projects like this: grab a can of spray adhesive and lightly coat the stabilizer (tip: do it outside or on scrap paper so you don't get sticky spray on everything around it). This is where it's important to have cut the stabilizer smaller than the fabric pieces, as mentioned earlier, so it will fit together like a glove when the seam allowances are gone.
-
 Step 6
Smooth the circular pieces into place on the wrong sides of the box bottom and lid top. If there are wrinkles or it's not centered, just peel it up and move. That's what you can't do when sewing & it slides around (unless you want to unpick all the stitching and start over, which I rarely want to do).
-
 Step 7
Repeat with the side piece on the outer fabric. It takes a little time, but I feel like it's much better than wrestling with it on the machine. It helps to start pressing it on it's side and then sit the box up and smooth like shown.
-
 Step 8
No need to add it to the lid's edge, so one less thing to spray! Once everything looks good, insert the lining into the outer box, smooth together, and pin along raw edge at the top. Repeat with the lid.
-
 Step 9
Encase the edge in the bias tape and stitch along the tape edge, using a heavy duty needle. Repeat with the lid.
-
 Step 10
Now the box is ready to fill with all sorts of holiday goodies.


Comments

