About
Fabric Book Tutorial - Part 1
Learn how to sew a fabric book to showcase your favorite fabric prints. I used my favorite Liberty Art Fabrics in this tutorial with the exception of the quilting cotton used for part of the cover and to make the pages. This is part 1 of the 3 part tutorial. In part 1, I will go over how I made the front cover of the book.
-
 Alissa B. favorited Fabric Book Tutorial Part 1
02 Oct 18:14
Alissa B. favorited Fabric Book Tutorial Part 1
02 Oct 18:14
-
Vicky published their project Fabric Book Tutorial Part 1
19 May 09:02
-
Step 1
Draw a heart shape onto a piece of paper and cut out as a template.
-
 Step 2
Take 2 solid pieces of Liberty lawn half the width of your heart template and add 2″. For example if your heart is 6 inches wide, cut 2 solid lawn pieces 5 inches wide. I added 2″ but you can add 3 or 4 depending how much empty space you would like to have your heart and the edge of your cover. Add solid color strips at the top and bottom to create borders. Alternatively you can add to all 4 sides to create a frame effect.
-
 Step 3
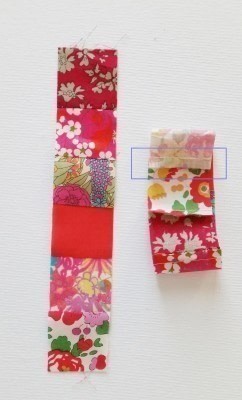
Cut fabric into strips 1.25″ wide and sew together. Depending how big your heart shape is, you will need more strips than I have here. Then sew the top and bottom edges I marked in blue boxes below so you get a tube.
-
 Step 4
Cut the tube into 1.25″ strips. Then unpick the stitches between 2 of the squares. Alternate the sections where you unpick the stitches so the prints are different when you put them side by side.
Strip after unpicking stitches between the 2 squares ( left )
Tube before unpicking stitches noted with blue box ( right ) -
 Step 5
Now sew the strips together and stagger the seams so they do not line up. You can choose to line up the seams but this requires less fussy cutting since the seams don’t need to line up. I actually ended up adding 2 extra squares in the middle because my heart was bigger than these 3 strips sewn here so you can sew extra squares to fit the size of your heart template.
-
 Step 6
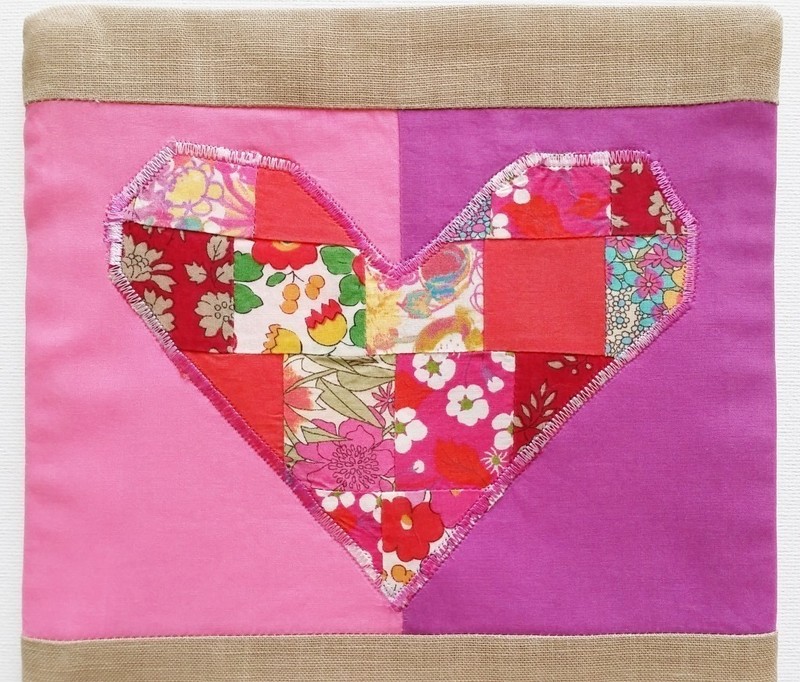
Cut out your heart shape. Use glue stick to adhere your heart to the background created in step #1. Then use a zigzag stitch to go around your heart. I put a solid piece of white quilting cotton on the back before I did the zigzag stitch because the cotton lawn is too lightweight by itself to hold the force of the stitches.
Heart applique on front of cover ( left )
Stitching on back of cover ( right ) -
Step 7
Cut out a piece of quilting cotton the size of your front cover. Also cut interfacing .25″ smaller on each side and iron to the back of your quilting cotton.
-
 Step 8
With right sides together, sew the front and back pieces together leaving a gap indicated by the blue arrows to turn the fabrics inside out. I used pinking shears to prevent the edges from fraying but that’s totally optional. You can also serge the sides as well.
-
 Step 9
Turn your fabric right side out using the gap. Don’t worry about sewing the gap closed as that will be taken care of when we bind all the pages together.