
About
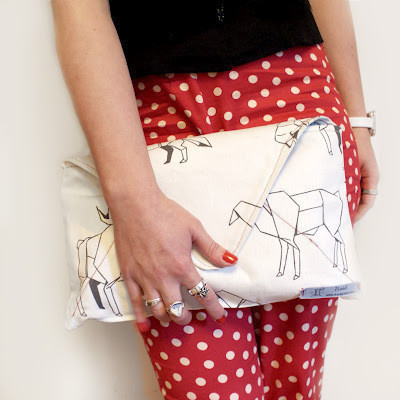
How to make a super cute envelope clutch bag
I don't know about you, but my two favorite pastimes are fashion and thrifting. I like to make new clothes and accessories so I stand out from the crowd; I've always been pretty quirky and individual and fitting in never really appealed to me!
I often pick up fabric remnants to experiment with and decided that I needed a giant envelope clutch bag to finish off an outfit. I mean, lets face it, every girl needs a giant handbag!
This diy is a little fiddly, but can be done with left overs from other sewing projects and can be whipped up and ready to go pretty quickly. You can guarantee you will be the talk of the town touting about a giant envelope for the evening :D
-
 Trisha J. favorited Envelope Clutch Handbag
27 Nov 02:53
Trisha J. favorited Envelope Clutch Handbag
27 Nov 02:53
-
 Xfluffy_unitatoX favorited Envelope Clutch Handbag
19 Nov 20:41
Xfluffy_unitatoX favorited Envelope Clutch Handbag
19 Nov 20:41
-
 Emily B added Envelope Clutch Handbag to karlie kloss inspiration
03 Aug 23:06
Emily B added Envelope Clutch Handbag to karlie kloss inspiration
03 Aug 23:06
-
 Maje Zmaje favorited Envelope Clutch Handbag
05 May 09:26
Maje Zmaje favorited Envelope Clutch Handbag
05 May 09:26
-
 Aishwarya Purohit favorited Envelope Clutch Handbag
22 Nov 05:07
Aishwarya Purohit favorited Envelope Clutch Handbag
22 Nov 05:07
-
 Joann S. favorited Envelope Clutch Handbag
06 Oct 04:27
Joann S. favorited Envelope Clutch Handbag
06 Oct 04:27
-
 Nyctophobia favorited Envelope Clutch Handbag
22 Aug 20:47
Nyctophobia favorited Envelope Clutch Handbag
22 Aug 20:47
-
 Charlotte H. favorited Envelope Clutch Handbag
25 May 09:38
Charlotte H. favorited Envelope Clutch Handbag
25 May 09:38
-
Maxine M. added Envelope Clutch Handbag to To-make list
12 Apr 04:16
-
 Blair M. favorited Envelope Clutch Handbag
14 Mar 03:06
Blair M. favorited Envelope Clutch Handbag
14 Mar 03:06
You Will Need
-
 Step 1
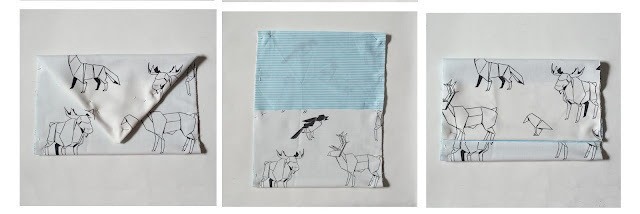
So, first up pick a couple of fabrics.
We have gone with an illustrative material for the outside and blue and white stripes on the inside. Cute! As our material is fairly thin, we will be adding some iron on interfacing in-between the two to stiffen it up and make sure it isn't too flimsy. Iron on interfacing may in fact be the best creation in the whole world, and it is really easy to use! If you have gone with a heavier fabric/leather/pvc (etc) you should be ok; the lining helps to make it more ridged too.
Right, so pin the two pieces of fabric together so you can see the patterns on both sides...
-
 Step 2
This is how it is going to work. Dead simple!
You will be pinning the bottom part of the clutch about 1/3 into the fabric. This will allow the cover to fold down on top of it and sit perfectly. Don't do it just yet though!
We will be stitching this part inside out to keep these seams hidden. Remember to pin this area on the inside (the lining). This is the only part which is done inside out, don't worry.To give an idea of the final look, I have pinned together the point of the envelope for now to keep us right with the measurements. Vivid don't believe in patterns and instructions, but if you do, we find marking everything with pencil on the fabric works a dream as it comes off with no bother. A cheap alternative to fabric pens is always a bonus!
-
 Step 3
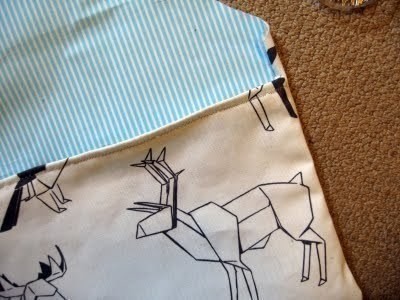
First of all we recommend hemming the bottom of the material as this will be the opening of your new bag and we don't want to get it all frayed when rummaging for our change on your night out. Then pin the bottom of the fabric 1/3 of the way up. Remember that your fabric should be inside out for this step so the seams will be hidden. If you are blessed enough to own a sewing machine, sew the two sides together to meet the hemmed opening as shown. For those who are manual makers, get your trusty needle and thread out and stitch it up a storm!
-
 Step 4
TaDa! Geeze, you are nearly done already!
Flip your bag right way out and admire your handy work. Brilliant!
Next, trim around the edges of your envelope flap so there isn't too much excess fabric. Remember you will be hemming it so make sure to leave enough to fold it over to create a nice edge all the way round. -
 Step 5
The point of your envelope will be the trickiest thing to master.
We worked from the outside of the bag (what people would see) and pinned our pointed curve in place with a couple of pins. From the inside, you will see that this part isn't hemmed like the rest. We will be trimming the fabric around this area very neatly once it has been sewed. If you find yours is threading after a few uses, add a little fray glue to ensure it stays put. We haven't needed it for this project, but it has saved our threads before and is worth the investment! -
 Step 6
Now that you have the top pinned and you are ready to go you will be able to see how lovely your clutch is going to look. Perfect! We have decided to give our Envelope Clutch red stitching to highlight our outlines - you may want to pick a colour that gives a bit of a kick too :)
The bolder the better!Carefully sew around the rim and take extra time sewing round the curve as it can be a little fiddly. No one will see the inside of this so don't worry if it doesn't look impeccable. You can always cover it with a little excess fabric if it bothers you; we love the little imperfections as it gives character. We made it ourselves after all!
-
 Step 7
Done! Check it out - isn't that great?!
We added on a couple of stitched diagonal lines in red to give ours more of an envelope feel. Cute, huh? You could sew these on free hand, or draw your lines on in pencil and run it through your sewing machine like we did. Then add on little extras and flourishing (like a few kites or maybe some rolled fabric flowers) to really make it stand out.
As much or as little as you like; possibilities are endless!
To keep the flap in place you could add a little Velcro (we LOVE velcro!), a button or if your material is more stiff perhaps even a magnet clasp to hold it in place. Perfect! -
 Step 8
Good work!
We hope you enjoyed our Envelope Clutch tutorial and made your own beautiful bag.
Let us know how you got on - we would love to see your creations and hear your comments... -
 Step 9
Happy Making!
www.vividplease.me
xox


Comments