About
Emergency Make Up Tutorial
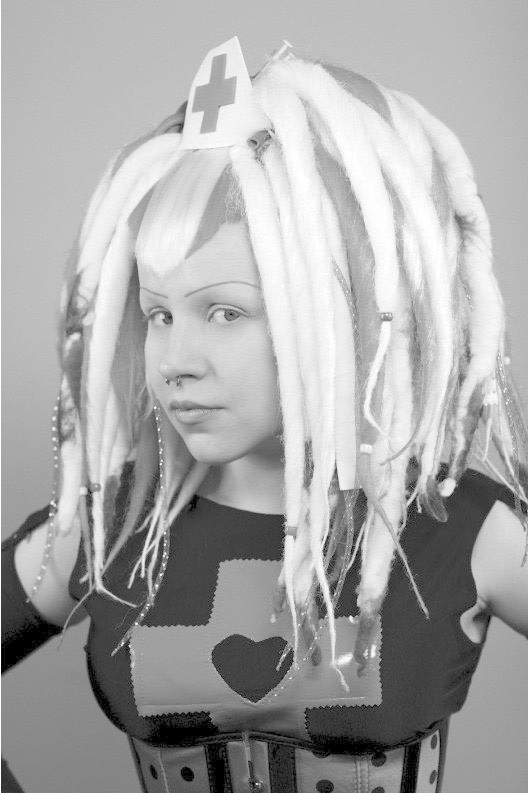
Turn fashion into a controlled substance in visceral red, sterile gray and padded cell white eyeshadows. A prescription for surgical style will be issued to all medical fun time dollies, fetish nurses and gurololis. Inoculate yourself against the drabness disease and inject a dose of hospital chic into your makeup routine.
Prep Work:
Wash your face with a cleanser formulated especially for your skin type. Rinse thoroughly and pat dry with a soft cloth.
Prep your skin with moisturizer before applying concealer in order to ensure a smoother, flake free application.
Before proceeding any further allow your skin to properly absorb the moisturizer. This should take about 10 minutes.
Since foundation worn alone often has a nasty habit of settling in the fine lines around your mouth, near your eyes and on your forehead, I highly recommend using a primer such as Smashbox Photo Finish Foundation Primer after you’ve moisturized your face. Utilizing a small amount of Photo Finish helps to fill in unflattering expression lines, pores and scars, thus allowing foundation to actually do its job!
Nix blemishes and skin discoloration by gently patting concealer (I like Make Up For Ever Full Cover Concealer in Porcelain 2) over the trouble area Follow by blending with your ring finger.
Apply a liquid foundation that best matches your skin tone to your face and neck with a foundation brush (A full dome shaped brush such as A/1ac's 182 Buffer Brush works beautifully).
Start by applying small dots in the center of your face and then moving outward (I cannot stop raving about Make Up For Ever Mat Velvet + Matifying Foundation in no. 25 Warm Ivory).
Set everything in place by finishing off with a thin coat of translucent powder (Make Up For Ever HD Microfinish Powder provides long lasting even coverage even in generally unforgiving high def resolutions). Use a full, round shaped powder brush such as the 129 Powder/Blush Brush by Mac for optimal results.
Tags
© 2024 · Reproduced with permission.
You Will Need
-
 Step 1
Prep your brows by filling them in with a pencil and softening the lines with a small brush or drawing them in if you don't have them. Eyebrowless ladies like myself should make sure to use a pencil that matches their hair color. I opted for Rimmel Exaggerate Full Colour Lip Liner in O24 Red Diva, which was color coordinated to my red and white medically themed wig.
After you're satisfied with the shape of your brows, feel free to seal them with a single coat of a makeup sealer, such as She Laq by Benefit Cosmetics. Treat it as insurance for your eyebrows, since I'm fairly sure that when you're dancing at the club, the last thing you want is your eyebrows dancing off your face.
Last but not least, lightly coat your entire eyelid area with an eyeshadow primer, such as Urban Decay's Eyeshadow Primer Potion to build a smooth base for your shadows, pigments and liners.
-
 Step 2
Pining for precision?
Apply clear adhesive tape starting at the outer corner of your eye and extend to the end of your eyebrow. Press down gently with your finger to smooth it out. This little trick gives your eyeshadow an extremely pronounced hard edge, which creates a clean and defined shape.Let’s paint those eyelids a cardiac arrest inducing shade of red now! Take an eyeshadow brush with a round/tapered edge (such as the 239 brush by Mac which rocks so hard that I now own two of them) and wet it a little.
Dip your dampened brush into the ruby red pigment (such as Mac Accent Red) and gently tap, Do not swipe, the pigment across your entire eyelid from lashline to crease. Don't worry if you get excess pigment on the tape. Once you're done with your eye makeup and peel the sticky stuff off, I assure you that any messes you might have made will magically disappear.
Using a blending brush (such as my makeup bag staple 217 brush by Mac) add some gold pearl infused black pigment (I used Mac Dark Soul) to the outer crease of your eye and bring it down to your lashline on the outer corner of your eyelid. This is also known as the “outer V", Blend into the ruby red pigment from Step 2.
If you shave and draw your brows on you can extend the pigment past your crease and onto the lower part of your browbone, since you obviously have more room to work with. Once again, ignore any fallout that might have ended up on the area you previously taped off.
-
 Step 3
Starting at the inner corner of your eye, using a small fluffy eyeshadow brush (like the 213 brush by Mac) tap some light pink pigment (Mac Helium would be most optimal since it contains a red duochrome which would blend nicely with the pigment from Step 2) outward toward the "V" of gold infused black you applied in Step 2.5. Blend into the ruby red pigment you added in Step 2.
Eyebrowless girls and boys have the option to extend the pigment past the crease and onto the lower part of their browbone the same way they did in Step 2.5.
At this point, the outer part of your crease (and parts of your browbone if you're brow-less) should be a metallic black shade, while the inner part should be a slightly reddish pink. Blend both shades into each other at their meeting point which should lie somewhere at the halfway point in the crease of your eye.
-
Step 4
Clean the fluffy eyeshadow brush you used in the previous step. Sweep some frosty off white shadow (Mac Phloof! works nicely) directly under your eyebrows (doesn't matter if they’re drawn on or natural).
Blend the frosty off white eyeshadow into the two colors that you've blended into your crease in Step3, the metallic black and the reddish pink.
Line your bottom lid starting from the outer corner of your eye, slowly making your way toward the inner corner with your favorite brand of black kohl eyeliner. Most of the color should be concentrated in the outer corner. I find that it's easiest to put on eyeliner after eyeshadow and before mascara.
Curl your eyelashes with an eyelash curler and top off with 2 coats of black mascara (I used Barry M Extreme Black Waterproof Mascara) Now would be a good time to remove the tape and admire your eyeshadow blending skills!
-
 Step 5
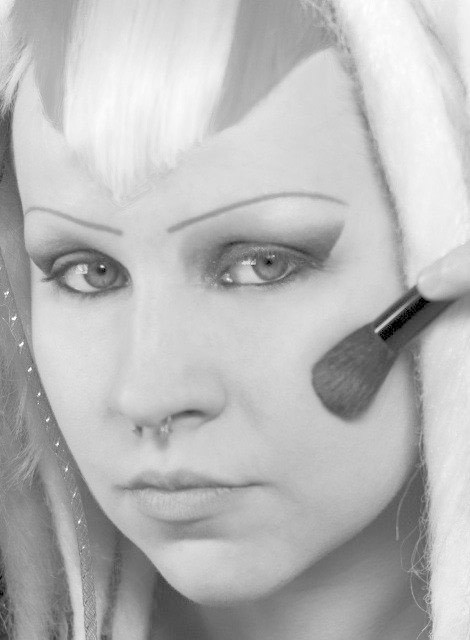
And now for some cheekbone definition! Swipe some pressed bronzer (try Sephora Brand Bronzer Powder SPF 15 in Bora Bora) onto your blush brush (I just acquired the Mac 187 Duo Fibre Brush and am seriously in love with it).
Starting mid-cheek, going towards your ear apply the bronzer into the hollows of your cheeks using short, up-and down vertical strokes.
Darker shades will give the illusion of the hollows of your cheeks receding.
Now using the same technique add a peachy pink blush (Nars Orgasm looks good on everyone) to the apples of your cheeks, which will cause them to protrude. Use translucent powder to blend between the two colors in order to avoid obvious lines. Stripes are for zebras, not for your face.
-
 Step 6
Filling in your entire lip area prevents your lip color from fading, blurring and feathering throughout the course of the day/evening/night.
Use a flesh toned lip liner such as Mac Lip Pencil in Stripdown to fill in your lips starting at the center of your natural lip line and moving toward the outer corners.
-
 Step 7
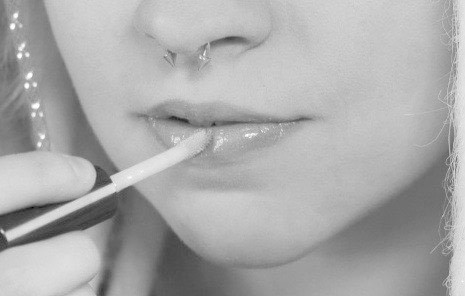
Ultra glossy near nude lipgloss with a slightly peachy beige tint (like Mac Lipgloss in C-Thru) is truly a perfect finish for your show stopping red, black and white lids!
Beginning in the center of your upper lip, gently press the gloss wand into the flesh of your lip and then proceed to roll it over the entire top lip area working toward the edges. Repeat the process on your bottom lip.
Remember kids: Lipstick stained teeth are the polar opposite of sexy. To ensure that your gloss sticks to your mouth and not your teeth put your index finger in your mouth, then proceed to slide it out slowly with your mouth still closed. This will remove any excess lip color.
Caution: This look may be habit forming.
Best worn with your finest medical dressings and a cute rich Doctor.