


About
Upcycled bird feeder
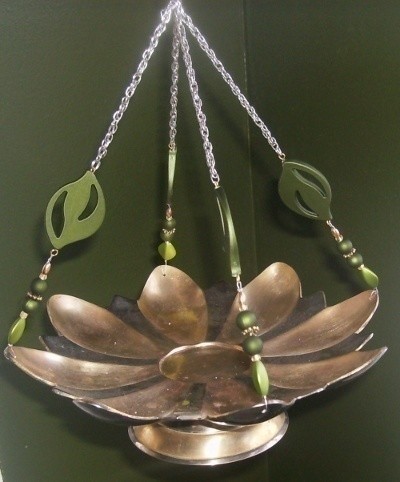
This is a super easy project that you can do in an hour or so. You will end up with a really neat hanging dish that you can use as a bird feeder, or to hang from a hook to hold a candle, potpourri, etc.
First of all, you need a dish or plate or platter. I use metal because it's much easier to drill through than glass and weathers better than wood, though wood is super neat as well.
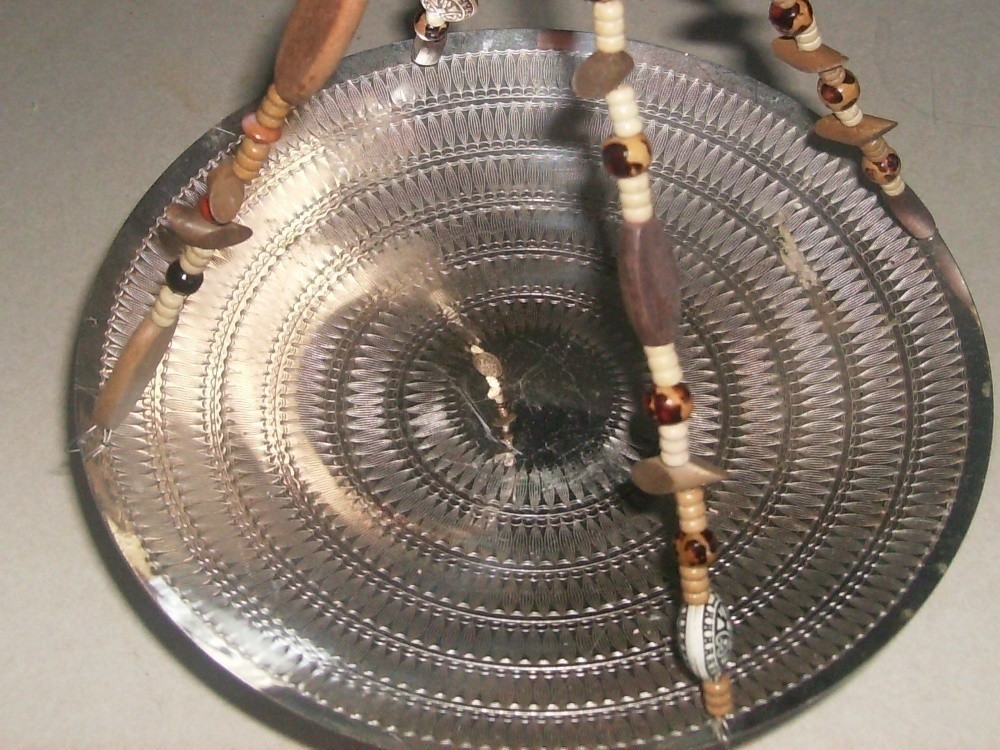
1. So, you find your bowl or dish or whatever and you drill 3 or 4 holes evenly around the upper edge. You may want to smooth your holes with a Dremmel and little stone bit, just to clean off all the sharp edges.
2. You take about 8 inches of your beading wire, add a crimp bead and then thread it through one of the holes. Take the end of the wire and thread it back up through the crimp bead and crimp it off with your pliers. Do this with seperate wires all the way around.
3. Now, start beading. You can use new beads, or you can use beads from old necklaces. To get the "floating" bead look, like in picture 1 and 2, you simply crimp down a crimp bead anywhere on the wire and add a few beads, then top them off with another crimp bead. Bead however, you like.
4. Gather all 3 or 4 wires together at the top and make sure they are even so your bowl is level. I like to add a bigger crimp bead here (to accomodate all 3-4 wires) and crimp it down so it holds all the strands even while you make the loop.
5. Add a largish bead if you like. This just dresses up your loop a bit and gives you a place to hide your wire ends.
6. Add another large crimp bead. This will hold your loop together. Make a loop with the leftover wire around your finger and thread the ends back down through the crimp bead and the decorative bead. When you have the loop the way you want it, crimp the bead off.
7. Trim any excess wire ends that are not hidden by the decorative bead and viola! Your done!
Tags
-
 Key West Witch favorited Easy Bird Feeder/Candle Holder
29 Jun 10:12
Key West Witch favorited Easy Bird Feeder/Candle Holder
29 Jun 10:12
-
 Kindsister D. favorited Easy Bird Feeder/Candle Holder
17 Feb 19:38
Kindsister D. favorited Easy Bird Feeder/Candle Holder
17 Feb 19:38
-
Step 1
So, you find your bowl or dish or whatever and you drill 3 or 4 holes evenly around the upper edge. You may want to smooth your holes with a Dremmel and little stone bit, just to clean off all the sharp edges.
-
Step 2
You take about 8 inches of your beading wire, add a crimp bead and then thread it through one of the holes. Take the end of the wire and thread it back up through the crimp bead and crimp it off with your pliers. Do this with seperate wires all the way around.
-
Step 3
Now, start beading. You can use new beads, or you can use beads from old necklaces. To get the "floating" bead look, like in picture 1 and 2, you simply crimp down a crimp bead anywhere on the wire and add a few beads, then top them off with another crimp bead. Bead however, you like.
-
Step 4
Gather all 3 or 4 wires together at the top and make sure they are even so your bowl is level. I like to add a bigger crimp bead here (to accomodate all 3-4 wires) and crimp it down so it holds all the strands even while you make the loop.
-
Step 5
Add a largish bead if you like. This just dresses up your loop a bit and gives you a place to hide your wire ends.
-
Step 6
Add another large crimp bead. This will hold your loop together. Make a loop with the leftover wire around your finger and thread the ends back down through the crimp bead and the decorative bead. When you have the loop the way you want it, crimp the bead off.
-
Step 7
Trim any excess wire ends that are not hidden by the decorative bead and viola! Your done!
Comments

