About
Cute pocket for rings/buttons/ beads etc
My mum found a plain non-mousey one of these when clearing out a while back which I think I'd made at school - really, really easy but with loads of uses so thought I'd use up some scraps and have another go :)
They make great jewellery pouches / coin wallets /xmas decorations with sweets inside.
This is my first how-to so hope it makes sense!
-
 Alma favorited Easy Jewellery Pouch
18 Jun 18:13
Alma favorited Easy Jewellery Pouch
18 Jun 18:13
-
 Belle W. favorited Easy Jewellery Pouch
02 Jul 13:38
Belle W. favorited Easy Jewellery Pouch
02 Jul 13:38
-
 Yana S. added Easy Jewellery Pouch to Kawai
22 Mar 11:51
Yana S. added Easy Jewellery Pouch to Kawai
22 Mar 11:51
-
 Timber H. added Easy Jewellery Pouch to Felt
28 Jul 12:28
Timber H. added Easy Jewellery Pouch to Felt
28 Jul 12:28
-
 Millie H. added Easy Jewellery Pouch to cool ideas
25 Mar 23:37
Millie H. added Easy Jewellery Pouch to cool ideas
25 Mar 23:37
-
 Alice N. added Easy Jewellery Pouch to Bags
21 Jan 20:05
Alice N. added Easy Jewellery Pouch to Bags
21 Jan 20:05
-
Alice N. added Easy Jewellery Pouch to Bags
21 Jan 20:04
-
 SilverSnake S. favorited Easy Jewellery Pouch
23 Jul 04:46
SilverSnake S. favorited Easy Jewellery Pouch
23 Jul 04:46
-
Len favorited Easy Jewellery Pouch
05 Jul 23:33
You Will Need
-
 Step 1
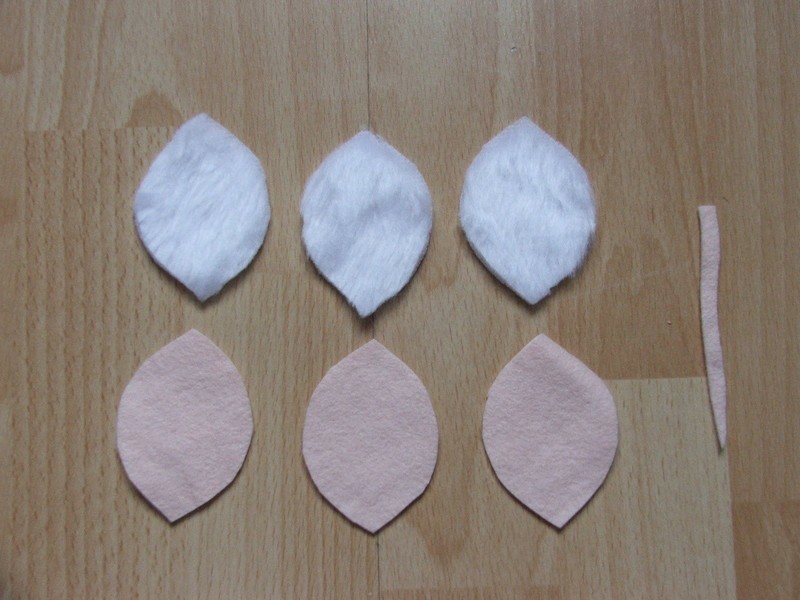
Cut out three eye shapes from thin cardboard. They can be as big as you want but all three need to be the same size.
-
 Step 2
Cut out six pieces of fabric - three pieces for the inside, three for outside. These need to be slightly bigger than the cardboard.
Felt is pretty good for this or something fairly weighty.
-
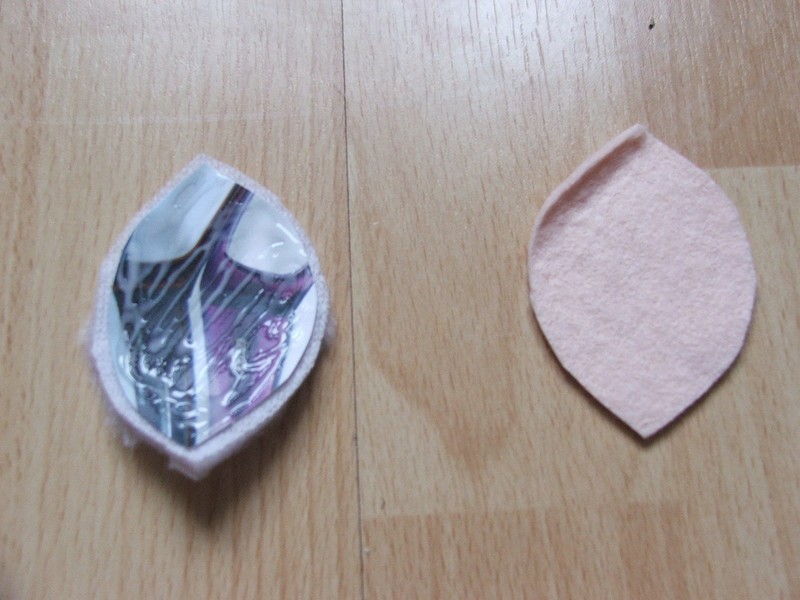
 Step 3
Glue an outside piece of fabric to a piece of cardboard using a small amount of glue - PVA works fine. Do the same with the inside piece and for the remaining pieces.
You don't have to wait for them to dry before you sew the whole thing together.
-
 Step 4
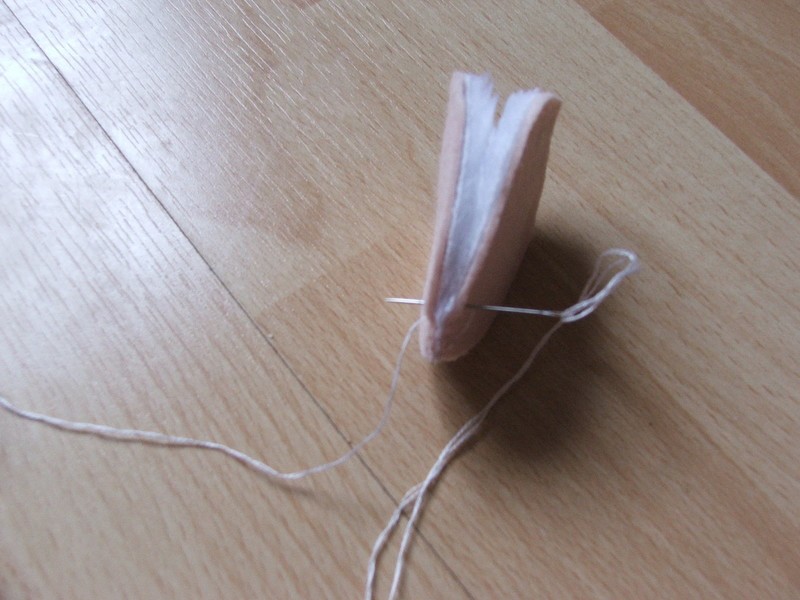
Sew two of the glued pieces together down one side only.
If you're using furry fabric make sure the fur's facing the same way on both pieces :)
-
 Step 5
So that it looks like this...
-
 Step 6
Sew the last piece on down one side only so that you have two sewn sides and one open.
-
 Step 7
Turn the whole thing inside out - easier if the glue's not dry - and add any embellishments.
You can also add any poppers / fastenings to the top to keep it shut - the cardboard will help it keep it's shape.
Have fun :)


Comments