


About
An in-depth tutorial about how to use chalk paint!
I am so excited to share with you the transformation of two side tables I bought for a whopping $12 each. I am slightly obsessed with finding frugal furniture pieces for my home that need some TLC. I love having the ability to make these finds look exactly how I envision them. I don’t hate the incredible cost savings either.
I found two matching side tables at our local Goodwill. After I determined the perfect color, I bought all the materials needed. Then, I went to work. This project cost me a total of $27 per side table which includes the cost the tables and the supplies.
In total, this project took me three days. If you time it right, you can tackle this project in a day.
-
 JadeSucksAtLife favorited Easy Diy Chalk Paint Tutorial
26 Feb 14:22
JadeSucksAtLife favorited Easy Diy Chalk Paint Tutorial
26 Feb 14:22
-
 browndogvintage favorited Easy Diy Chalk Paint Tutorial
08 Oct 01:20
browndogvintage favorited Easy Diy Chalk Paint Tutorial
08 Oct 01:20
-
 Crafterella featured Easy Diy Chalk Paint Tutorial
02 Oct 23:00
Crafterella featured Easy Diy Chalk Paint Tutorial
02 Oct 23:00
-
 marlene.gagne.3 favorited Easy Diy Chalk Paint Tutorial
02 Oct 01:49
marlene.gagne.3 favorited Easy Diy Chalk Paint Tutorial
02 Oct 01:49
-
 Marly D. published her project Easy Diy Chalk Paint Tutorial
21 Sep 09:00
Marly D. published her project Easy Diy Chalk Paint Tutorial
21 Sep 09:00
You Will Need
-
 Step 1
Gather your supplies.
-
 Step 2
Prepare your furniture. I cannot stress enough that preparing your furniture is vital. For this project, I lightly sanded the tables so the paint could adhere to the wood. After that, I removed the hardware, dusted the tables, and wiped them down. I also removed the drawers to prepare for painting.
-
 Step 3
Paint. Before you start painting, make sure to stir and not shake your chalk paint. It’s also important to note that it’s not recommended to use a roller when applying chalk paint. You should use a high-quality synthetic brush. Two or three coats can be applied, depending on the look you want. Make sure that you let each coat of paint dry completely before painting your next coat.
For this project, I opted for three coats of paint.
Here’s what one table looked like after one coat of paint.
-
 Step 4
Here's what it looked like after three coats of paint.
-
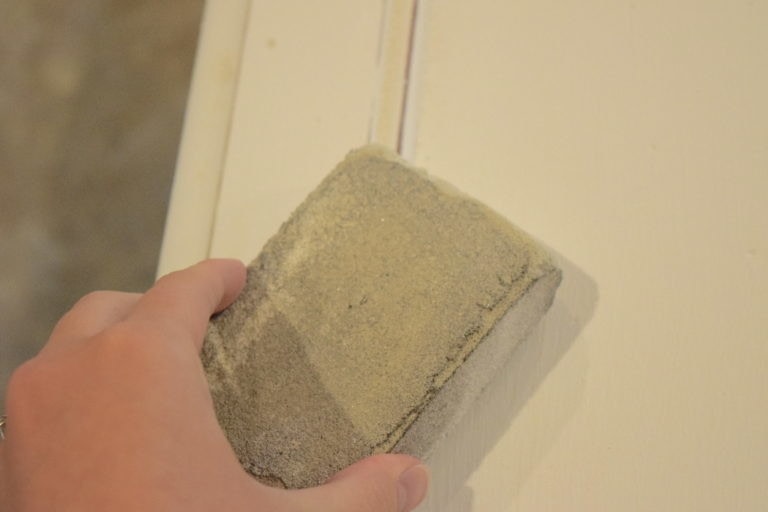
 Step 5
Distress. If you don’t like the distressed look, you can skip this section and go straight to the next step, which is to apply the polyurethane.
If you are looking for a distressed look, this is the part where you’ll begin sanding. Before you sand, make sure that your furniture piece is 100% dry.
I targeted the edges and corners, or the parts that would tend to distress naturally.
-
 Step 6
Here's how it will look after you distress it.
-
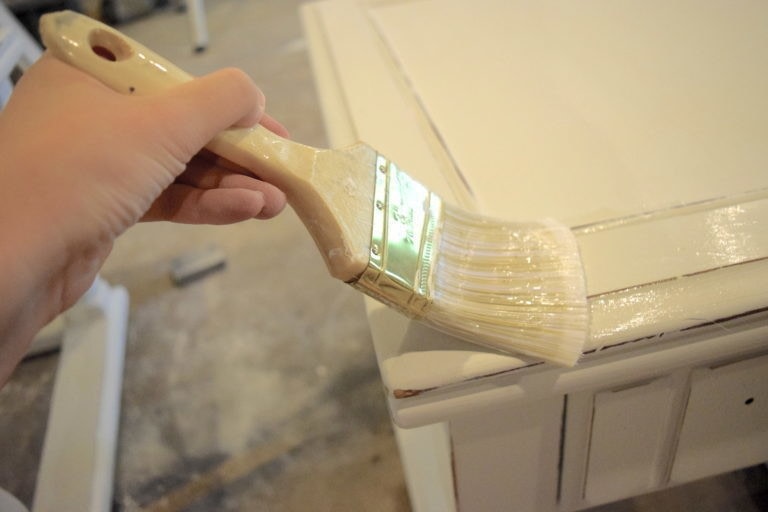
 Step 7
Apply polyurethane with your second paint brush. There is a lot of discussion surrounding whether to apply wax or polyurethane over chalk paint. You can use either. I opted for polyurethane in this case. Simply use your brush to apply an even coat over the entire piece. The polyurethane I used says to allow seven days for total cure of the project. It is dry, however, after a couple hours.
-
 Step 8
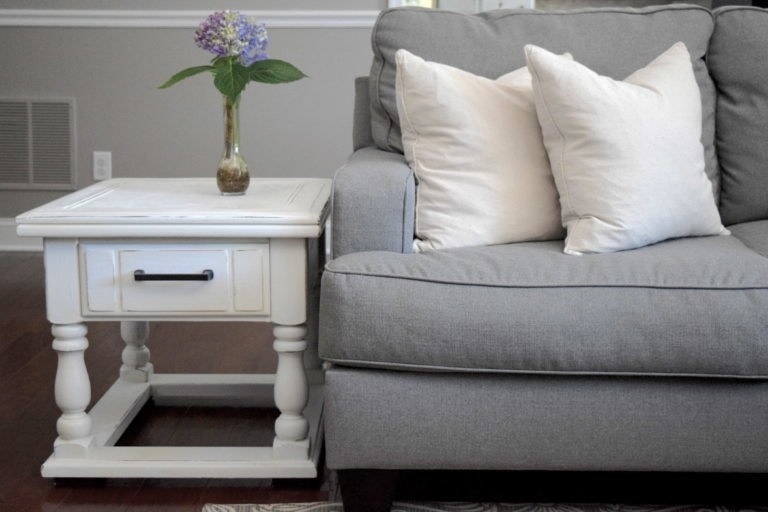
Assemble the hardware. Once the polyurethane is completely dry, assemble the hardware, and you’re done!
Your beautiful new piece is ready to make its debut.