Dovetail Joints
Extract from The Encyclopedia of Woodworking Techniques • By Jeremy Broun • Published by Search Press

About
The Encyclopedia of Woodworking Techniques
No other woodworking joint has the universal appeal of the dovetail. It seems to express the whole spirit of wood craftsmanship and yet, paradoxically, as a joint it is virtually redundant today in its strictest mechanical sense. There are other joints that, combined with the advantages of modern ‘permanent’ glues, are just as strong and a lot quicker to make.
Traditionally the dovetail was used by cabinet makers in the fronts of drawers; the pull of the drawer acted against the wedged design of the joint, making it very strong. This is because the greater the pull on the handle, the tighter the joint became. The effect was to pull the joint together rather than apart. The dovetail will probably always hold great appeal, not just visually but also as a challenge for woodworkers to make in its variety of forms. In hand woodworking it is commonly regarded as the last bastion of craftsmanship.
It can be made by hand or machine, and dovetail jigs involving the router now make the machine dovetail look as good as the hand-cut version. There are various types of dovetail, including lap dovetails, secret-mitred dovetails, single dovetails and common dovetails. All basically depend upon the same wedge shape to give them mechanical strength, so the common dovetail is shown here to illustrate the technique.
-
 Search Press published her project Dovetail Joints
26 Dec 09:00
Search Press published her project Dovetail Joints
26 Dec 09:00
You Will Need
-
 Step 1
Marking out a common dovetail joint
After preparing the wood to size, on each piece mark light shoulder lines all the way around to the thickness of the other piece plus 1mm (1⁄32in). You can use a try square and marking knife, keeping the stock against the face marks.
-
 Step 2
Using a dovetail template and pencil, mark out the positions of the dovetails on one piece. Always shade in the waste. The pitch angle is usually around 1:7 and can be marked alternatively with a sliding bevel. Pitch is the term used to denote the angle of the slope.
-
 Step 3
Using a try square, square the lines across the end of the wood and shade in the waste. This is very important so you know which bits to cut out.
-
 Step 4
Sawing the joint
Secure the workpiece in the vice and tilt at an angle so that you can saw the dovetails vertically. You will find this aids accurate cutting because gravity naturally pushes the saw downwards. Use a dovetail saw for fine work. It is crucial to saw on the waste side of the line, leaving the entire line intact.
-
 Step 5
Using a try square and marking knife, deepen the shoulder line where the joint is to be cut.
-
 Step 6
Remove the end waste with a tenon saw, working down across the grain, carefully to the line.
-
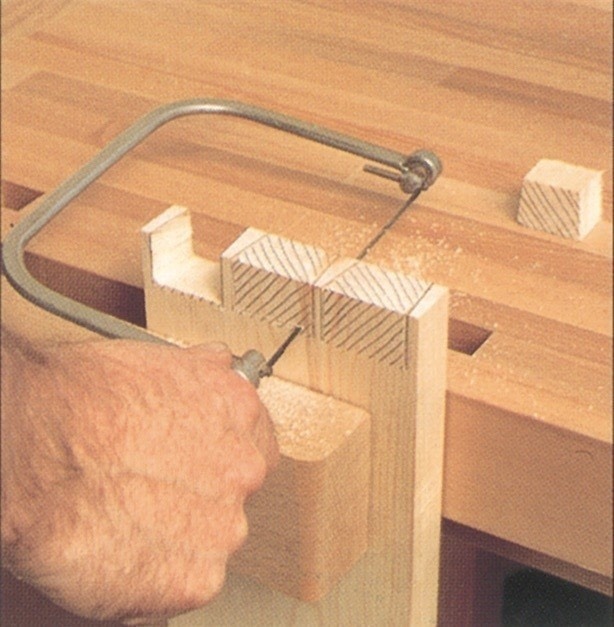
 Step 7
Remove the waste with a coping saw, cutting to about 3mm (1⁄8in) of the shoulder line. The 3mm (1⁄8in) is left on at this stage because it can only be removed accurately with a very sharp chisel.
-
 Step 8
Chiselling the joint
Chisel back to the shoulder line using a bevel-edged chisel and mallet; use a series of fine vertical cuts to half the thickness of the wood. Then turn the wood around to cut from the other side. This will prevent the wood fibres from splitting or breaking out.
-
 Step 9
Finally clean up the shoulder lines with the chisel by mounting the wood back in the vice.
-
 Step 10
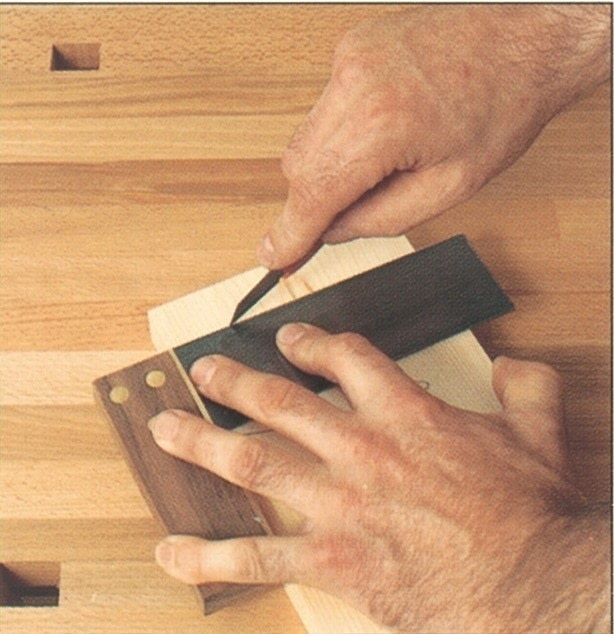
Transferring the marks
Now mount the second piece of wood in the vice at the raised level of a spacer piece, laid on the benchtop to ensure it lies flat, and carefully place the first piece (with tails cut) on to it. Align the shoulder lines and far edges perfectly. Trace the joint using a sharp pencil or dovetail scriber. Then shade in the waste.
-
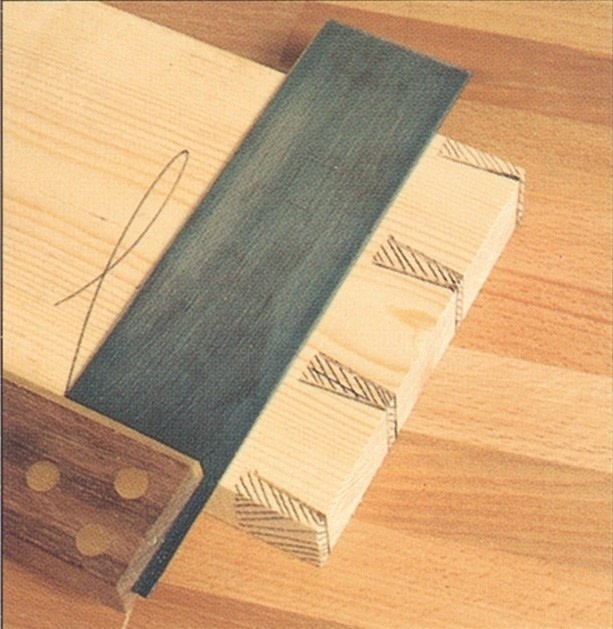
 Step 11
Extend the vertical lines down the front of the joint using a try square. Now shade the waste wood using a series of clear diagonal lines. It makes cutting much easier.
-
 Step 12
Cutting the matching piece
Carefully use a dovetail saw to cut on the waste side of the line down the grain to the shoulder line.
-
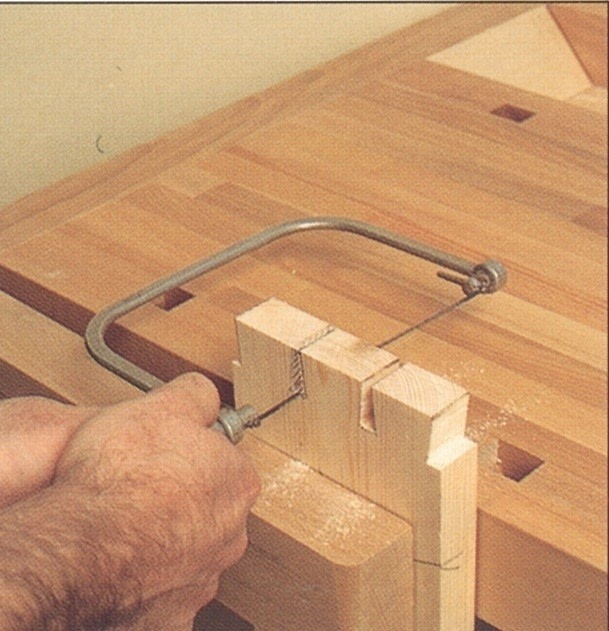
 Step 13
As before, a coping saw is used to remove the waste nearly to the line. Be careful not to cut into the angled pins.
-
 Step 14
Chiselling the matching piece
You can deepen the cut on the shoulder line to define it clearly for chiselling back.
-
 Step 15
Carefully chisel back to the shoulder line, overlapping each chisel cut to maintain a straight line. A narrow chisel gives much better control.
-
 Step 16
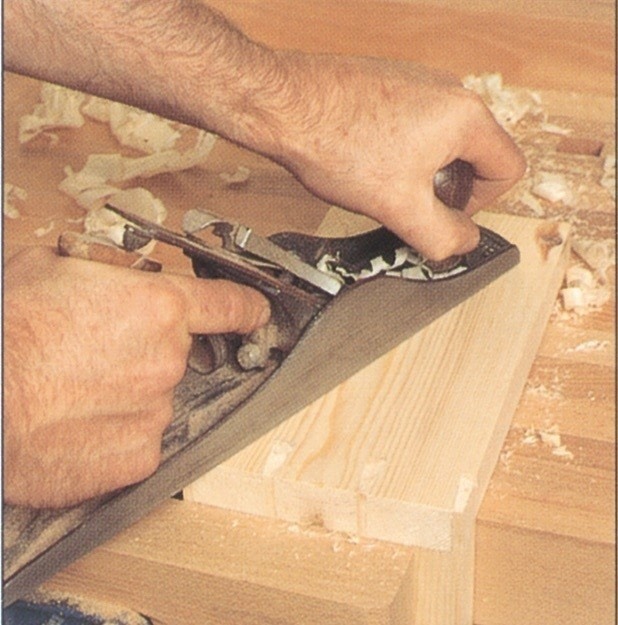
Clamping up
1 Clamp the dovetail joint together using a cutout scrap block to allow the fingers to squeeze together up to the shoulder line. Using the scrap block prevents bruising from the clamp and also helps to spread the pressure from the clamp more evenly. Check the joint is square with a try square/2 After gluing, clean up the joint with a plane, working inwards to avoid splitting the end grain on the joint itself. The edges of the joint can be planed diagonally to tidy them up, holding the wood in the vice.
-
 Step 17
Using a jig to make a common dovetail joint
A particular jig was used in this demonstration – some features it shares with other jigs; other features are unique. If you do use a jig, first read the manufacturer’s manual thoroughly to familiarise yourself with the particular type. Having read the manufacturer’s manual, set up the jig and insert the wood for cutting the tails.
-
 Step 18
The positions of dovetails can be quickly set by tightening up the adjustable reversible fingers using the template in the ‘pins’ mode.
-
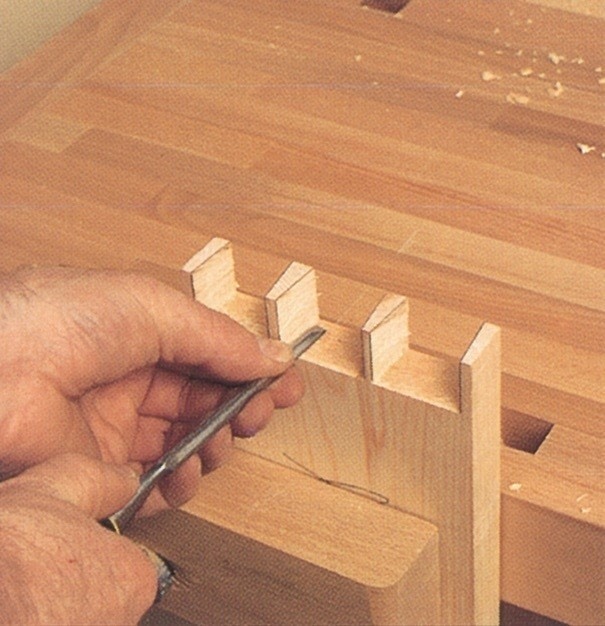
 Step 19
Now place the wood in the vice so that you can chisel horizontally to clean up the shoulder line. Take care not to cut right across, otherwise you will split the fibres.
-
 Step 20
Use a chisel to pare a fine bevel on the inside of the dovetails as a leading edge for pressing the joint together. This will ease the assembly of the joint.
-
 Step 21
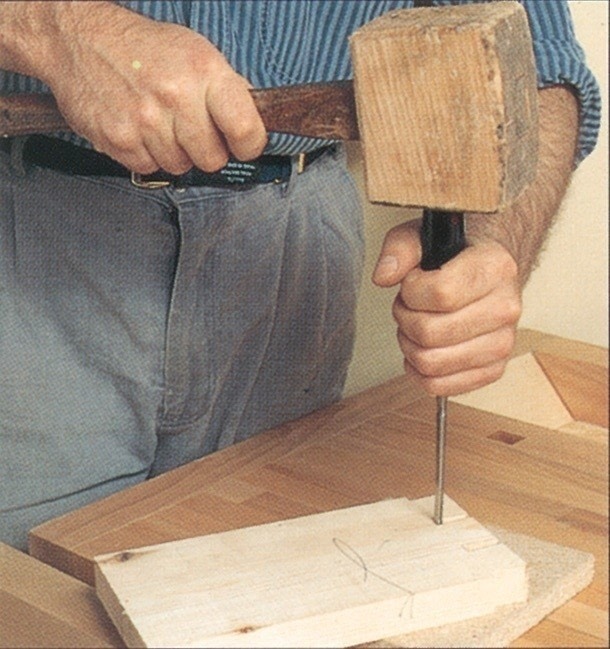
Assembly and gluing
Carefully drive the joint home either by squeezing it in the vice or using a hammer and piece of scrapwood.
-
 Step 22
If everything fits well together, take the joint apart and coat the mating surfaces with glue using a fine spatula.
-
 Step 23
Reverse the template to the ‘tails’ mode and lock into position with the tightening screws. Then set up the router with the appropriate dovetail cutter and guide bush (refer to the manufacturer’s manual). Mark the thickness of the other piece of wood to indicate the shoulder line of the joint, and set the depth of cut accordingly on the router.
-
 Step 24
Carefully rout the waste away to form the dovetails. A little practice is needed to avoid grain tear as the cutter comes out of the wood. Masking tape can help prevent fibres from splitting.
-
 Step 25
Remove the tails piece and insert the pins piece in the jig, marking the shoulder line as before.
Reverse the jig template and position according to the appropriate guide marks on the jig. Insert the appropriate straight cutter in the router and set to depth. First make a series of shallow cuts across the width of the pins. -
 Step 26
You can see by the profile of the jig fingers how the dovetail cutter and the straight cutter are used on their respective pieces. Here the straight cutter removes the waste for the pins in a series of fine cuts. After a little practice the jig can be fine-tuned to such a degree that finished dovetails will squeeze together by hand without any gaps showing. Glue and clamp as for the hand-cut dovetail.