
About
Easy No-Sew Method To Brighten Up An Ikat-Print Straw Clutch!
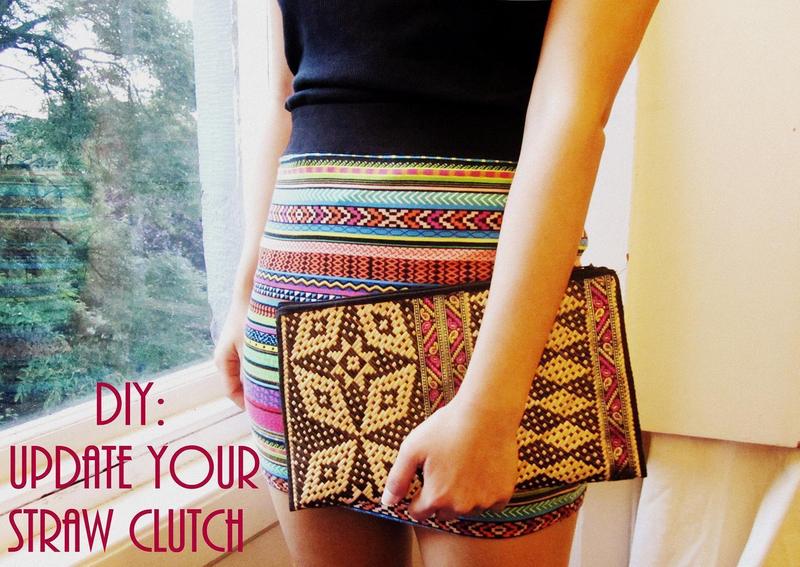
Where I live in Borneo, we’re famous for our ikat prints and straw clutches/bags. The thing is, as these natural straw bags rarely use colours it can look quite bland. I was actually thrift/vintage shopping in Edinburgh in the summer and I noticed this typical bland ikat print clutch in one of the shops. I picked it up and thought to myself why I should buy it when there are loads back in Borneo. However, I had a DIY plan in mind at that time so I picked it up for a cool £3.00! I have been seeing these great hem trims in fabric shops and have wanted to do something with it so badly that when I saw these vertical lines on the clutch, I couldn’t help but imagine how a hem trim would look on it.
Tags
-
 Cinnamon S. added her project Diy Update A Bland Ikat Print Straw Clutch to Lucy Liu
17 Mar 12:55
Cinnamon S. added her project Diy Update A Bland Ikat Print Straw Clutch to Lucy Liu
17 Mar 12:55
-
 Jed P. favorited Diy Update A Bland Ikat Print Straw Clutch
05 Feb 04:40
Jed P. favorited Diy Update A Bland Ikat Print Straw Clutch
05 Feb 04:40
-
 Sanne E. favorited Diy Update A Bland Ikat Print Straw Clutch
03 Dec 23:51
Sanne E. favorited Diy Update A Bland Ikat Print Straw Clutch
03 Dec 23:51
You Will Need
-
 Step 1
You will need a straw clutch, hemming to bind the trimming (found in fabric shops) and clutch together. Get ready your scissors and superglue or fabric glue ready.
-
 Step 2
To know how much trim you need, bring the clutch along to the fabric shop and measure the trim yourself. I chose a bright paisley print for the trim.
-
 Step 3
Once you get home, to know the exact length you need to cover the vertical lines on the clutch, measure the trim by looping it before you cut it!
-
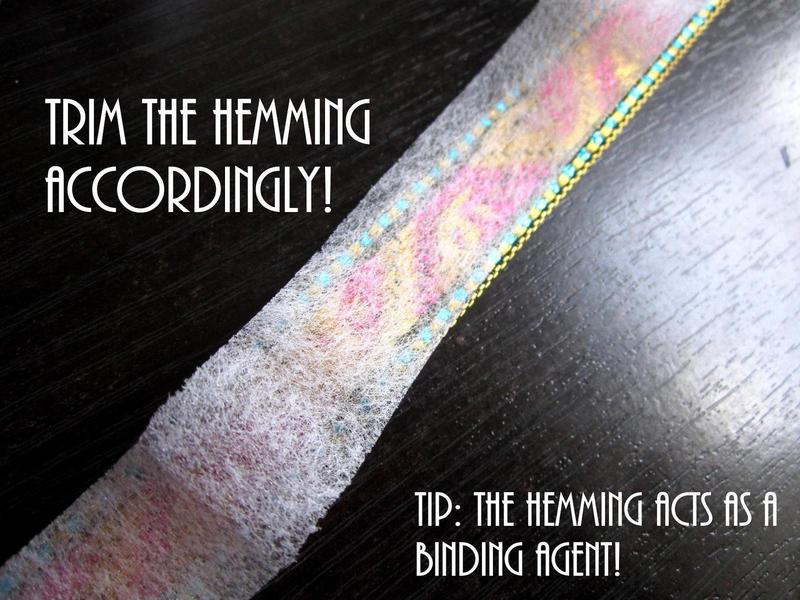
 Step 4
Then, trim the iron hemming accordingly. The hemming I used was slightly wider than the trim, so I trimmed it to fit.
-
 Step 5
I placed some superglue below the hemming for a better bond. Place the hemming in between the clutch and trim. Get ready your iron!
-
 Step 6
Keep on ironing! Place the iron for a few minutes or more until you are sure that the hemming has melted to bond the clutch and trim together! Release the iron from time to time so that it doesn't burn.
-
 Step 7
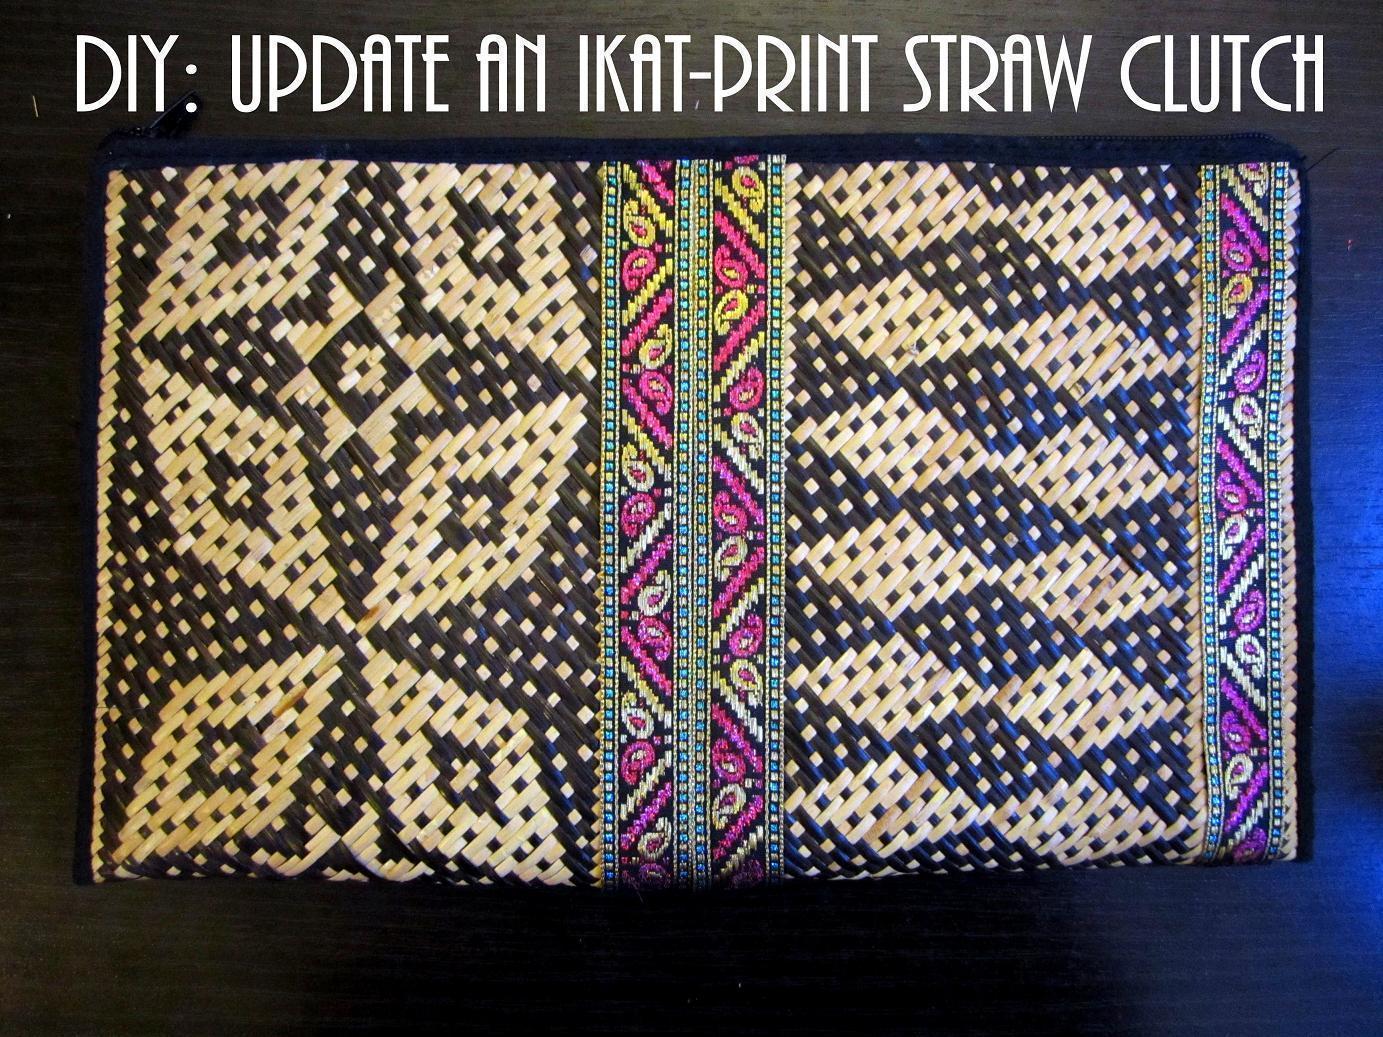
Leave it to set for a while! Now you have updated your straw clutch and added a pop of colour! This is the front of the clutch.
-
 Step 8
This is the back of the clutch.
-
 Step 9
I hope you enjoyed this DIY!